![AccountAbility_logo_primary_fullcolor-1.png]](https://knowledgebase.counta.com/hs-fs/hubfs/AccountAbility_logo_primary_fullcolor-1.png?height=40&name=AccountAbility_logo_primary_fullcolor-1.png)
Step by Step Guide:
Prerequisites
1. Your User Access Group needs to have full access to Supplier Invoices to add new invoices and, at minimum, Read Only access to search and view supplier invoices.
2. To route invoice PDF to your Incoming Supplier Invoices page in Accountability, coordinate the inbox setup with your IT team. To learn more, click here.
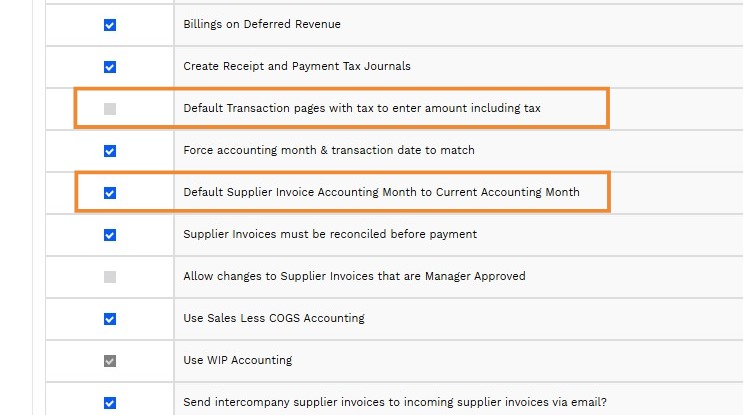
3. By default, the total amount on transaction pages, including supplier invoices, is inclusive of tax. To enter the Net amount on transactions, navigate to SET UP FILES > Setup Options > Accounting Options and uncheck Default transaction pages with tax to enter amount including tax in.
4. Accounting Month configuration
- Accountability automatically sets the Accounting Month for an invoice based on the Invoice Date. For example, if you entered an invoice date of September 15, 2022, the Accounting Month will default to September 2022.
- To use the Current Accounting Month controlled by global admin, check the Default Supplier Invoice Accounting Month to Current Accounting Month in SET UP FILES > Set Up Options > Accounting Options.
Tip: If your agency is in the middle of closing a month, the Current Accounting Month in the system will still reflect that month. For example, if you are closing November 2022, the Current Accounting Month is set to November 2022 even though the current calendar month is December.
If you enter an invoice for December 1, 2022, the system will automatically assign this to the current accounting month of November. You may override the Accounting Month for the invoice to December if you want to force the accounting month to match the invoice date.
Create a Supplier Invoice
5. You have two options for creating a supplier invoice.
- ACCOUNTING > Payables > Supplier Invoices.
- QUICK ADD > Add Supplier Invoice.
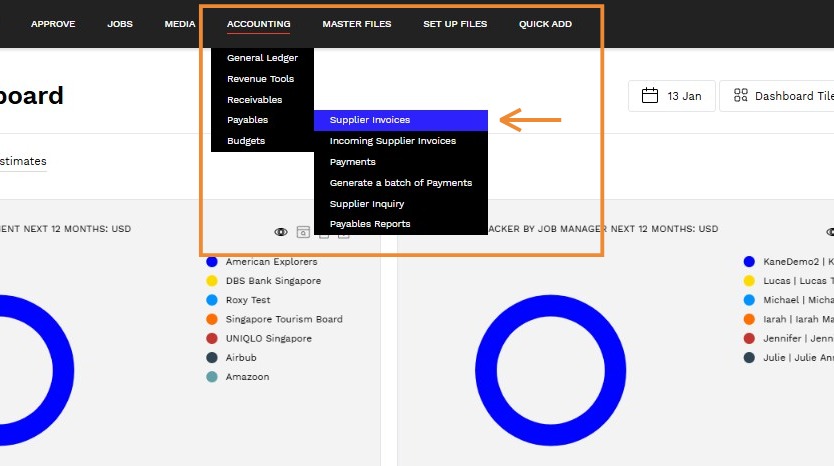
6. Navigate to ACCOUNTING > Payable > Supplier Invoices.
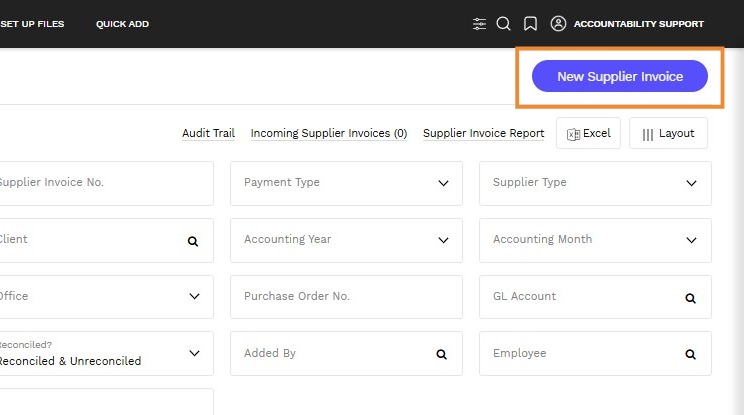
7. Click New Supplier Invoice.
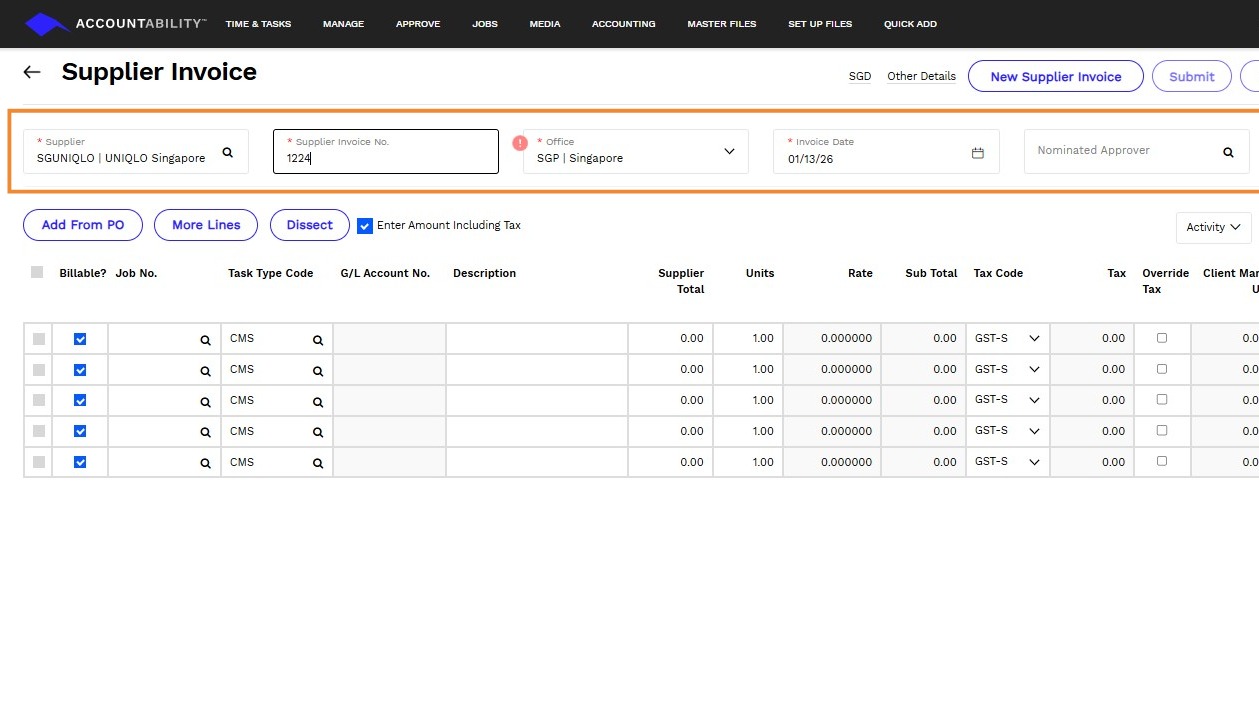
8. Enter the following information.
Supplier - Enter or select a supplier.
Supplier Invoice No. - Enter an invoice number.
Office - Will default to the office of the supplier chosen but can be changed if necessary. The system will post the payable journal entry to the office specified here. If there is a Country Restriction on the Supplier, the system will only list the offices assigned to that country.
Invoice Date - It will default to today's date but can be changed if necessary.
- The system uses the Invoice Date to determine the Accounting Year and Month.
- Closed Accounting Month/Year - If the invoice date falls in a closed month, click on the checkbox labeled Override Accounting Month to override the default Accounting Month/Year and select an open month/year.
- The system can automatically post Supplier Invoices to the Current Accounting Month.
This is a one-time setup for the agency. It can be found in SET UP FILES > Set Up Options > Accounting Options > Default Supplier Invoice Accounting Month to Current Accounting Month checkbox.
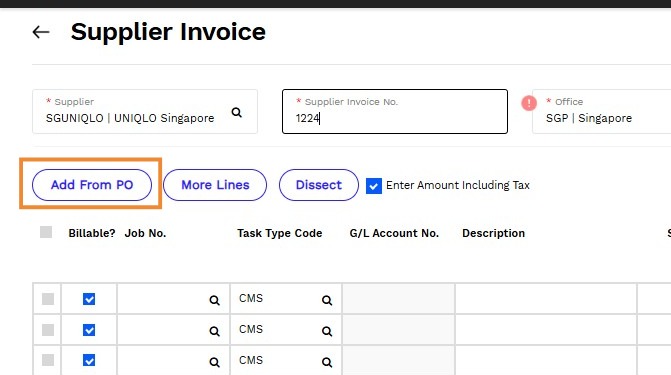
9. Click Add from PO.
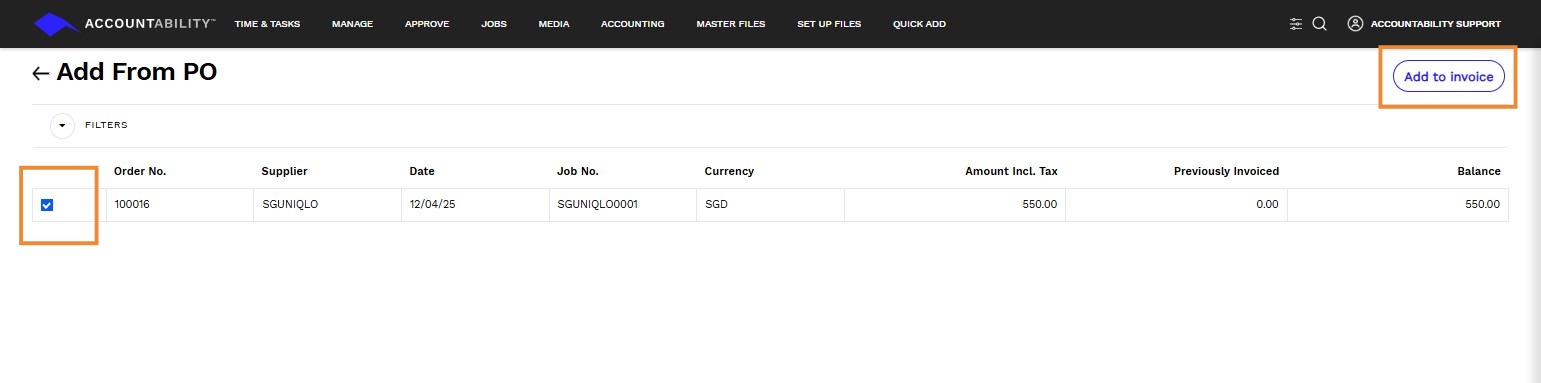
10. Click on the ORDER NO. that you wish to add to the invoice. Click ADD TO INVOICE.
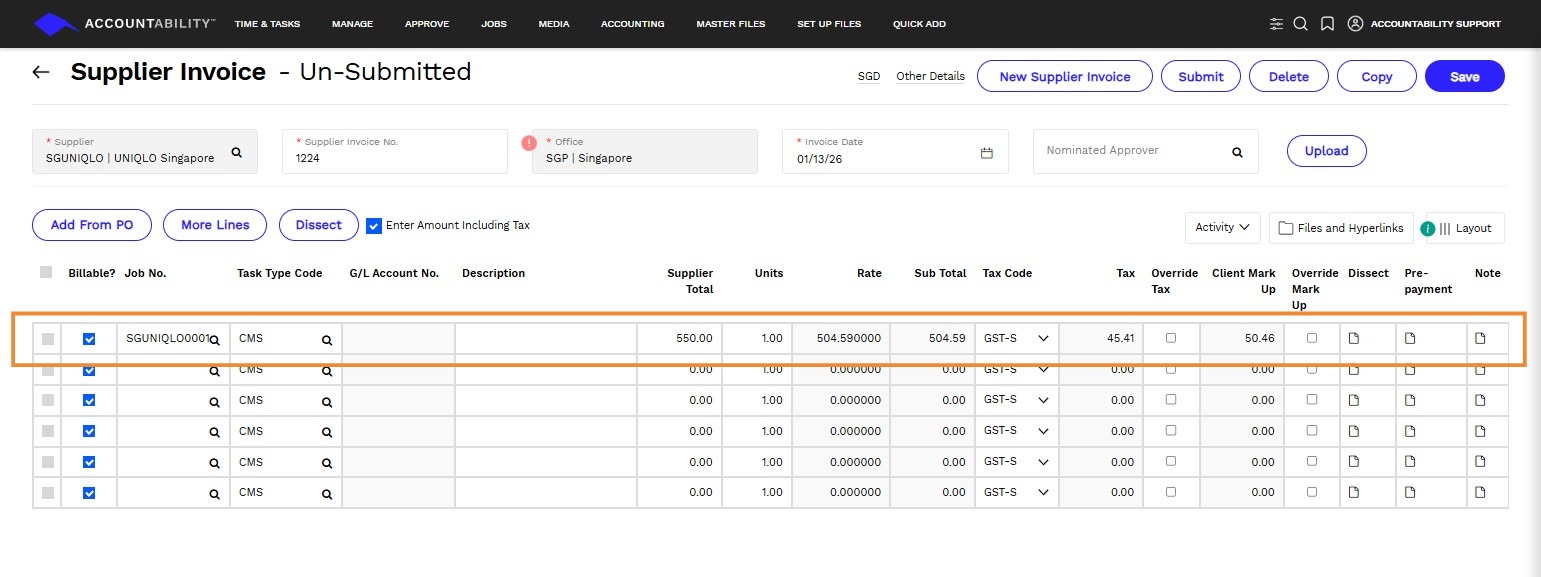
11. The details from the purchase order(s) will be added to this invoice. Change if needed.
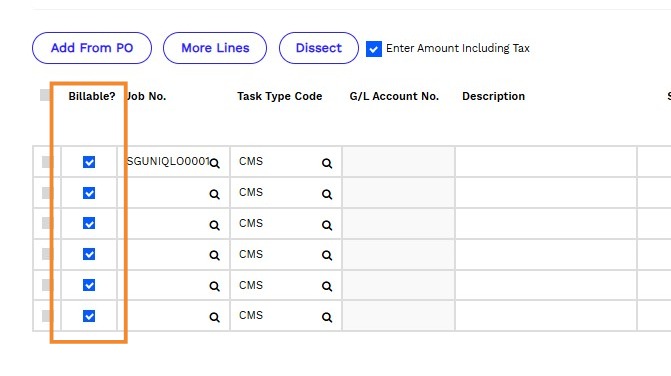
12. Check/uncheck if it is billable or non-billable
Billable
Supplier costs are posted to a job and then passed along to the client
When the Billable checkbox is ticked, you will need to enter a Job No and a Task Type Code to record the invoice line item.
The description will default to the Task Type name, but you can override it here.
Enter the SUPPLIER TOTAL (amount inclusive of tax). Alternatively, if you have changed the entry mode to enter the pre-tax amount, enter this amount into the RATE column.
To override the system-calculated tax amount, check the OVERRIDE TAX box. The Tax field will be enabled, allowing you to enter a different amount from the system-calculated tax amount.
The system default calculated markup amount can be overridden by checking the OVERRIDE MARKUP box. This activates the Mark Up amount field and makes it editable. The Mark Up default amount is calculated using the default markup percentage assigned to the job.
Non-Billable
Supplier costs are posted to a G/L account and written off, e.g., overhead expenses.
By default, the supplier invoice entry screen will have the Billable box checked. If you are coding the supplier invoice line to the GL account, uncheck the BILLABLE box, which will enable the G/L ACCOUNT NO field for data entry.
You can also enter a Job No and Task Type when you enter a G/L Account. However, the entry will post to the G/L Account. The Job No and Task Type will be recorded as a reference in the G/L account entry.
Enter the invoice amount in the Supplier Total or Rate column (depending on whether the amount entered is inclusive of tax).
Determine if the Tax and Mark Up amounts need to be overridden.
Optionally, click on the Dissect icon to assign the cost to another OFFICE via the Interoffice posting feature. From the Dissection page, you can also add a Client, Employee, and/or Department to accurately reflect on your profitability reports.
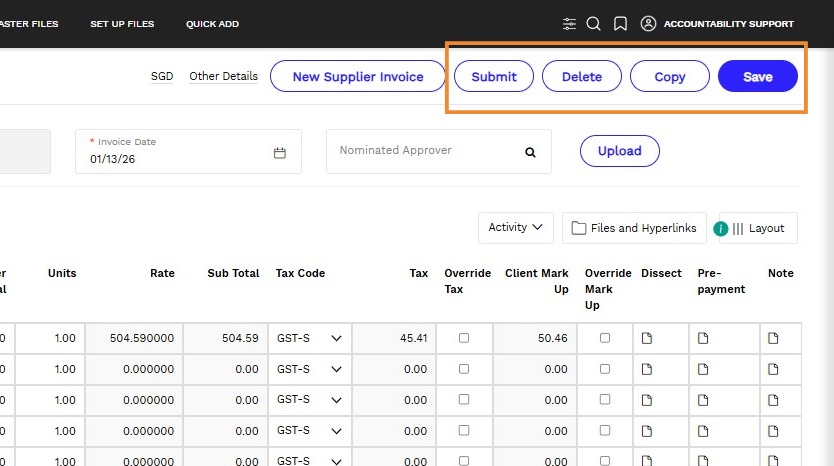
13. Click Save to save the details and click Submit to submit the supplier invoice.
Tip: If your invoice is billed in a currency other than the default currency for the supplier, click on the currency link from the top right of the page. A new page appears, allowing you to select a different currency.