![AccountAbility_logo_primary_fullcolor-1.png]](https://knowledgebase.counta.com/hs-fs/hubfs/AccountAbility_logo_primary_fullcolor-1.png?height=40&name=AccountAbility_logo_primary_fullcolor-1.png)
Approval rights determine whether a user can authorize transactions, time entries, or content within a system.
Posting rights define whether a user can finalize or submit entries (e.g., timesheets, journal entries, content) into the system.
These rights are typically managed at the individual level or through role-based access groups, allowing organizations to control who can approve or post specific types of data or content.
Step by Step Guide:
How to define approval and posting rights
Approval rights determine whether a user can authorize transactions, time entries, or content within a system. Posting rights define whether a user can finalize or submit entries (e.g., timesheets, journal entries, content) into the system. These rights are typically managed at the individual level or through role-based access groups, allowing organizations to control who can approve or post specific types of data or content.
1. Navigate to Master Files > Employees and bring up the Employee record for the manager approver.
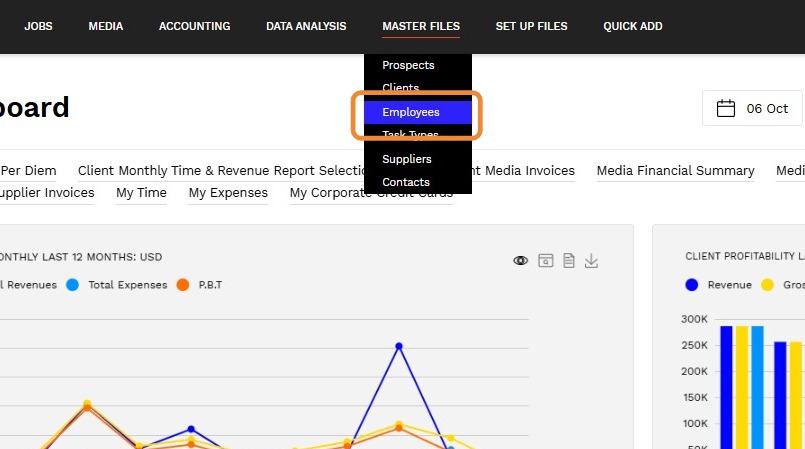
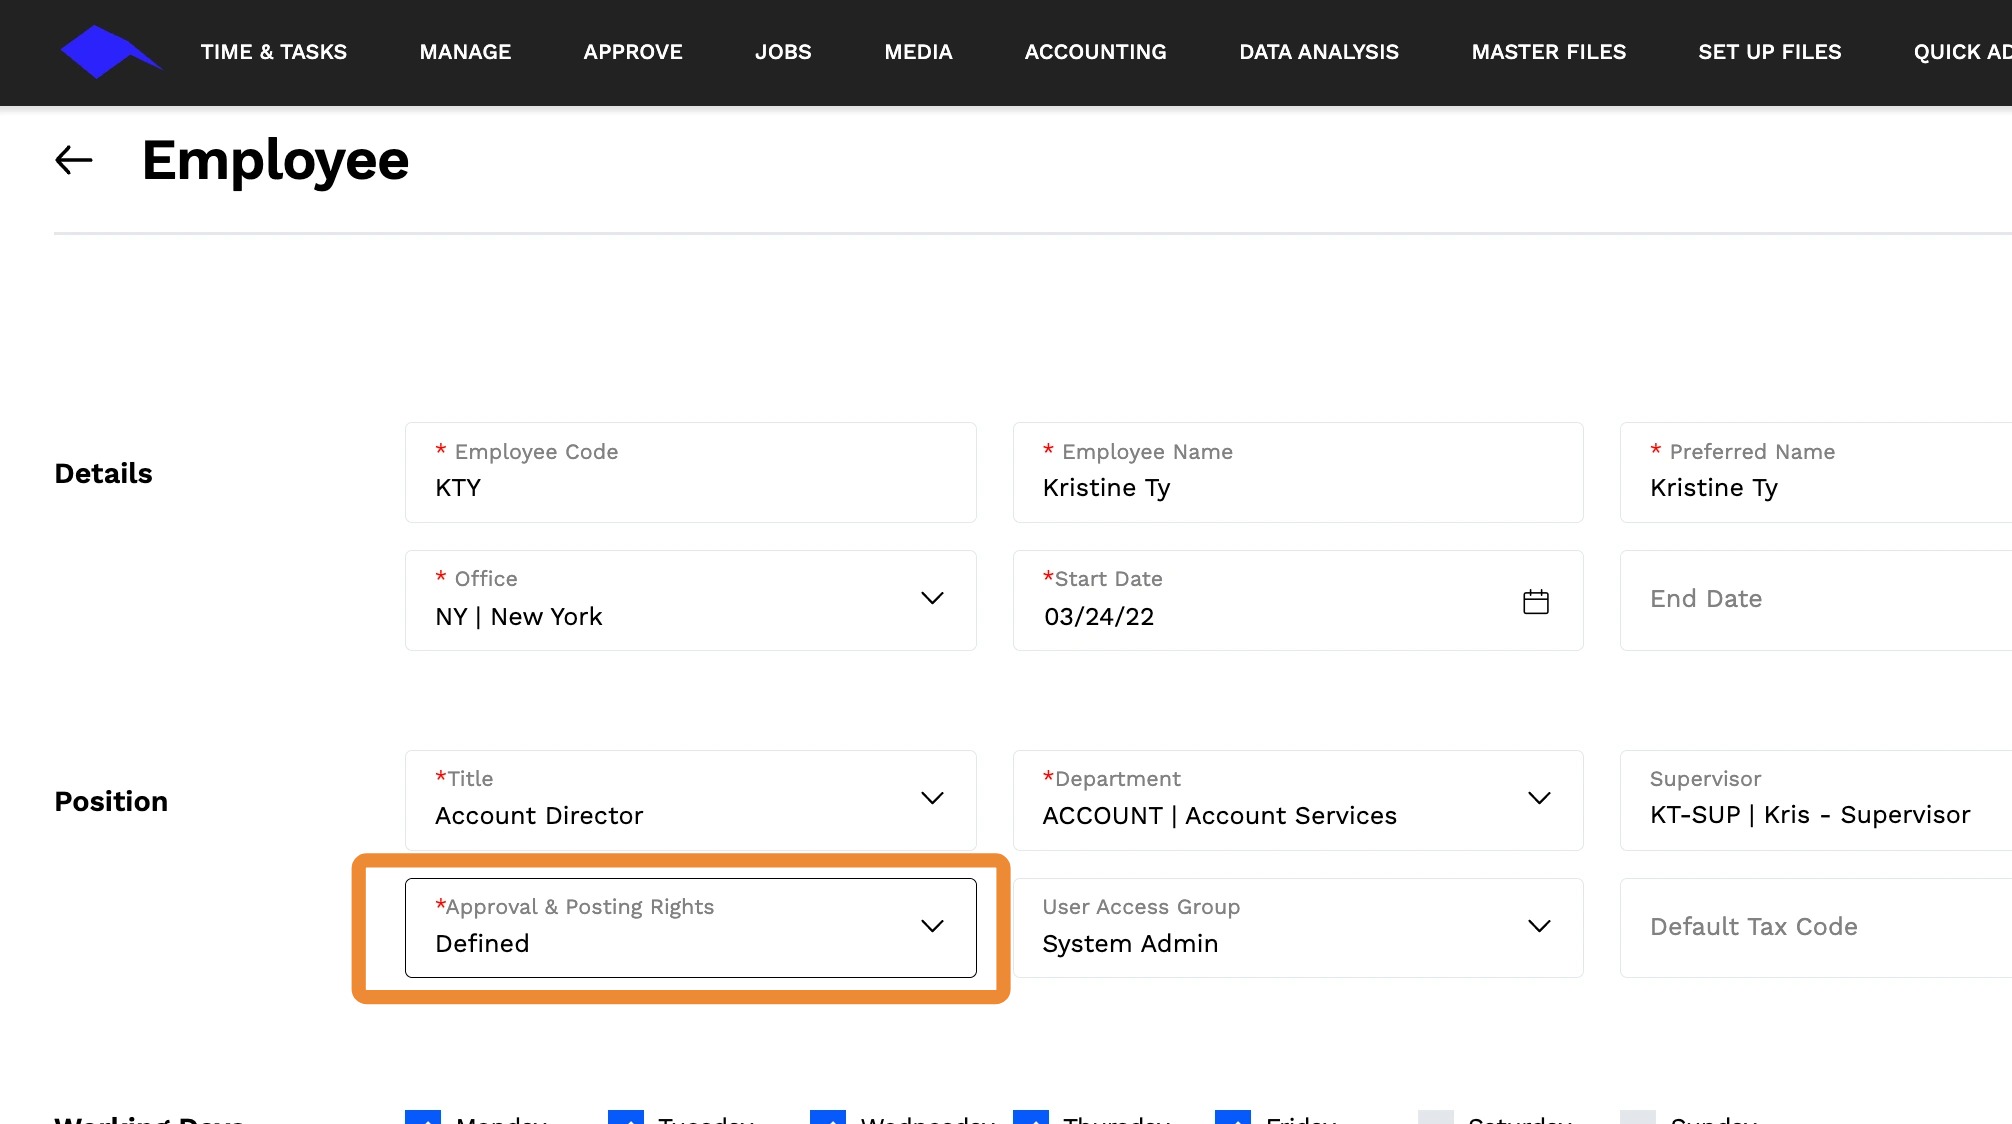
2. Set the APPROVAL & POSTING RIGHTS field to Defined.
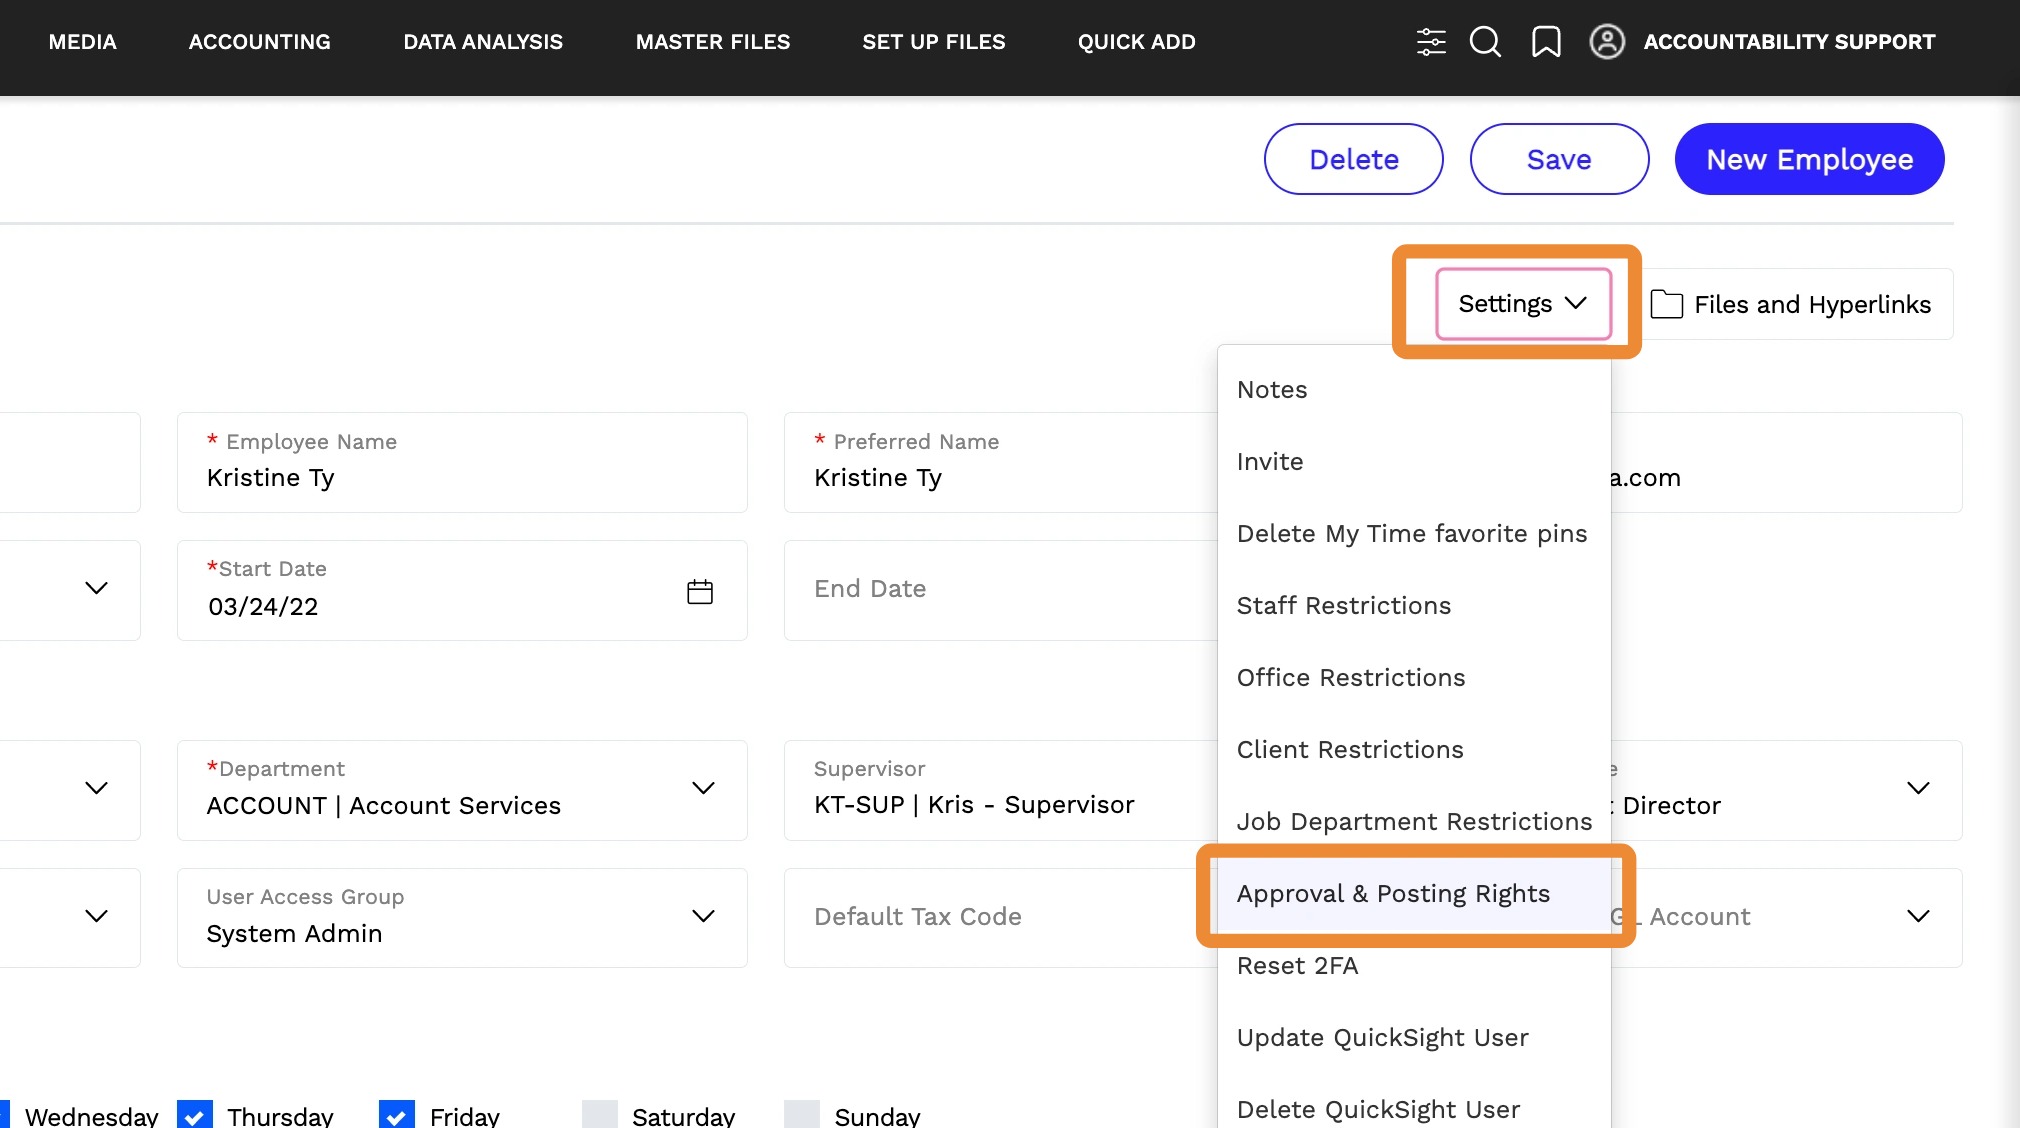
3. Navigate to Settings > Approval & Posting Rights at the top of the page.
4. Check the APPROVAL RIGHTS box next to the transaction type you wish to define and select the approval level.
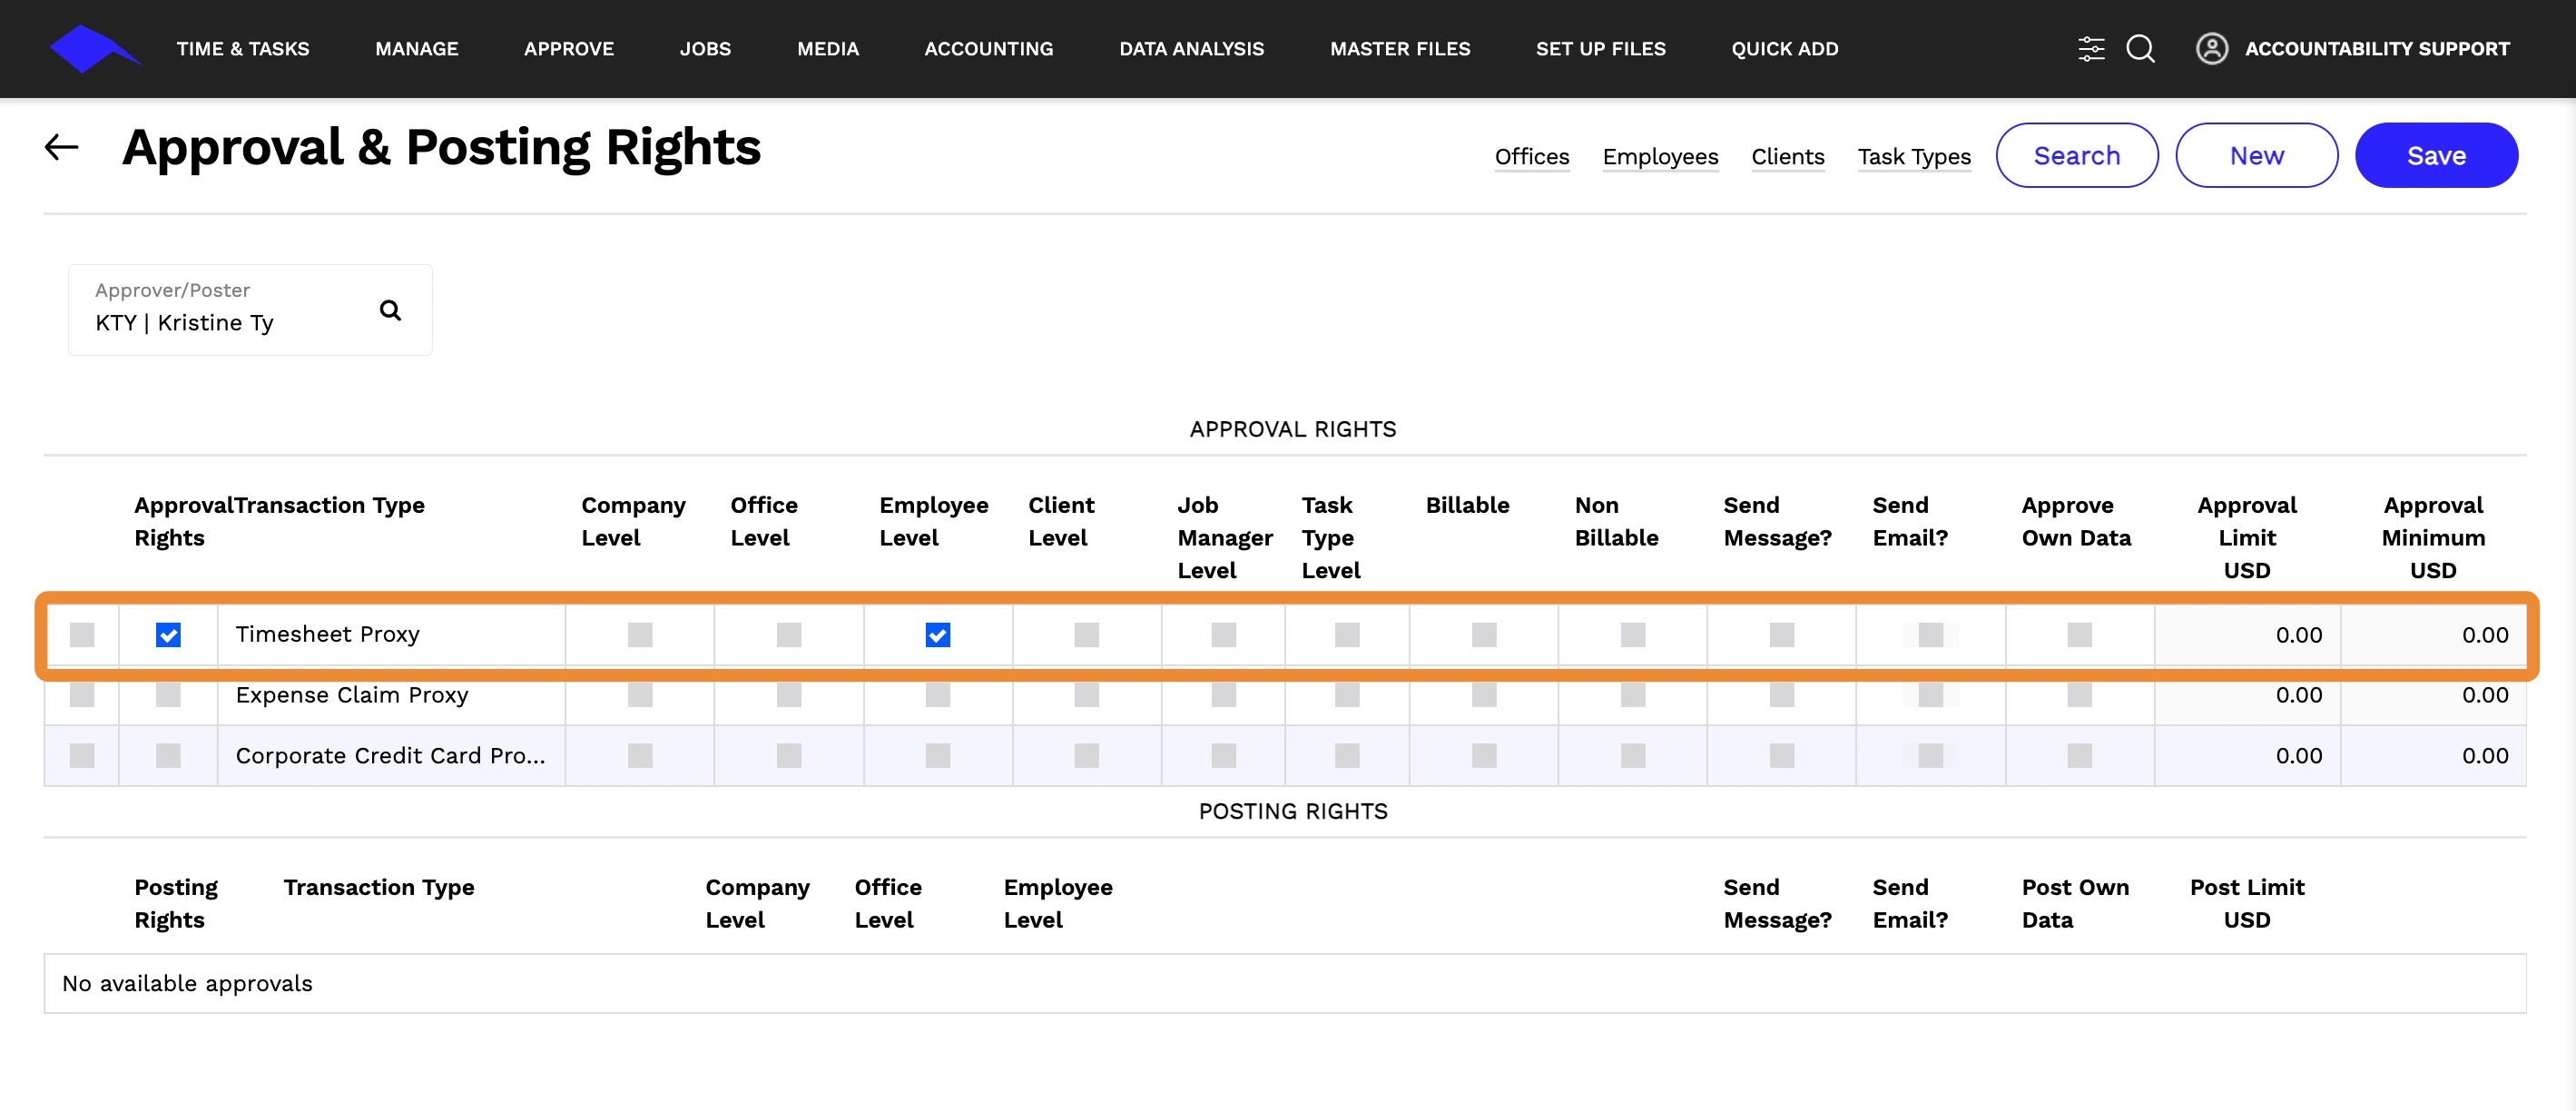
5. Click Save.
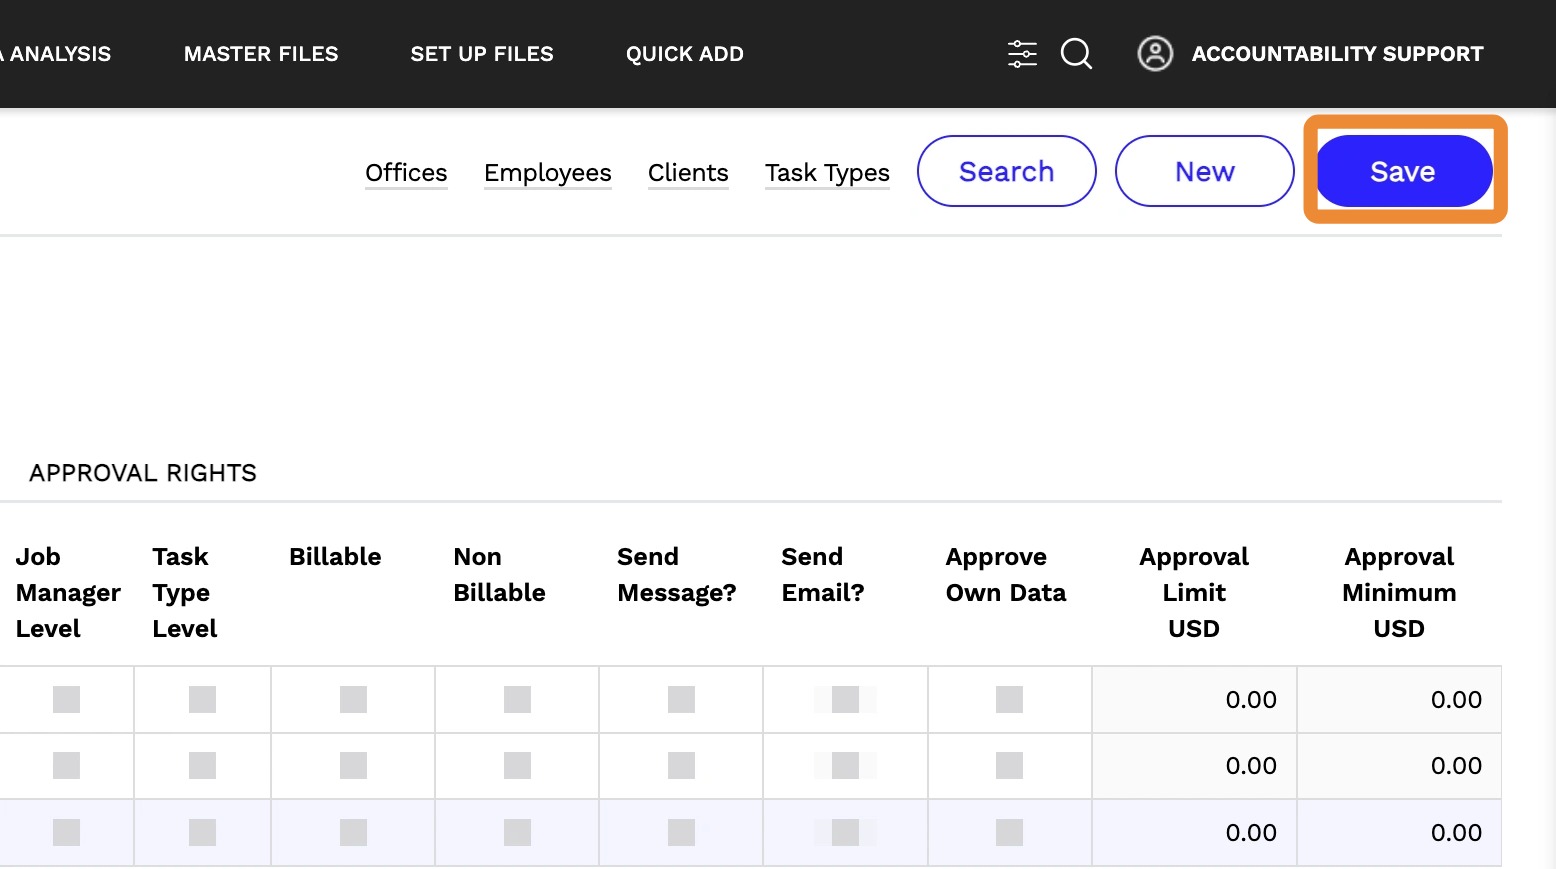
6. To assign the Approval Rights at the Offices / Employees / Clients Level, select the box to the far left of the Transaction Type - then select the Offices / Employees / or Clients at the top right. For example, if you'd like to set the Timesheet Proxy for specific Employees, you'll need to click the box to the left of Timesheet Proxy, then select Employees from the top right.
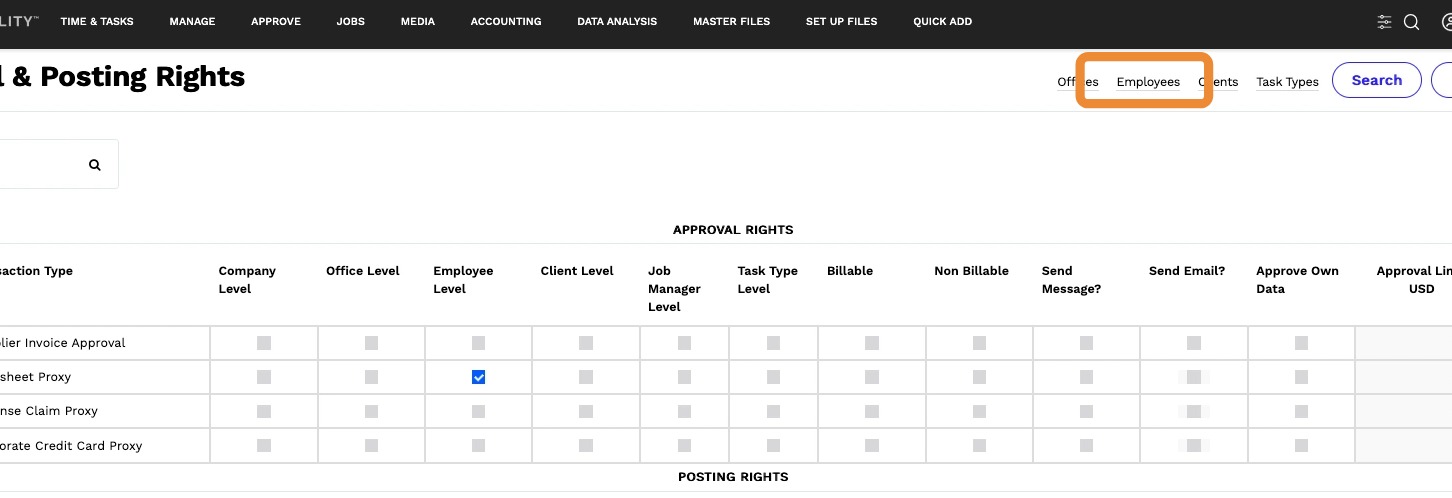
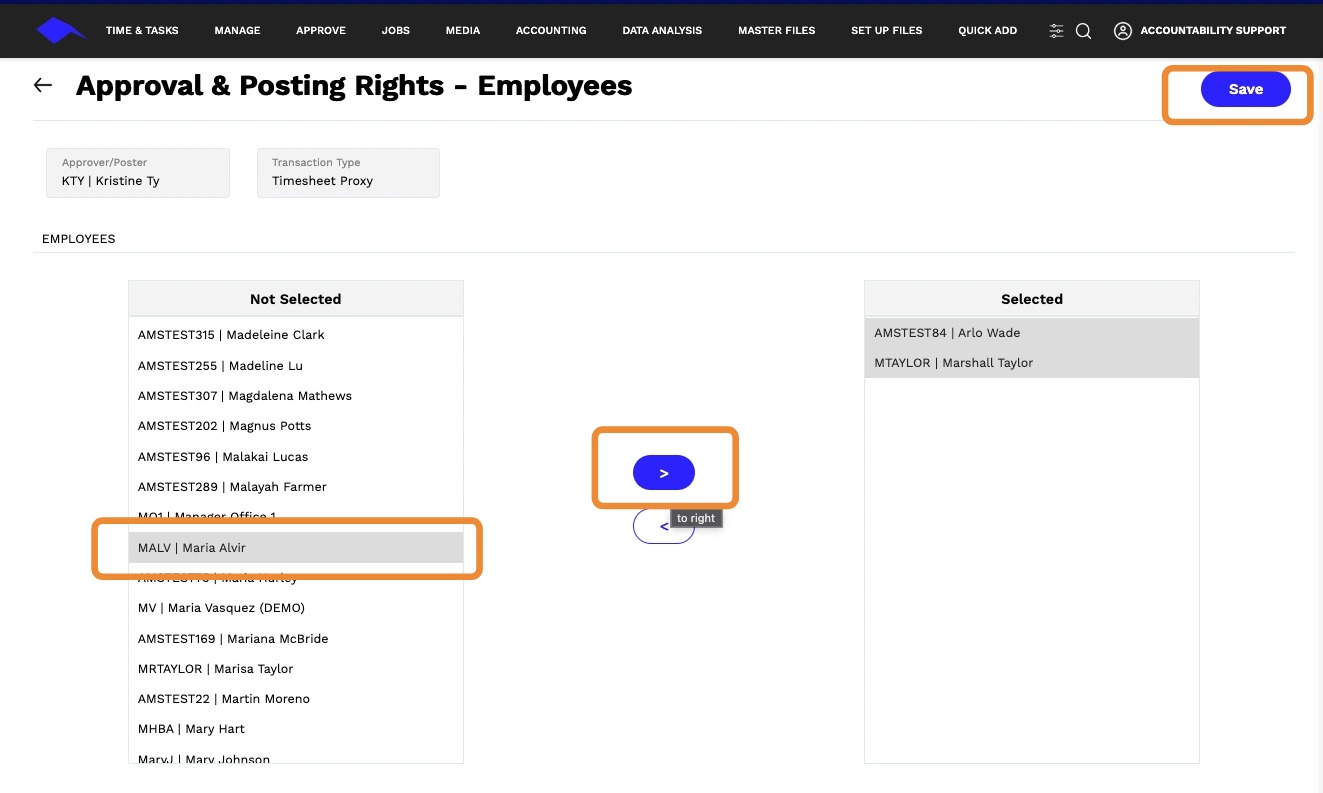
7. Select the Employee from the left box and click the > Icon to move the Employees to the right box labeled 'Selected' and this will give the user Approval and Posting Rights for Timesheet Proxy for the selected users. Click Save.
This same step can be done for Offices and Clients.