![AccountAbility_logo_primary_fullcolor-1.png]](https://knowledgebase.counta.com/hs-fs/hubfs/AccountAbility_logo_primary_fullcolor-1.png?height=40&name=AccountAbility_logo_primary_fullcolor-1.png)
Alert: Pre Requisites
To generate an ACH file from Accountability, the following needs to be set up.
Create An ACH Payment Type
1. Steps:
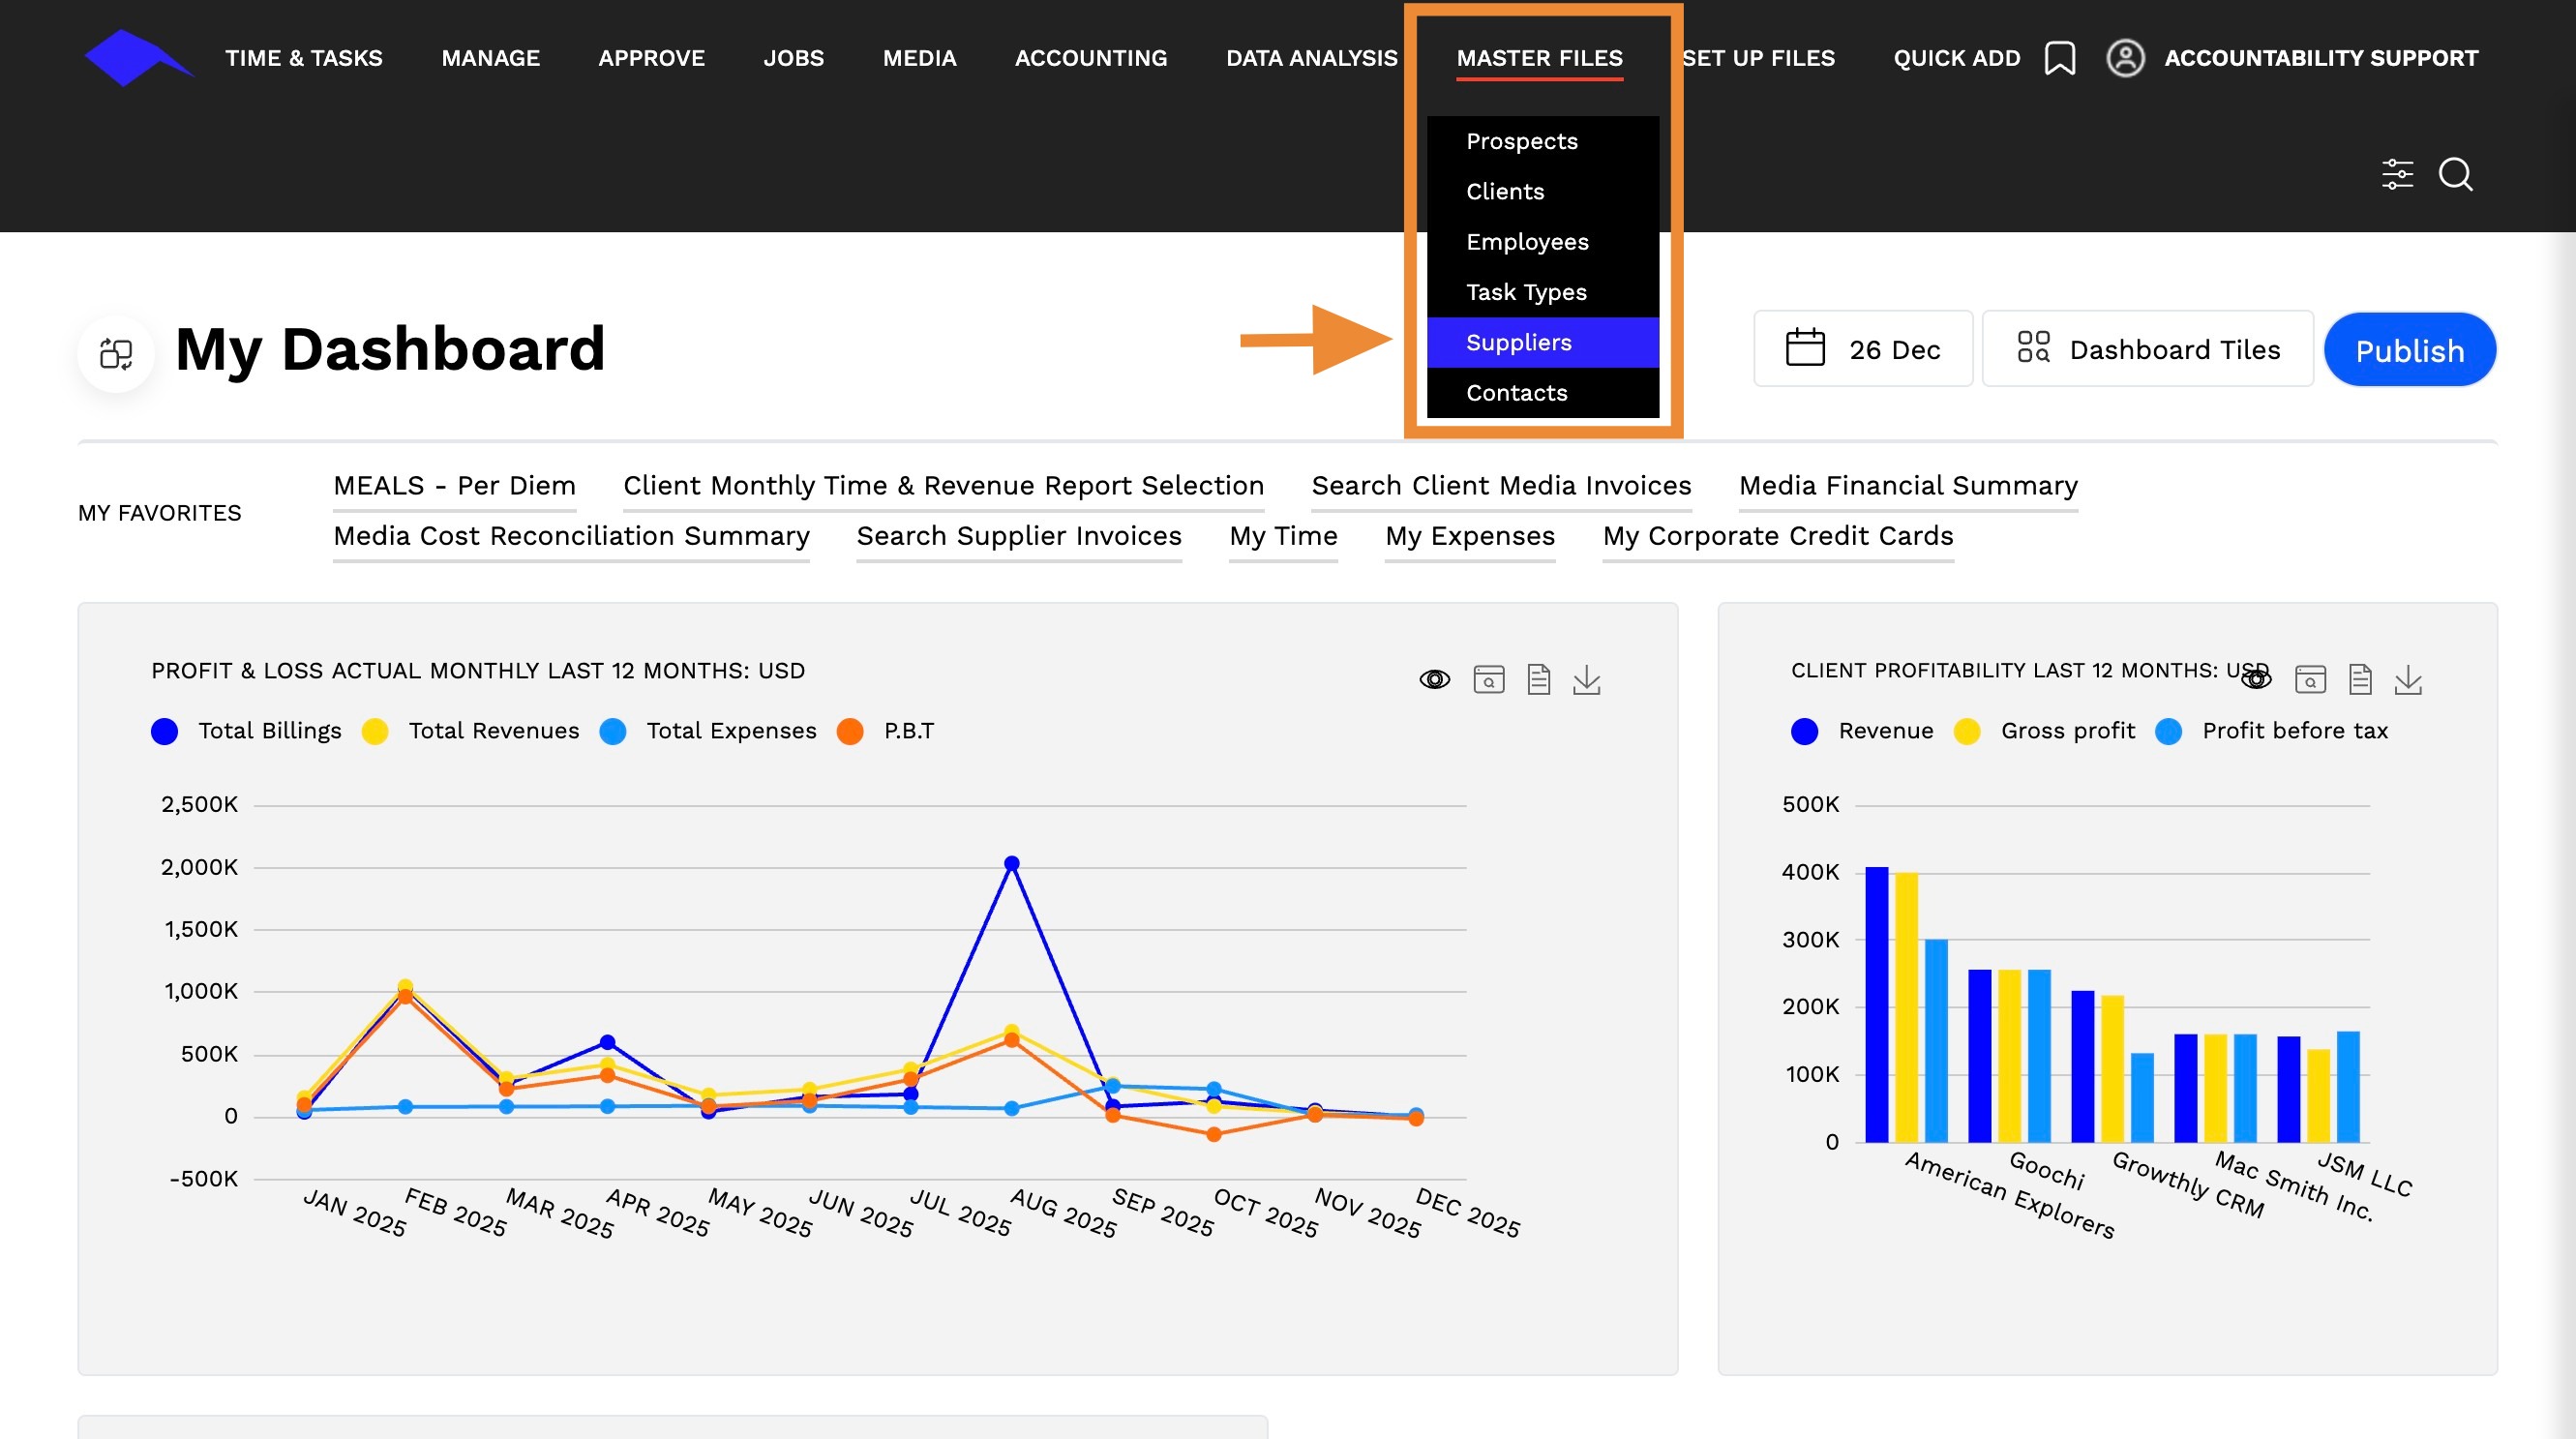
Navigate to Master Files > Suppliers
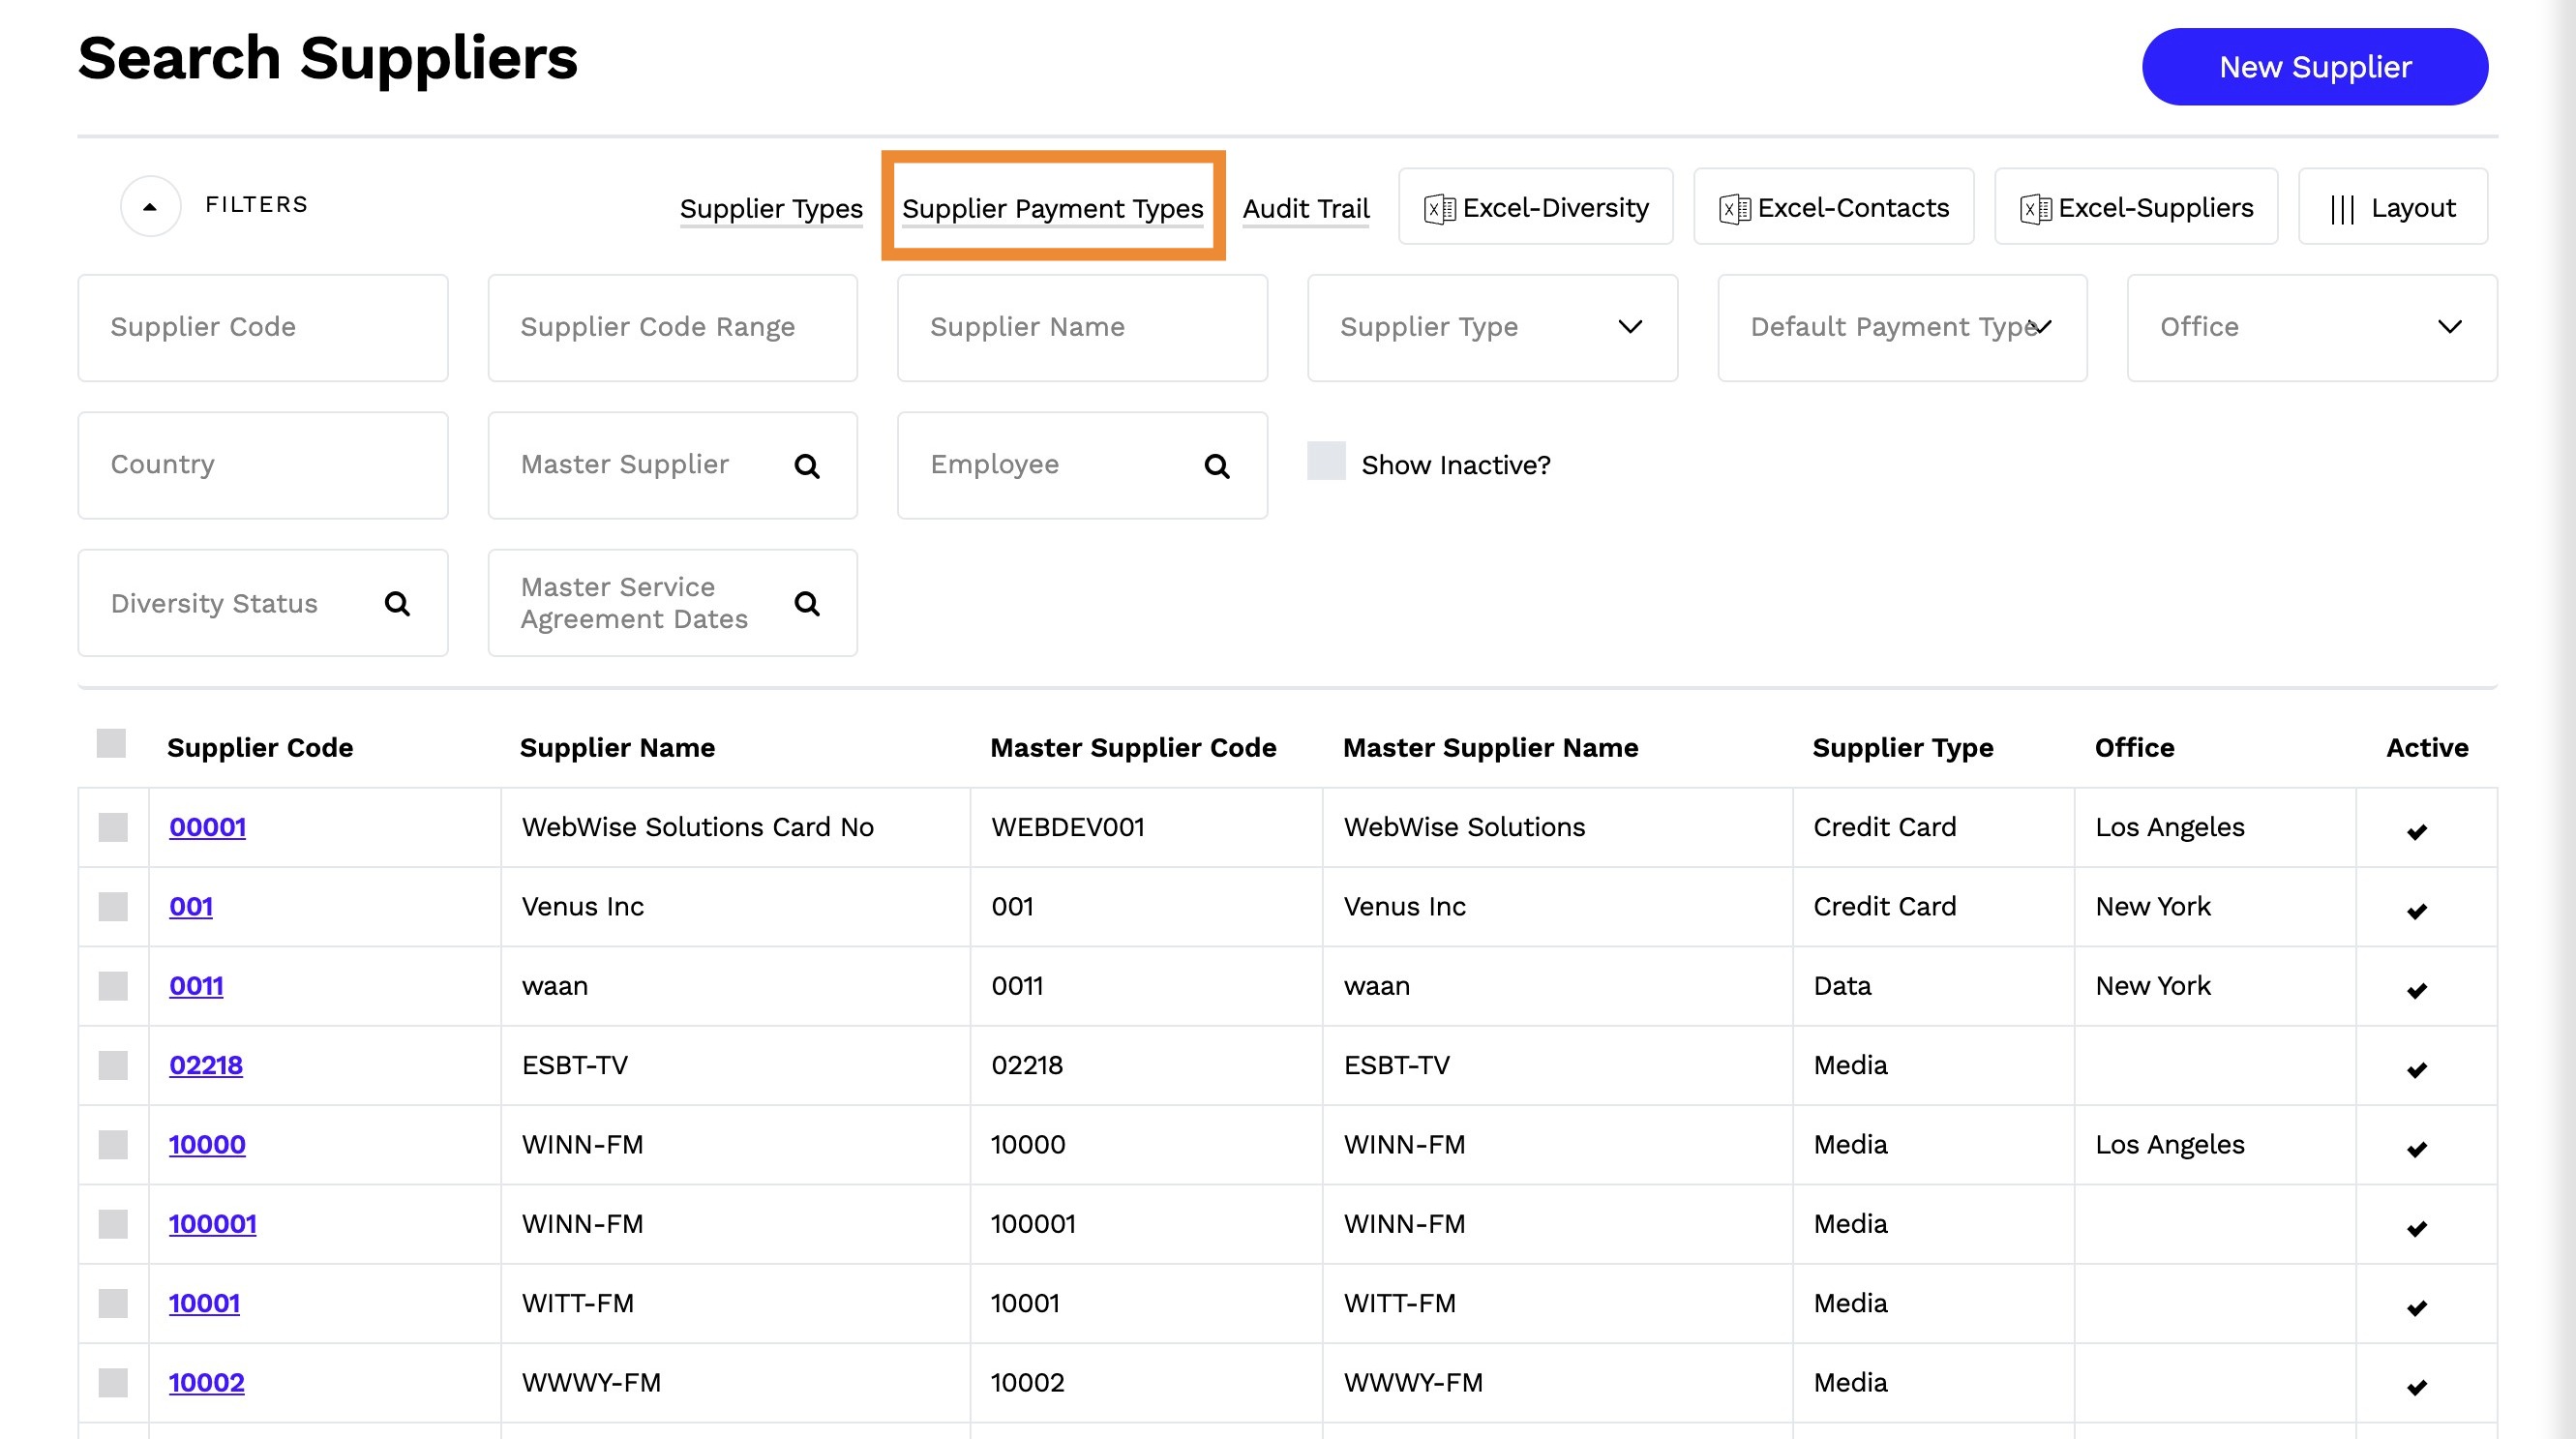
2. Click Supplier Payment Types at the top of the page
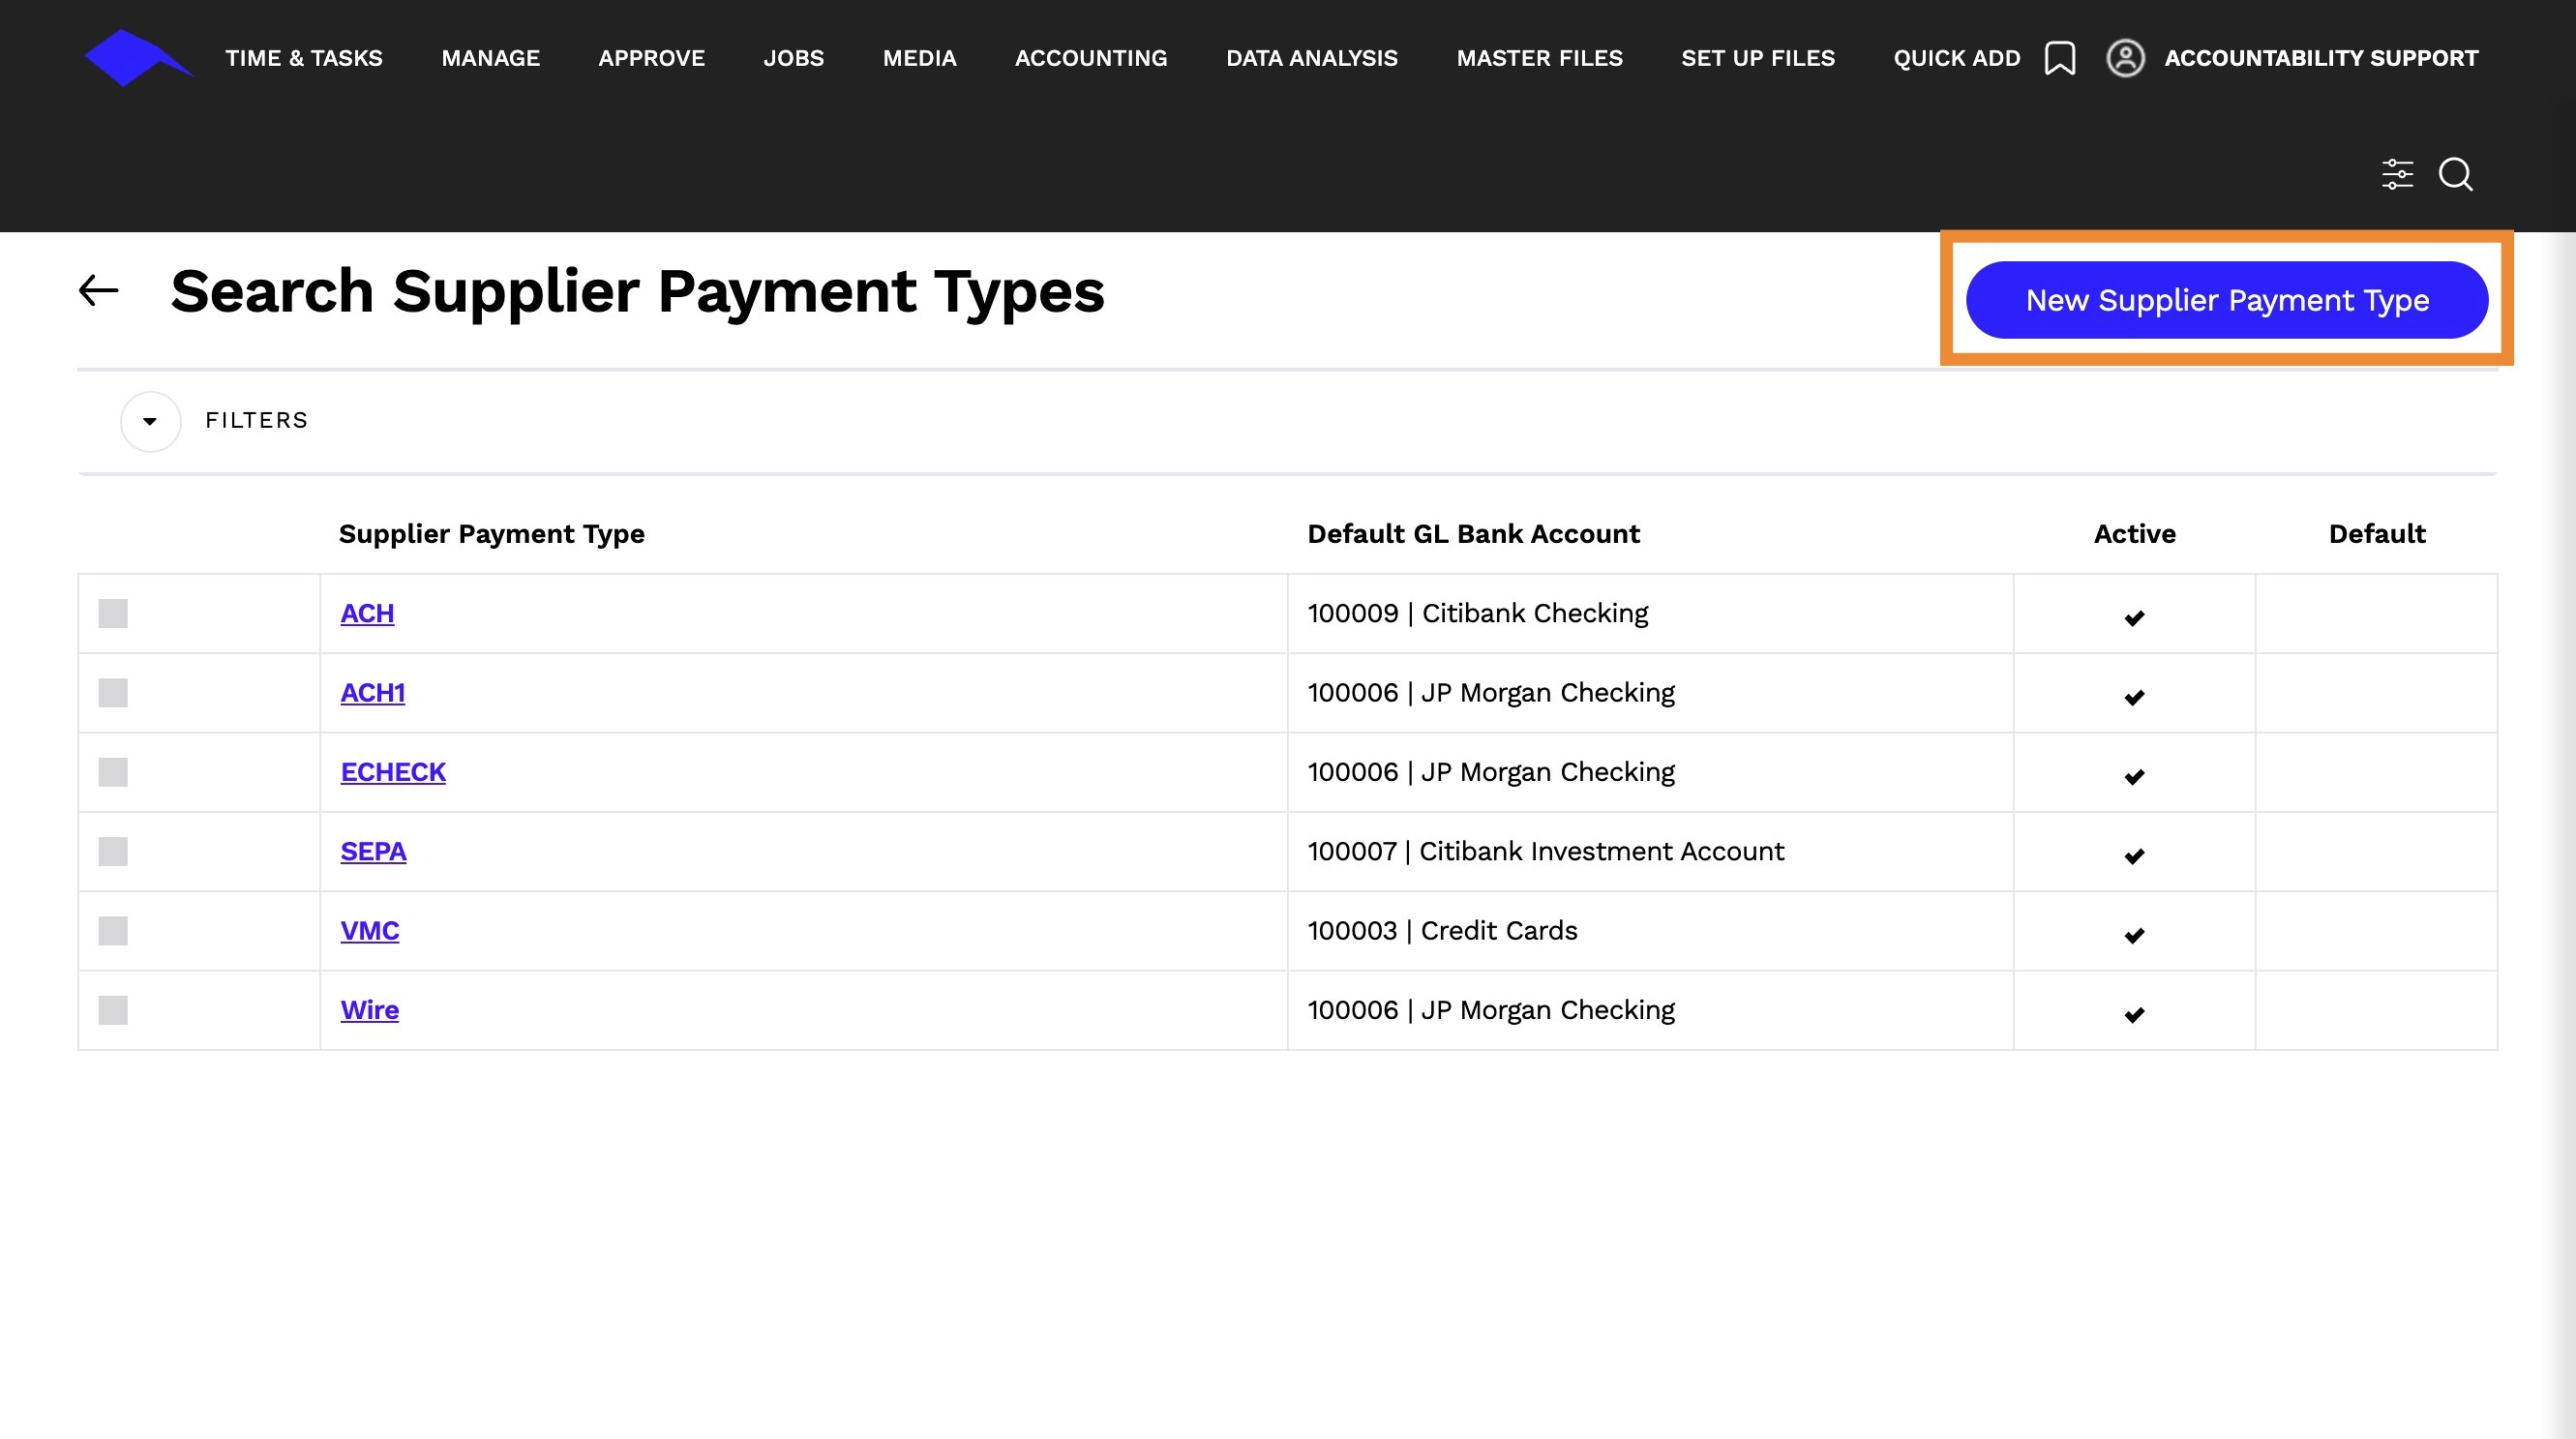
3. Select New Supplier Payment Type
4. Enter the Supplier Payment Type Name (In this case, it would be ACH) and Default GL Bank Account
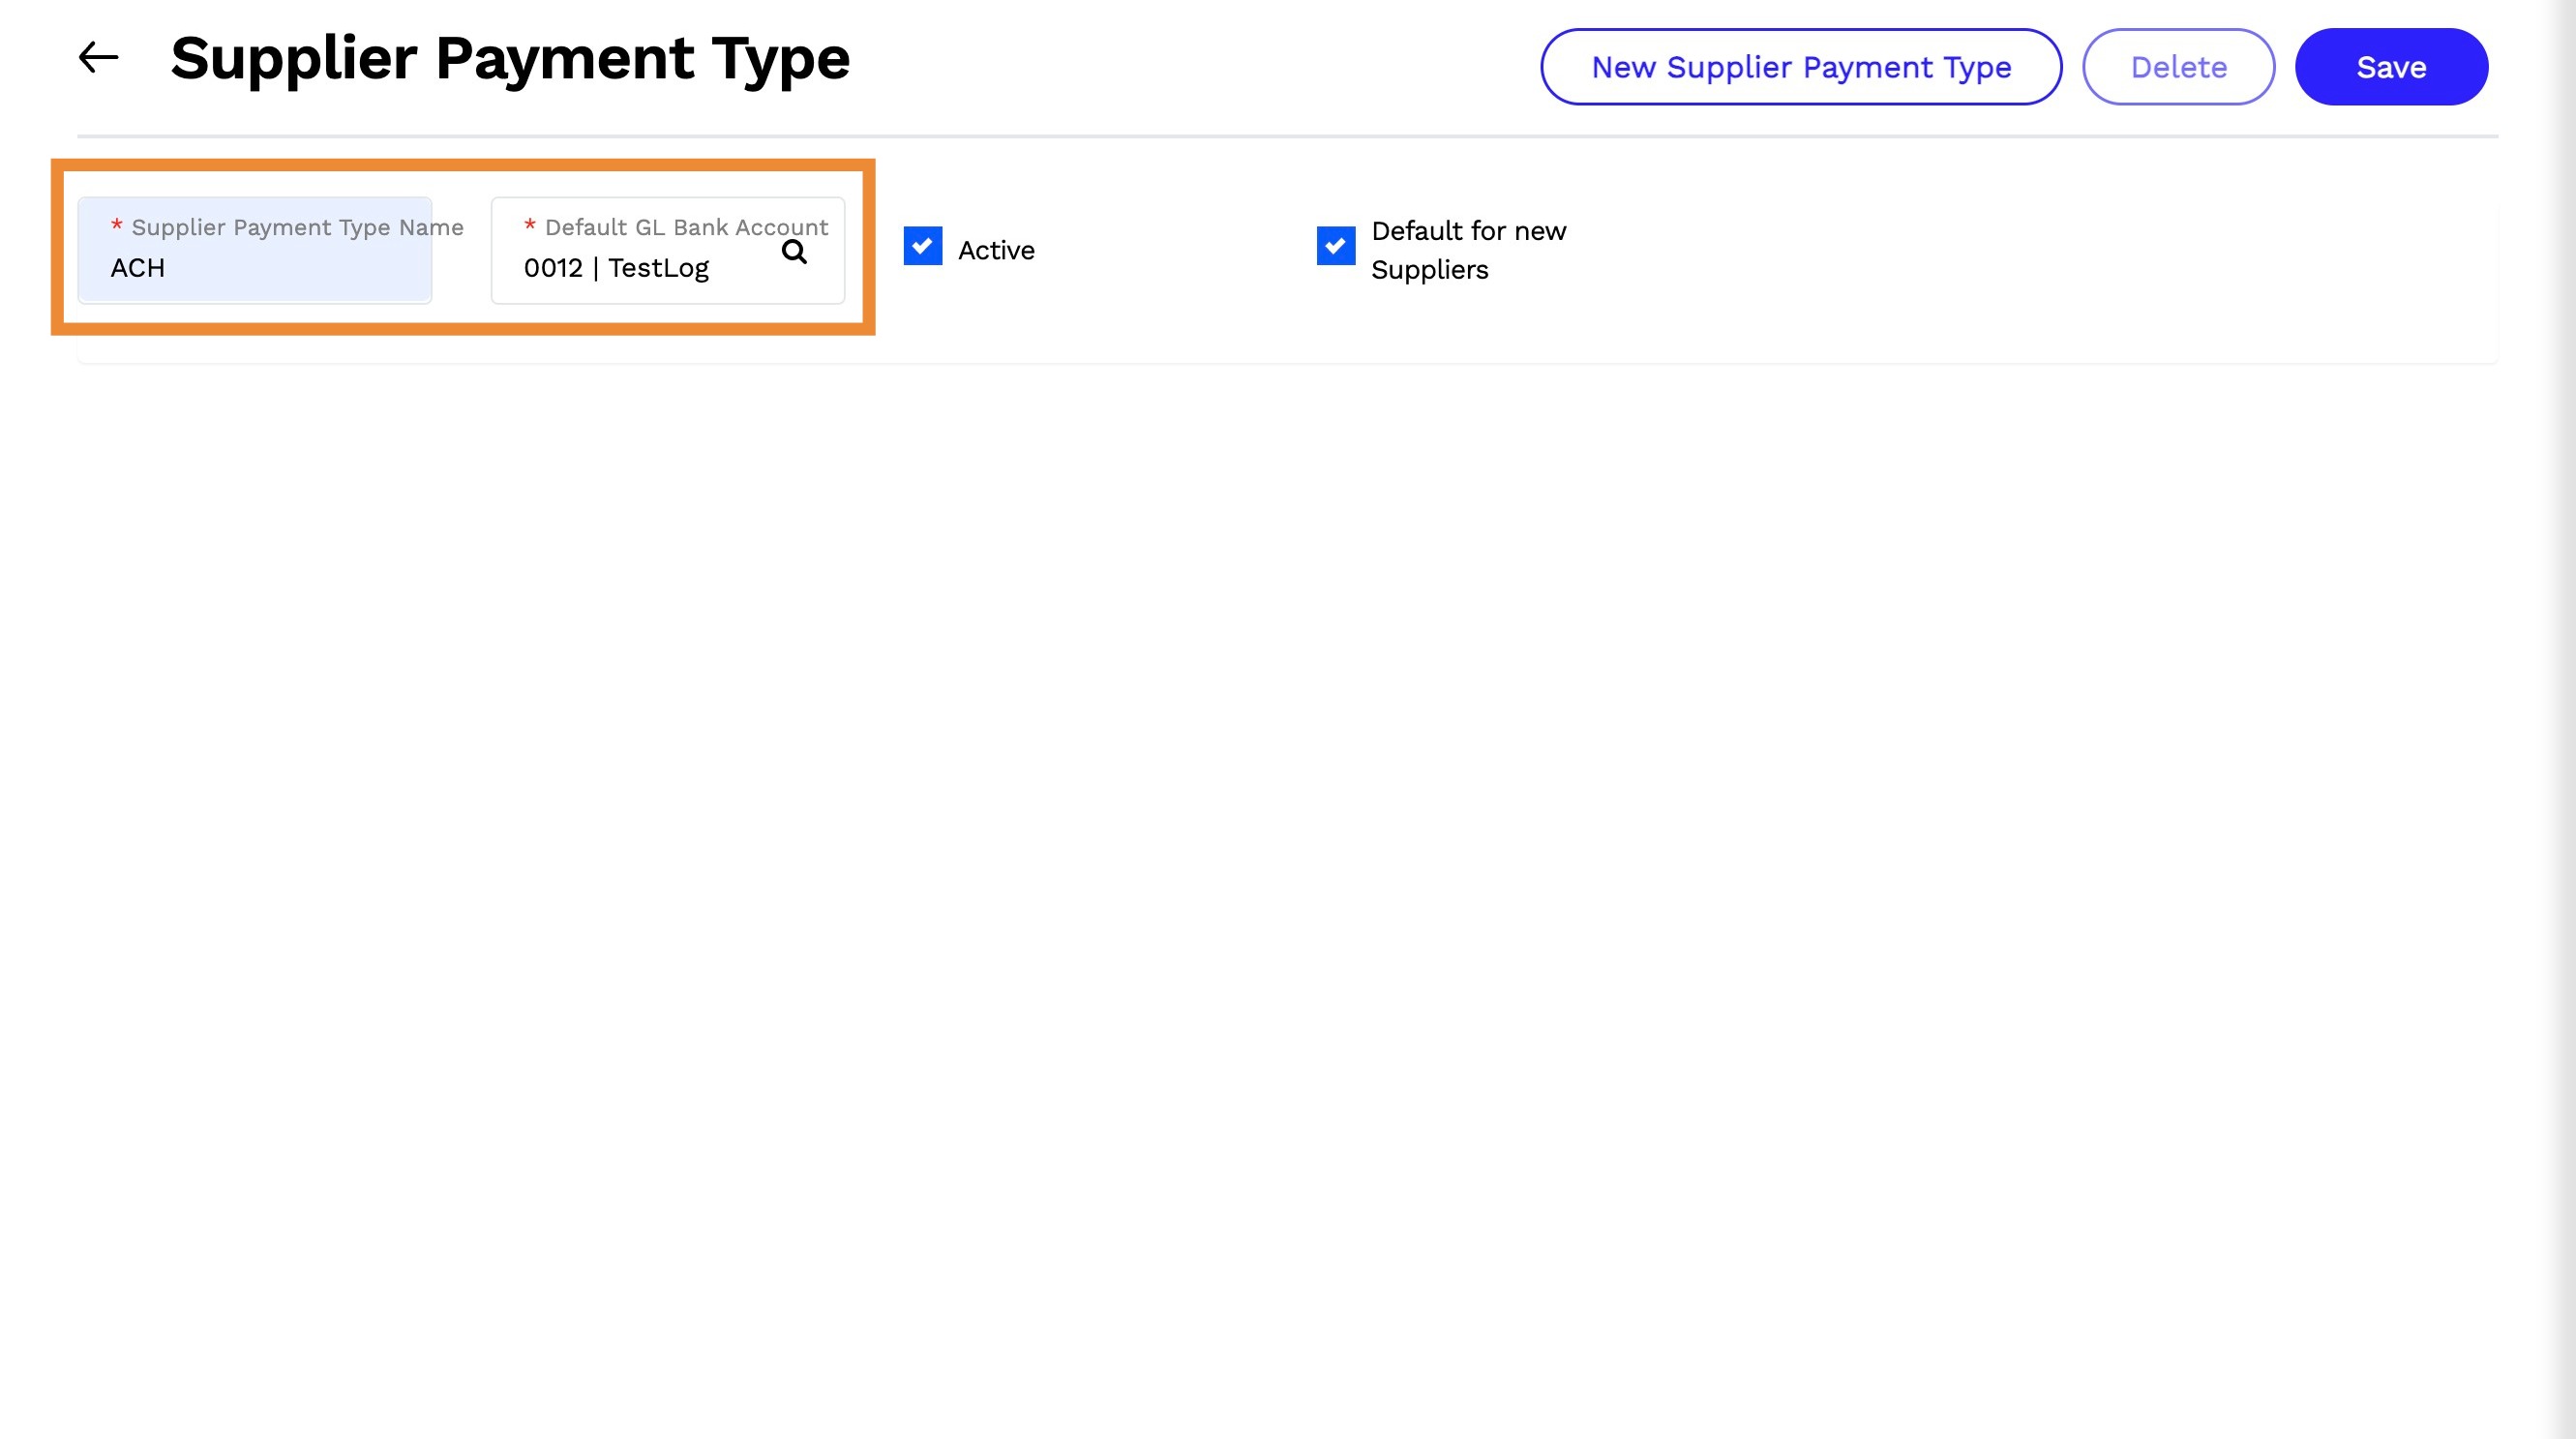
5. Click Save
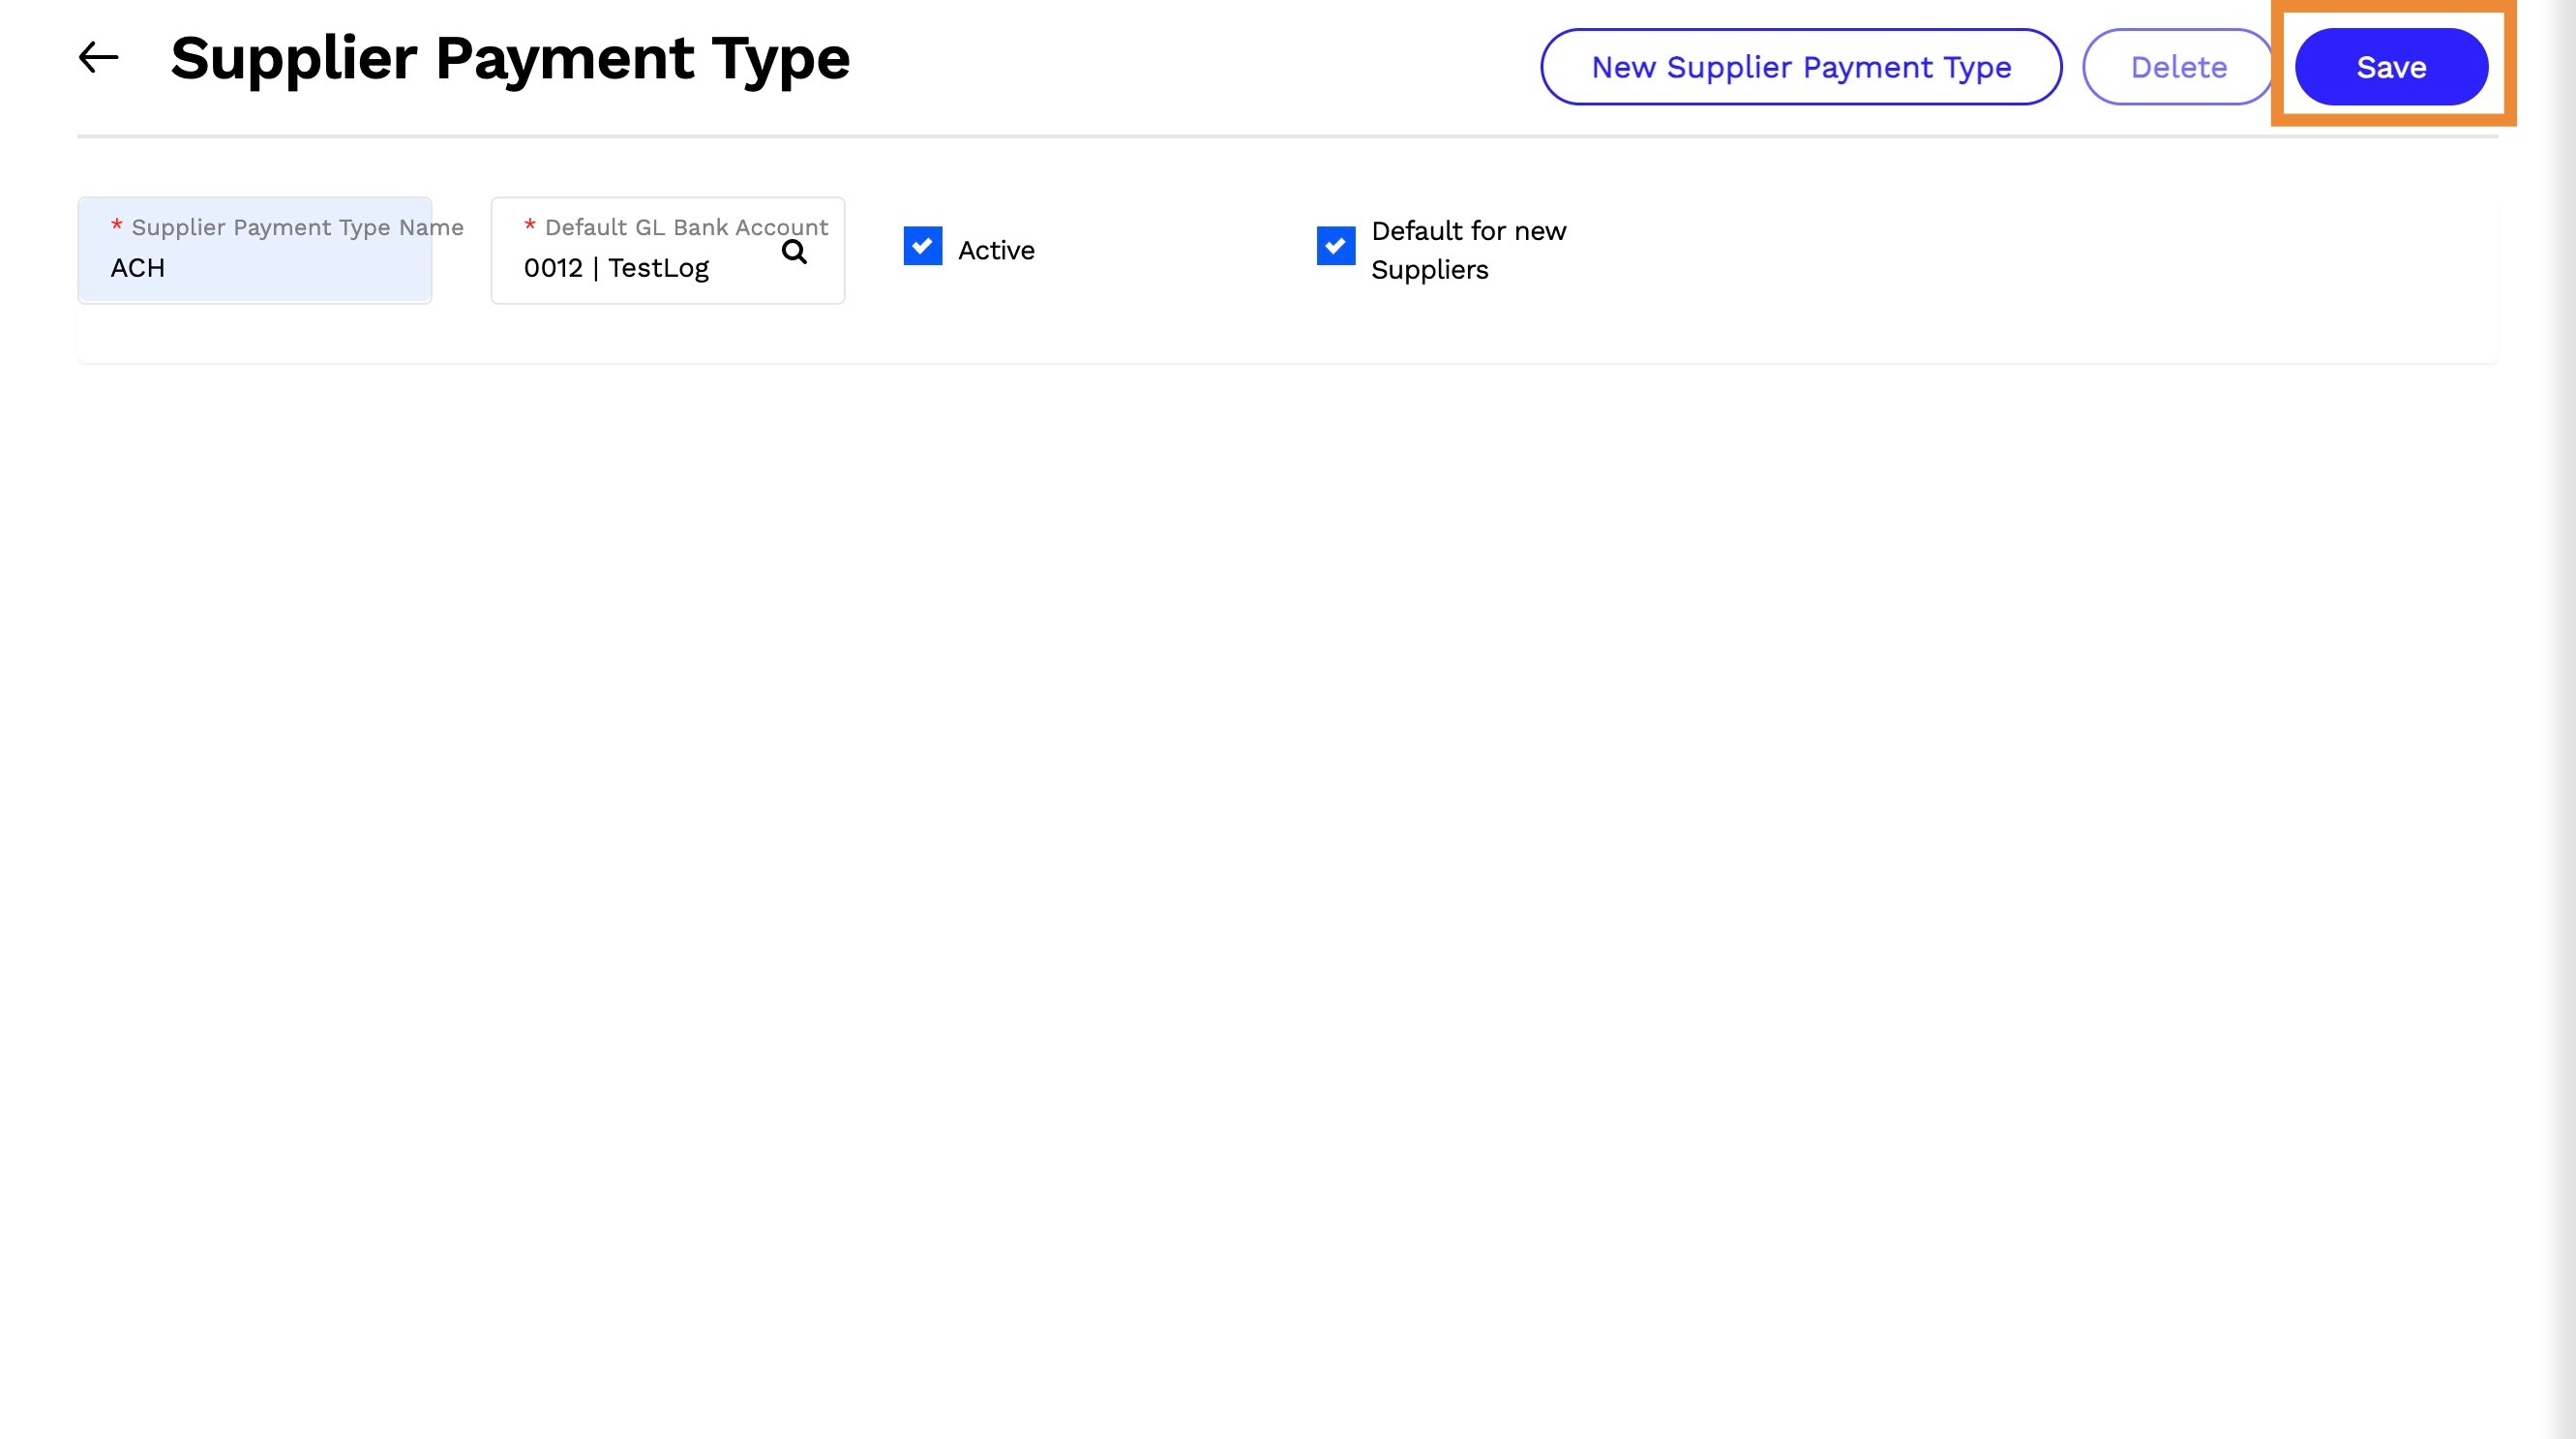
Link An ACH Payment Type To An Account
6. Steps:
Navigate to Accounting > General Ledger > General Ledger Accounts
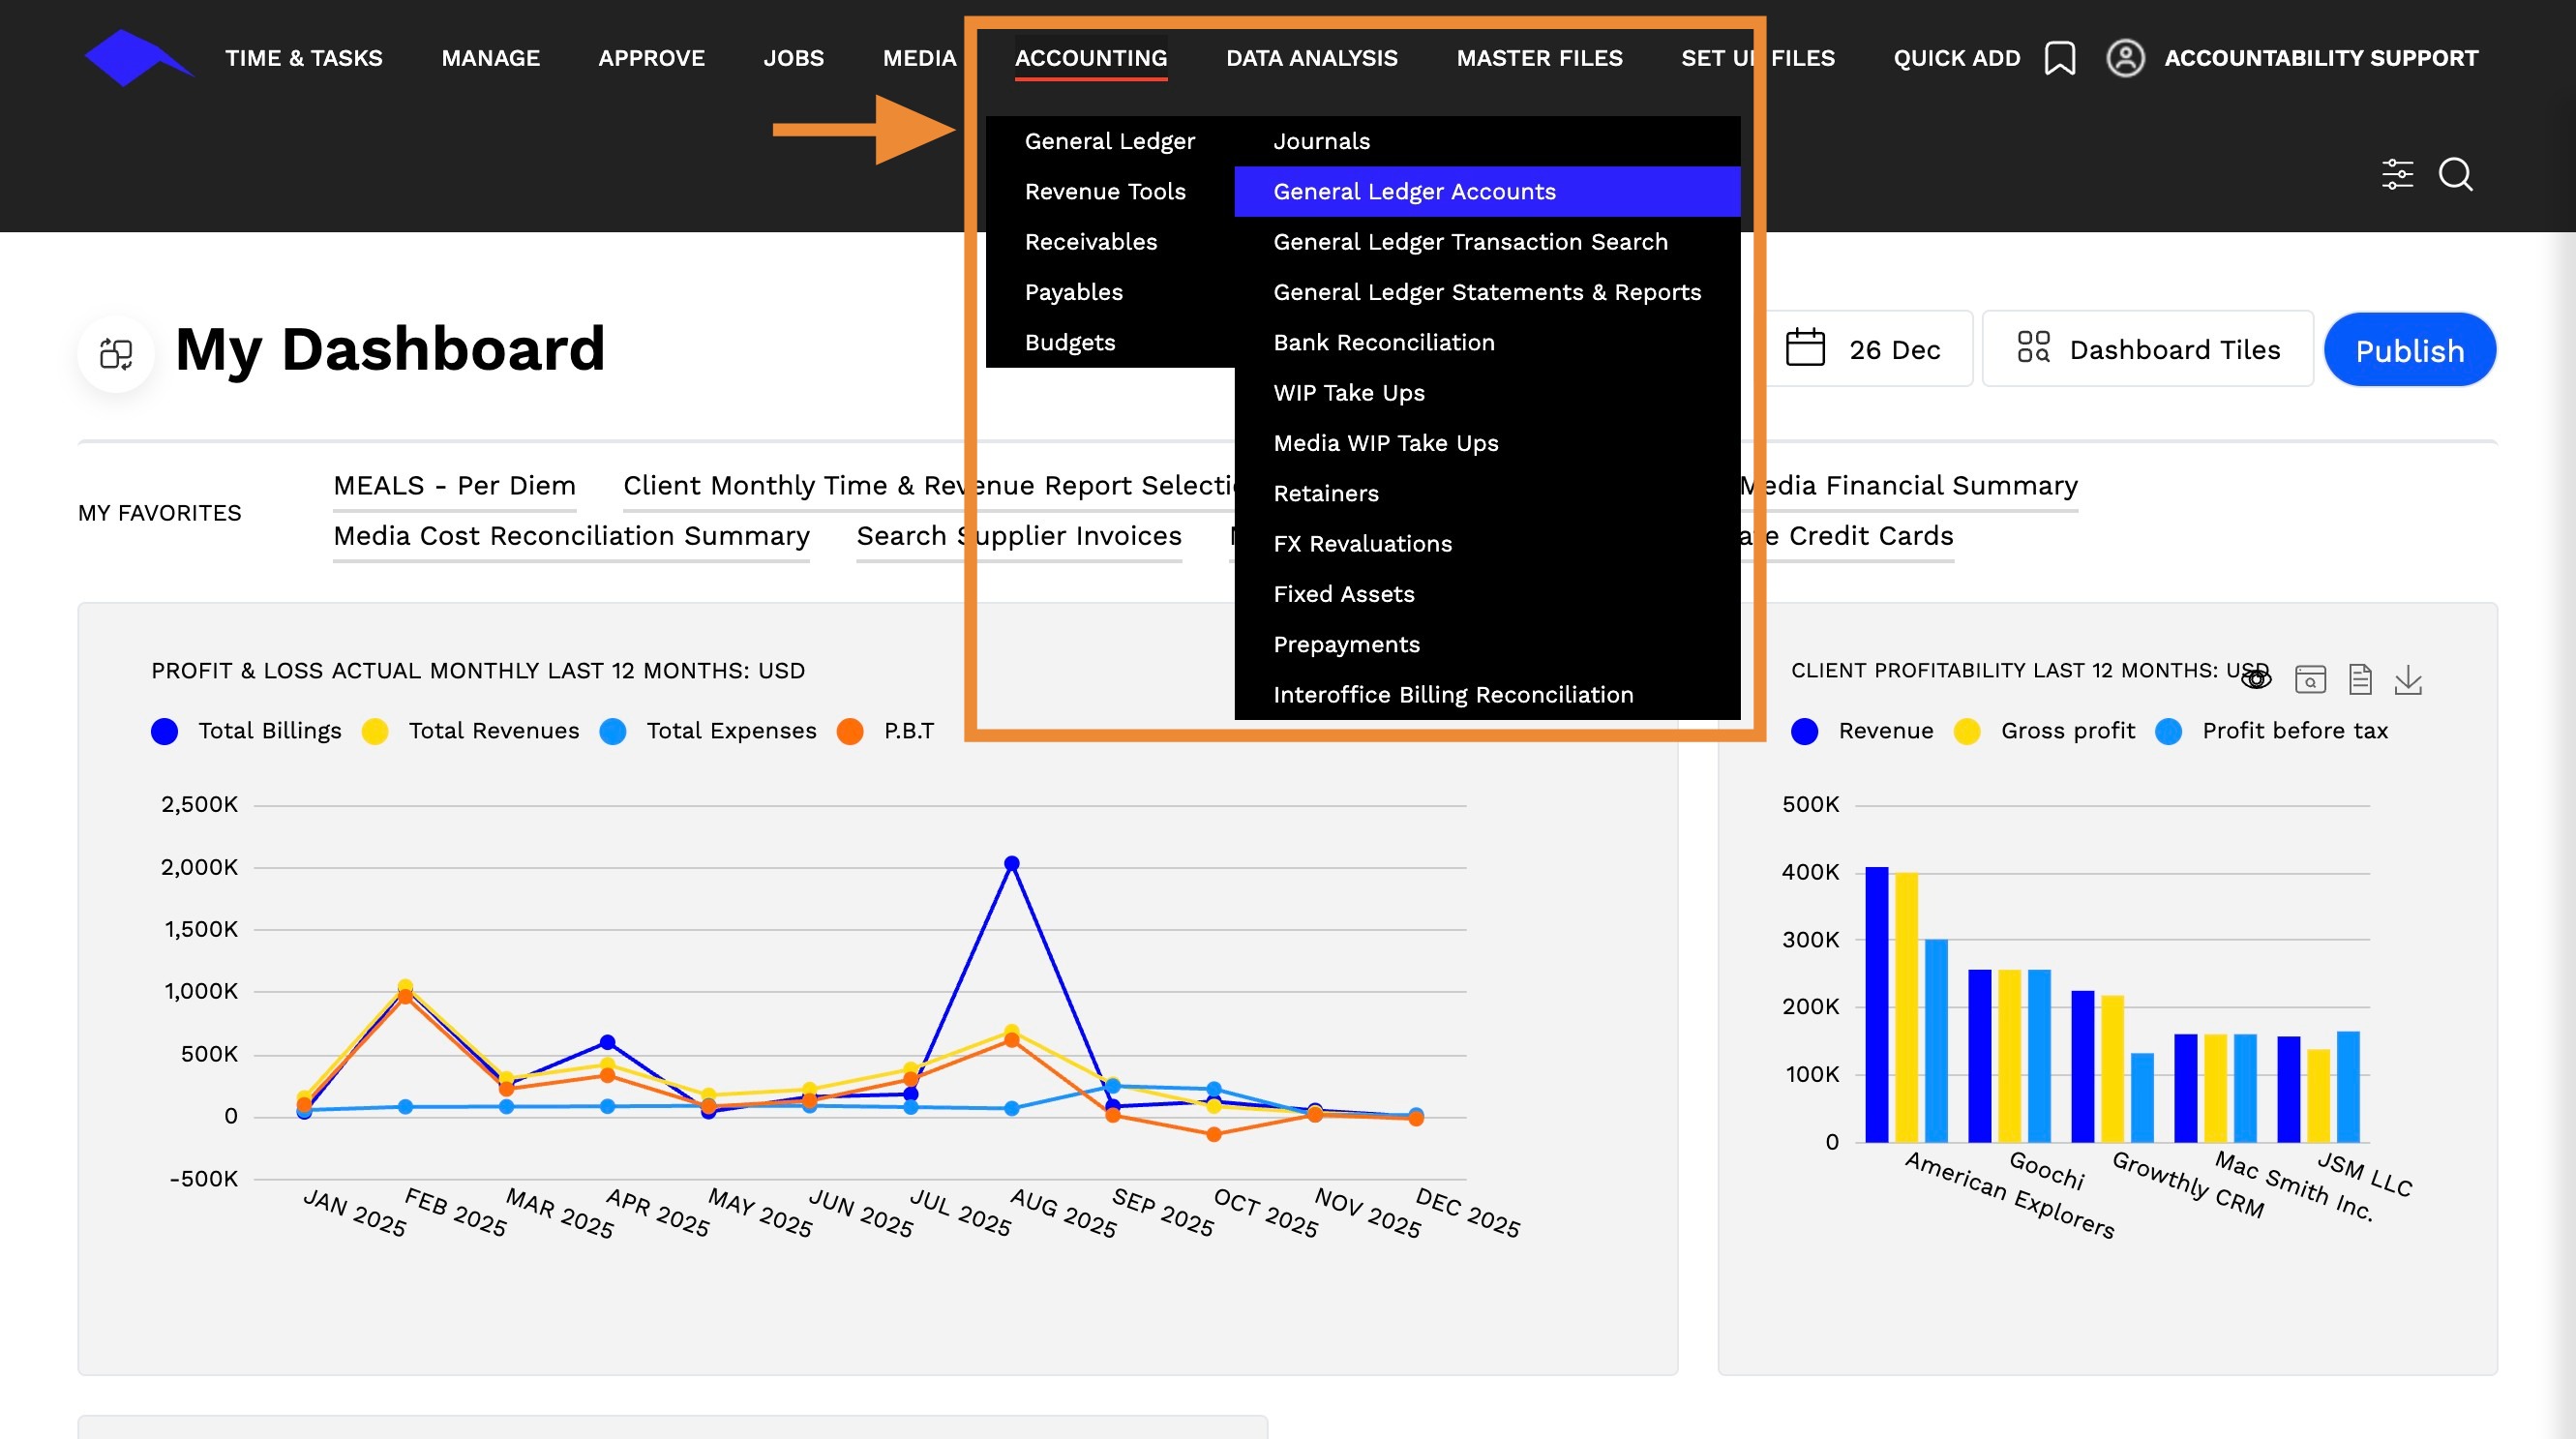
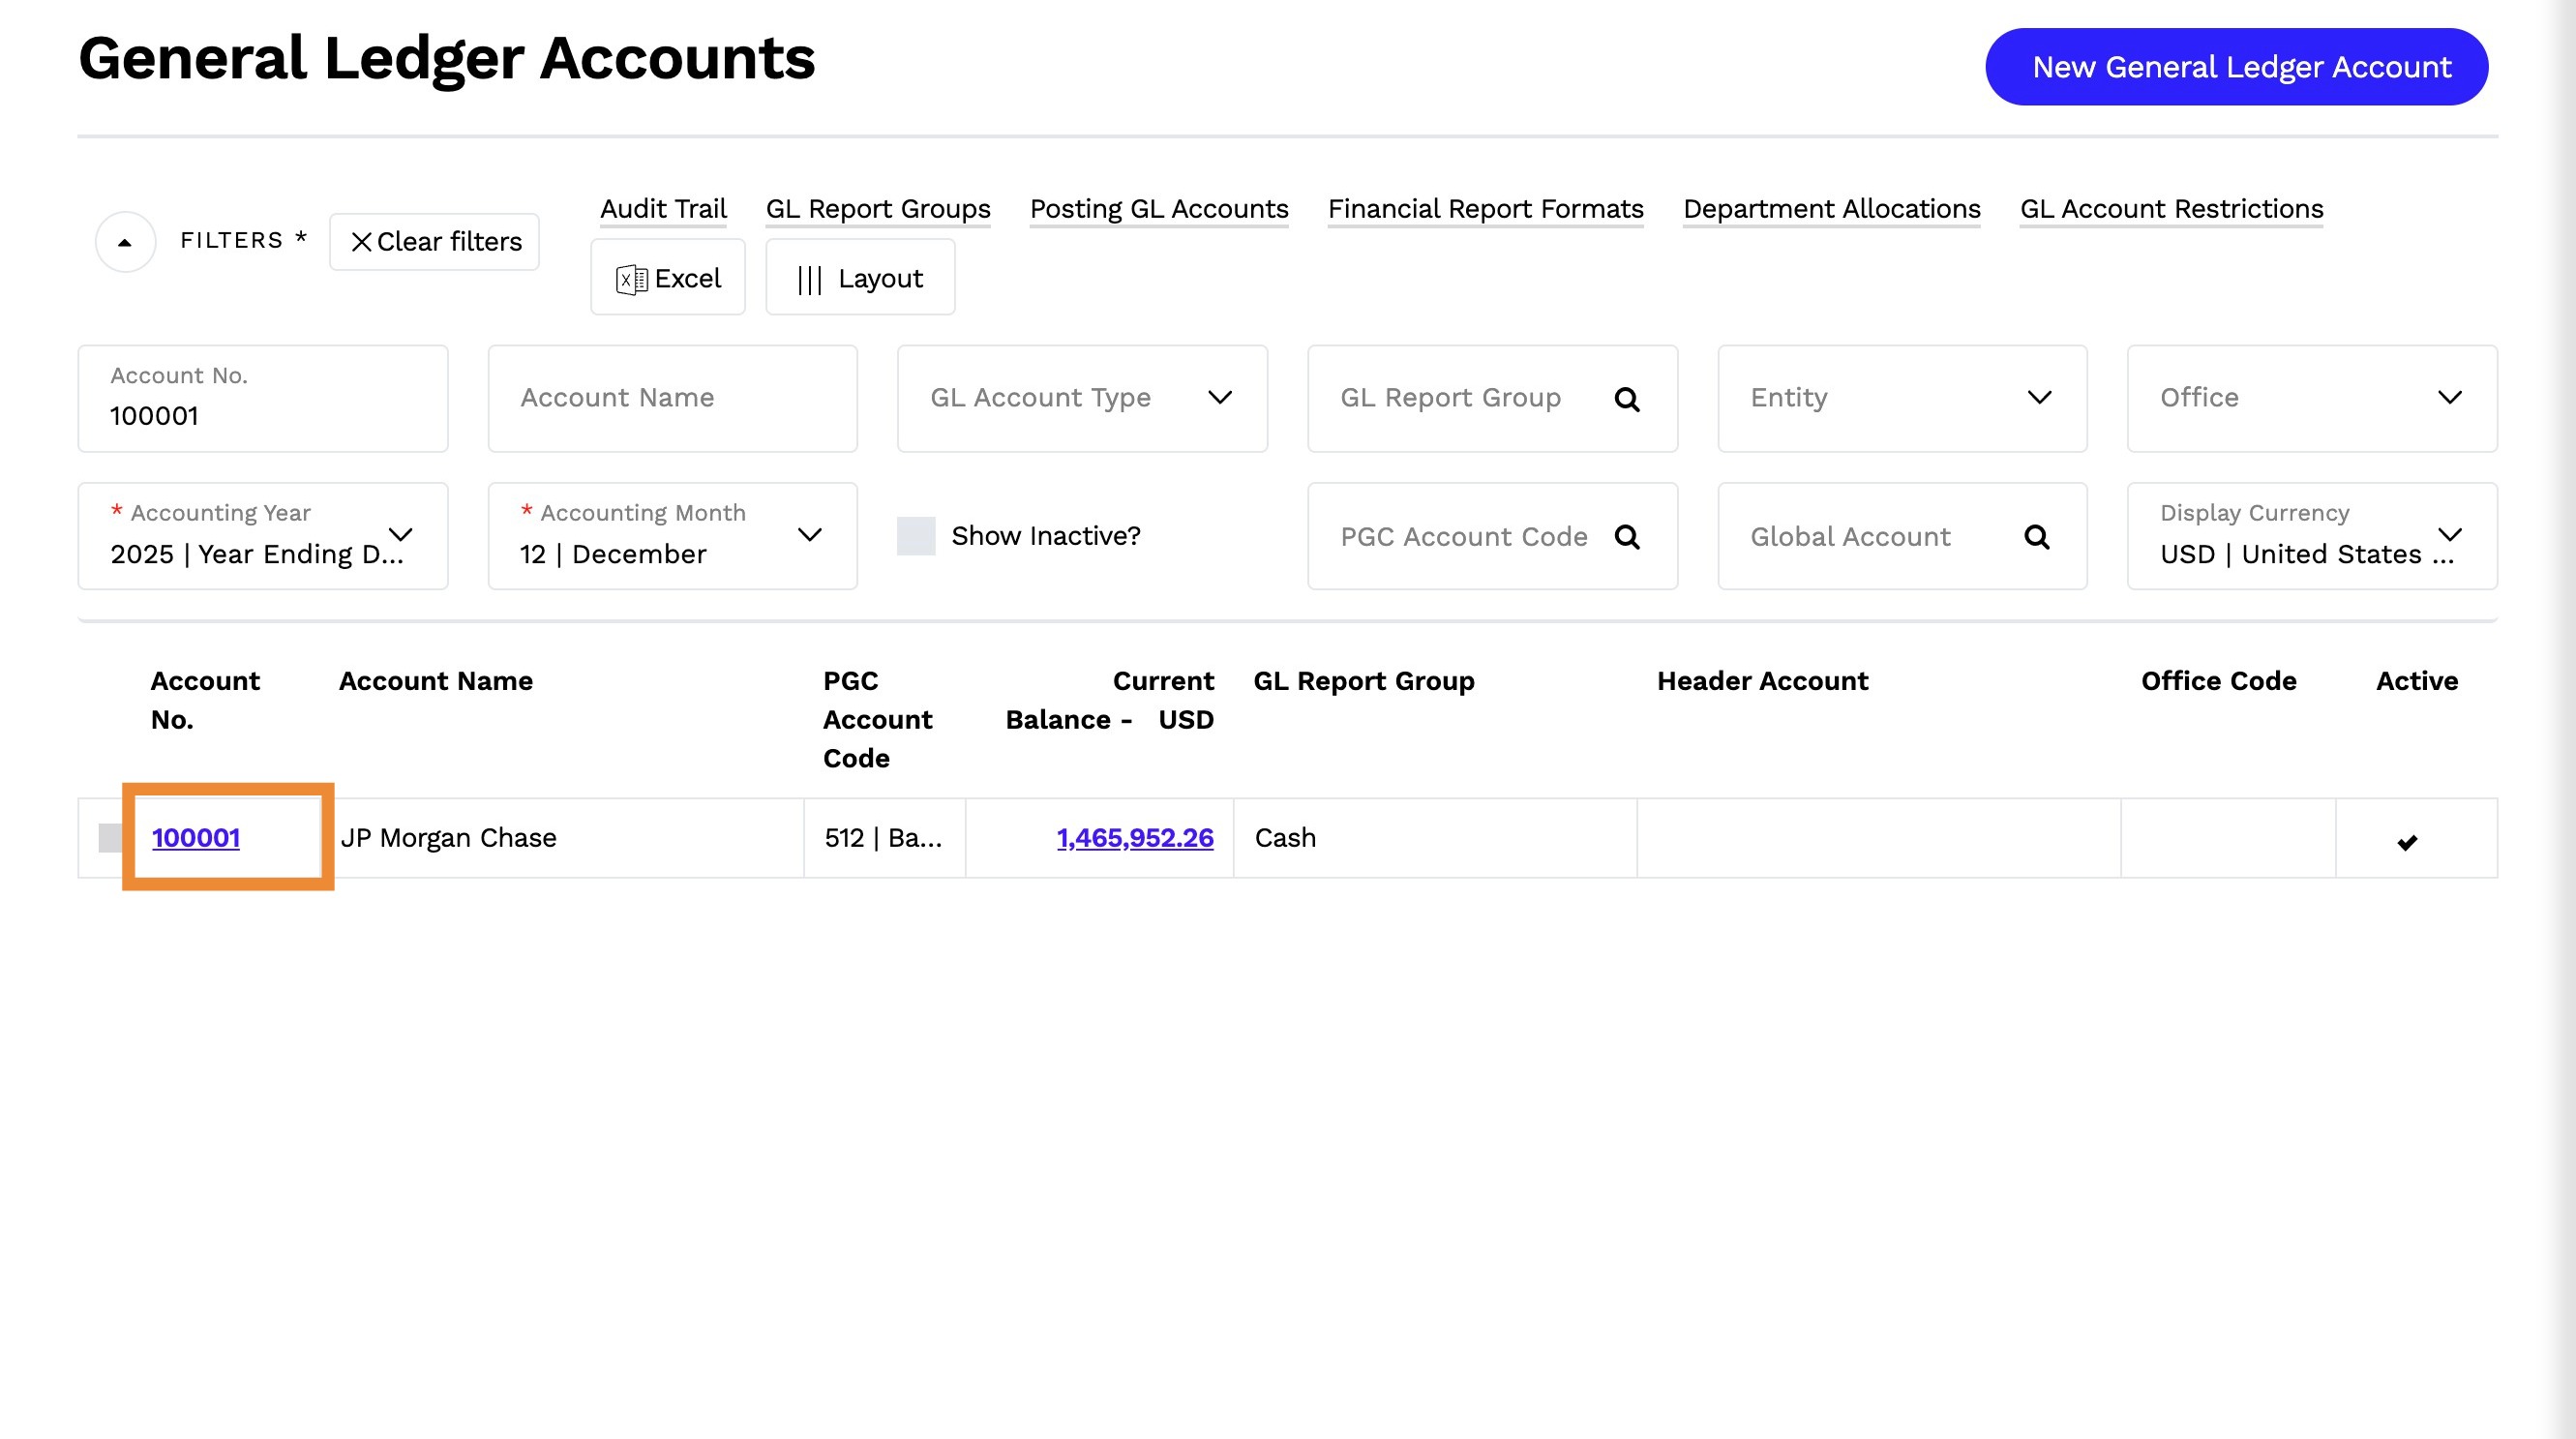
7. Select the Account No. you wish to link the payment to
8. Click on Banking Details at the top right of the page
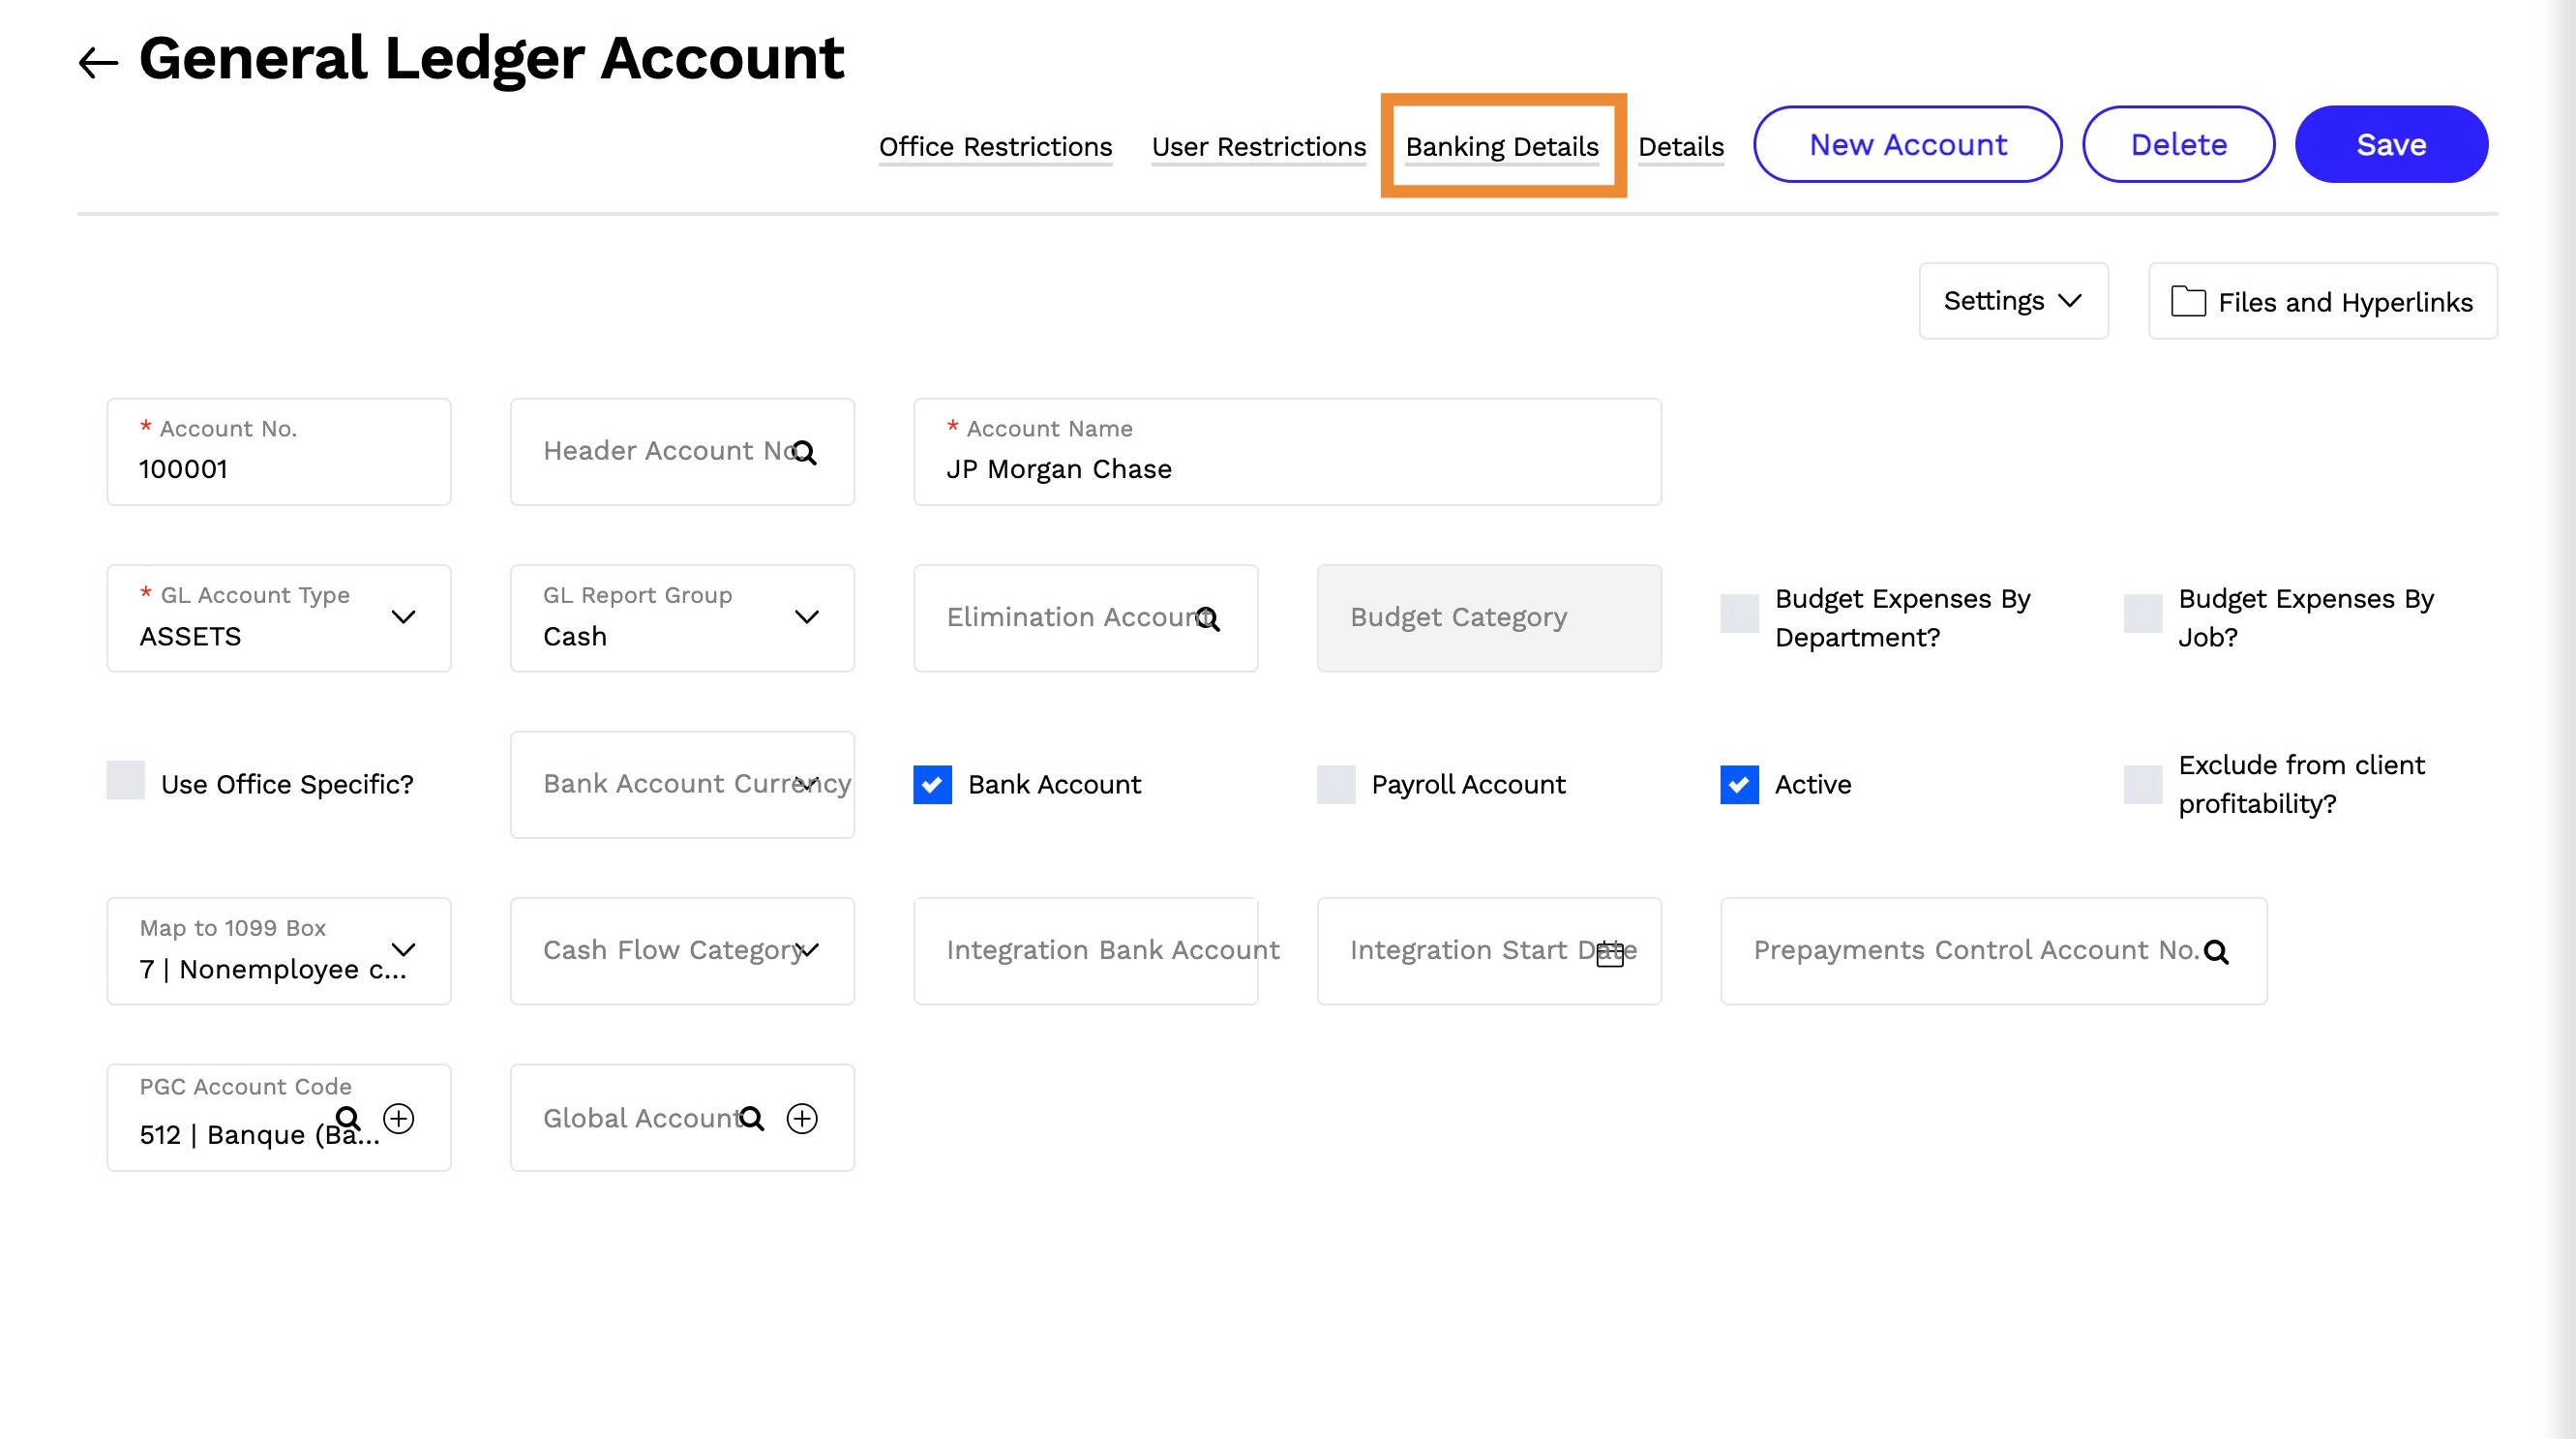
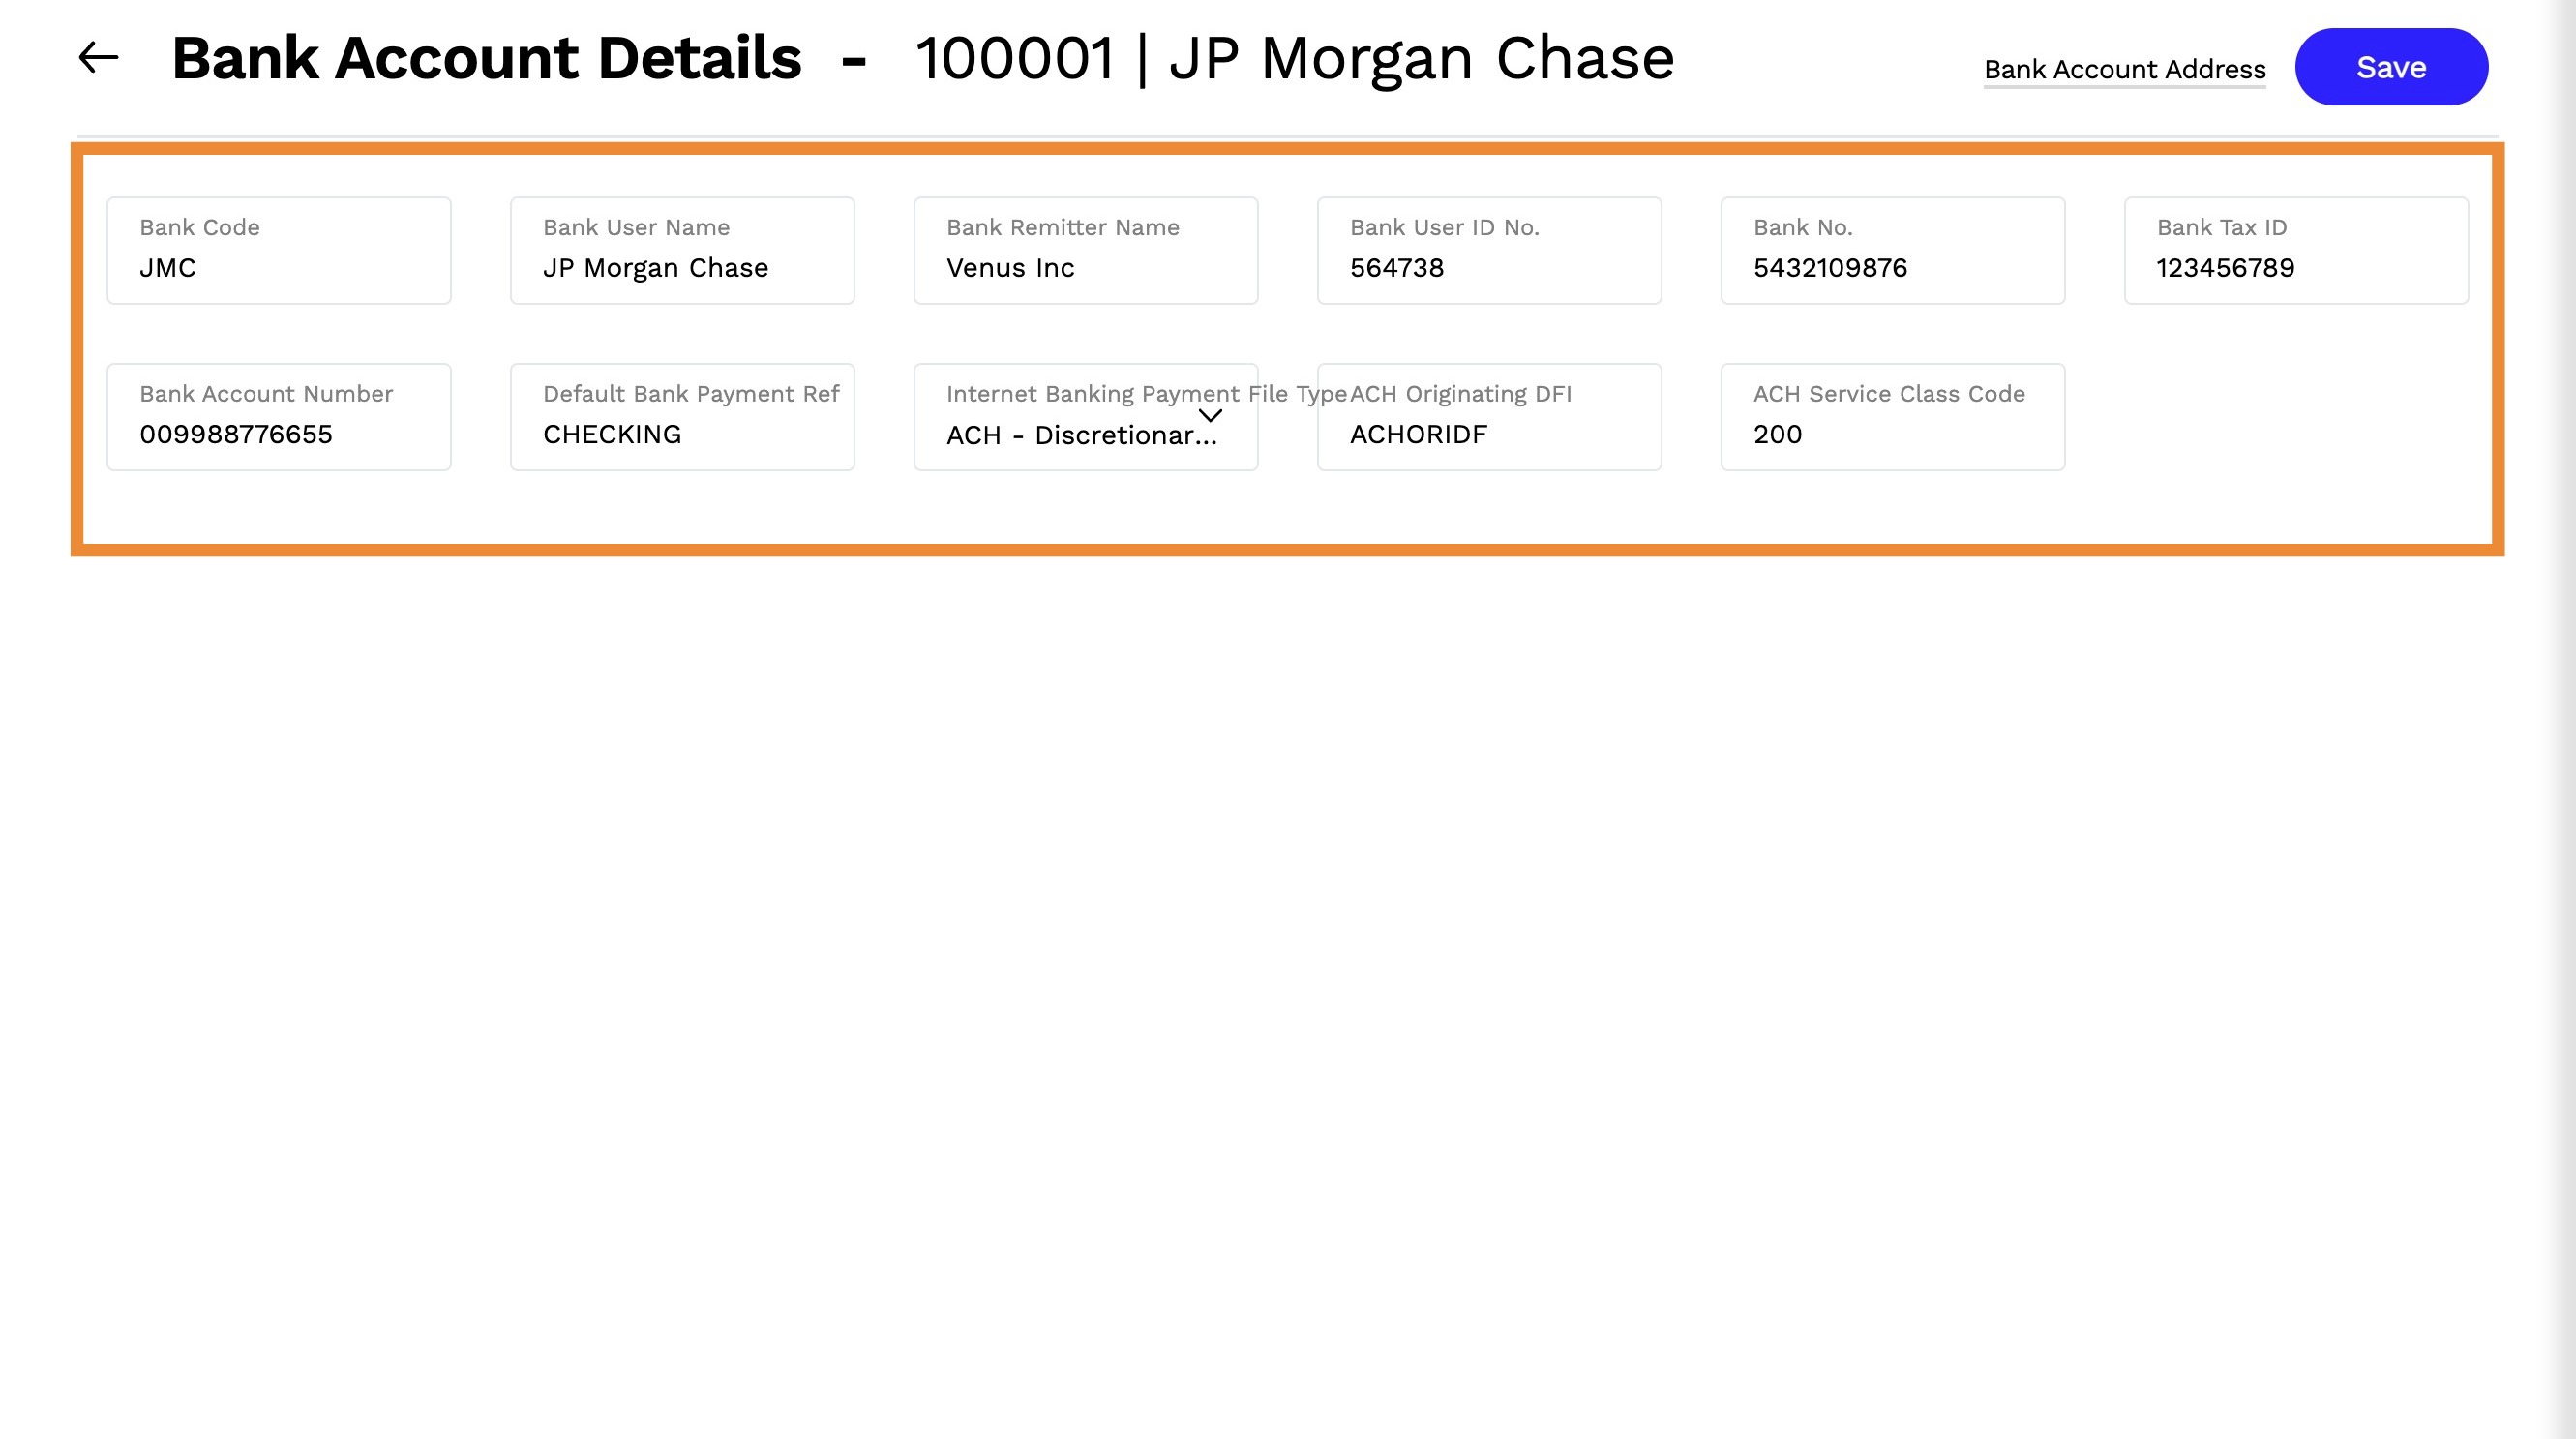
9. Enter the following information:
- Bank Code - Enter a bank code (optional)
- Bank User Name - Enter your bank's name as the user name. The bank ACH documentation may refer to this as the Immediate Destination Name, e,g., City National Bank.
- Bank Remitter Name - Enter the company name. The bank ACH documentation may refer to this as the Immediate Origin Name.
- Bank User ID No. - Enter the bank's user ID number (Optional)
- Bank No. - Enter the bank's routing number. The bank ACH documentation may refer to this as the Immediate Destination.
- Bank Tax ID - Enter the ID number that the bank has assigned to your company. The bank's ACH documentation may refer to this as the Company ID.
- Bank Account Number - Enter the Bank Account Number for this account.
- Default Bank Payment Ref - This payment reference is linked to all payment records included in the ACH file. For example, users might want to set this to INVOICES so the payee knows it's a payment for an invoice. Some agencies simply default this to say CHECKING to denote the type of account.
- Internet Banking Payment File Type - Select Payment File Type (In this case, it is ACH)
- ACH Originating DFI - Enter the ACH Originating Depository Financial Institution (Optional)
- ACH Service Class Code - Enter the three-digit code that identifies the type of electronic transaction being processed through the Automated Clearing House (ACH) network.
- 200 - ACH Entries Mixed Debits and Credits
- 220 - ACH Credits Only
- 225 - ACH Debits Only
10. Click Save
Supplier Set Up
11. This setup facilitates easy filtering for suppliers to be paid via ACH.
12. Steps:
Navigate to Master Files > Suppliers
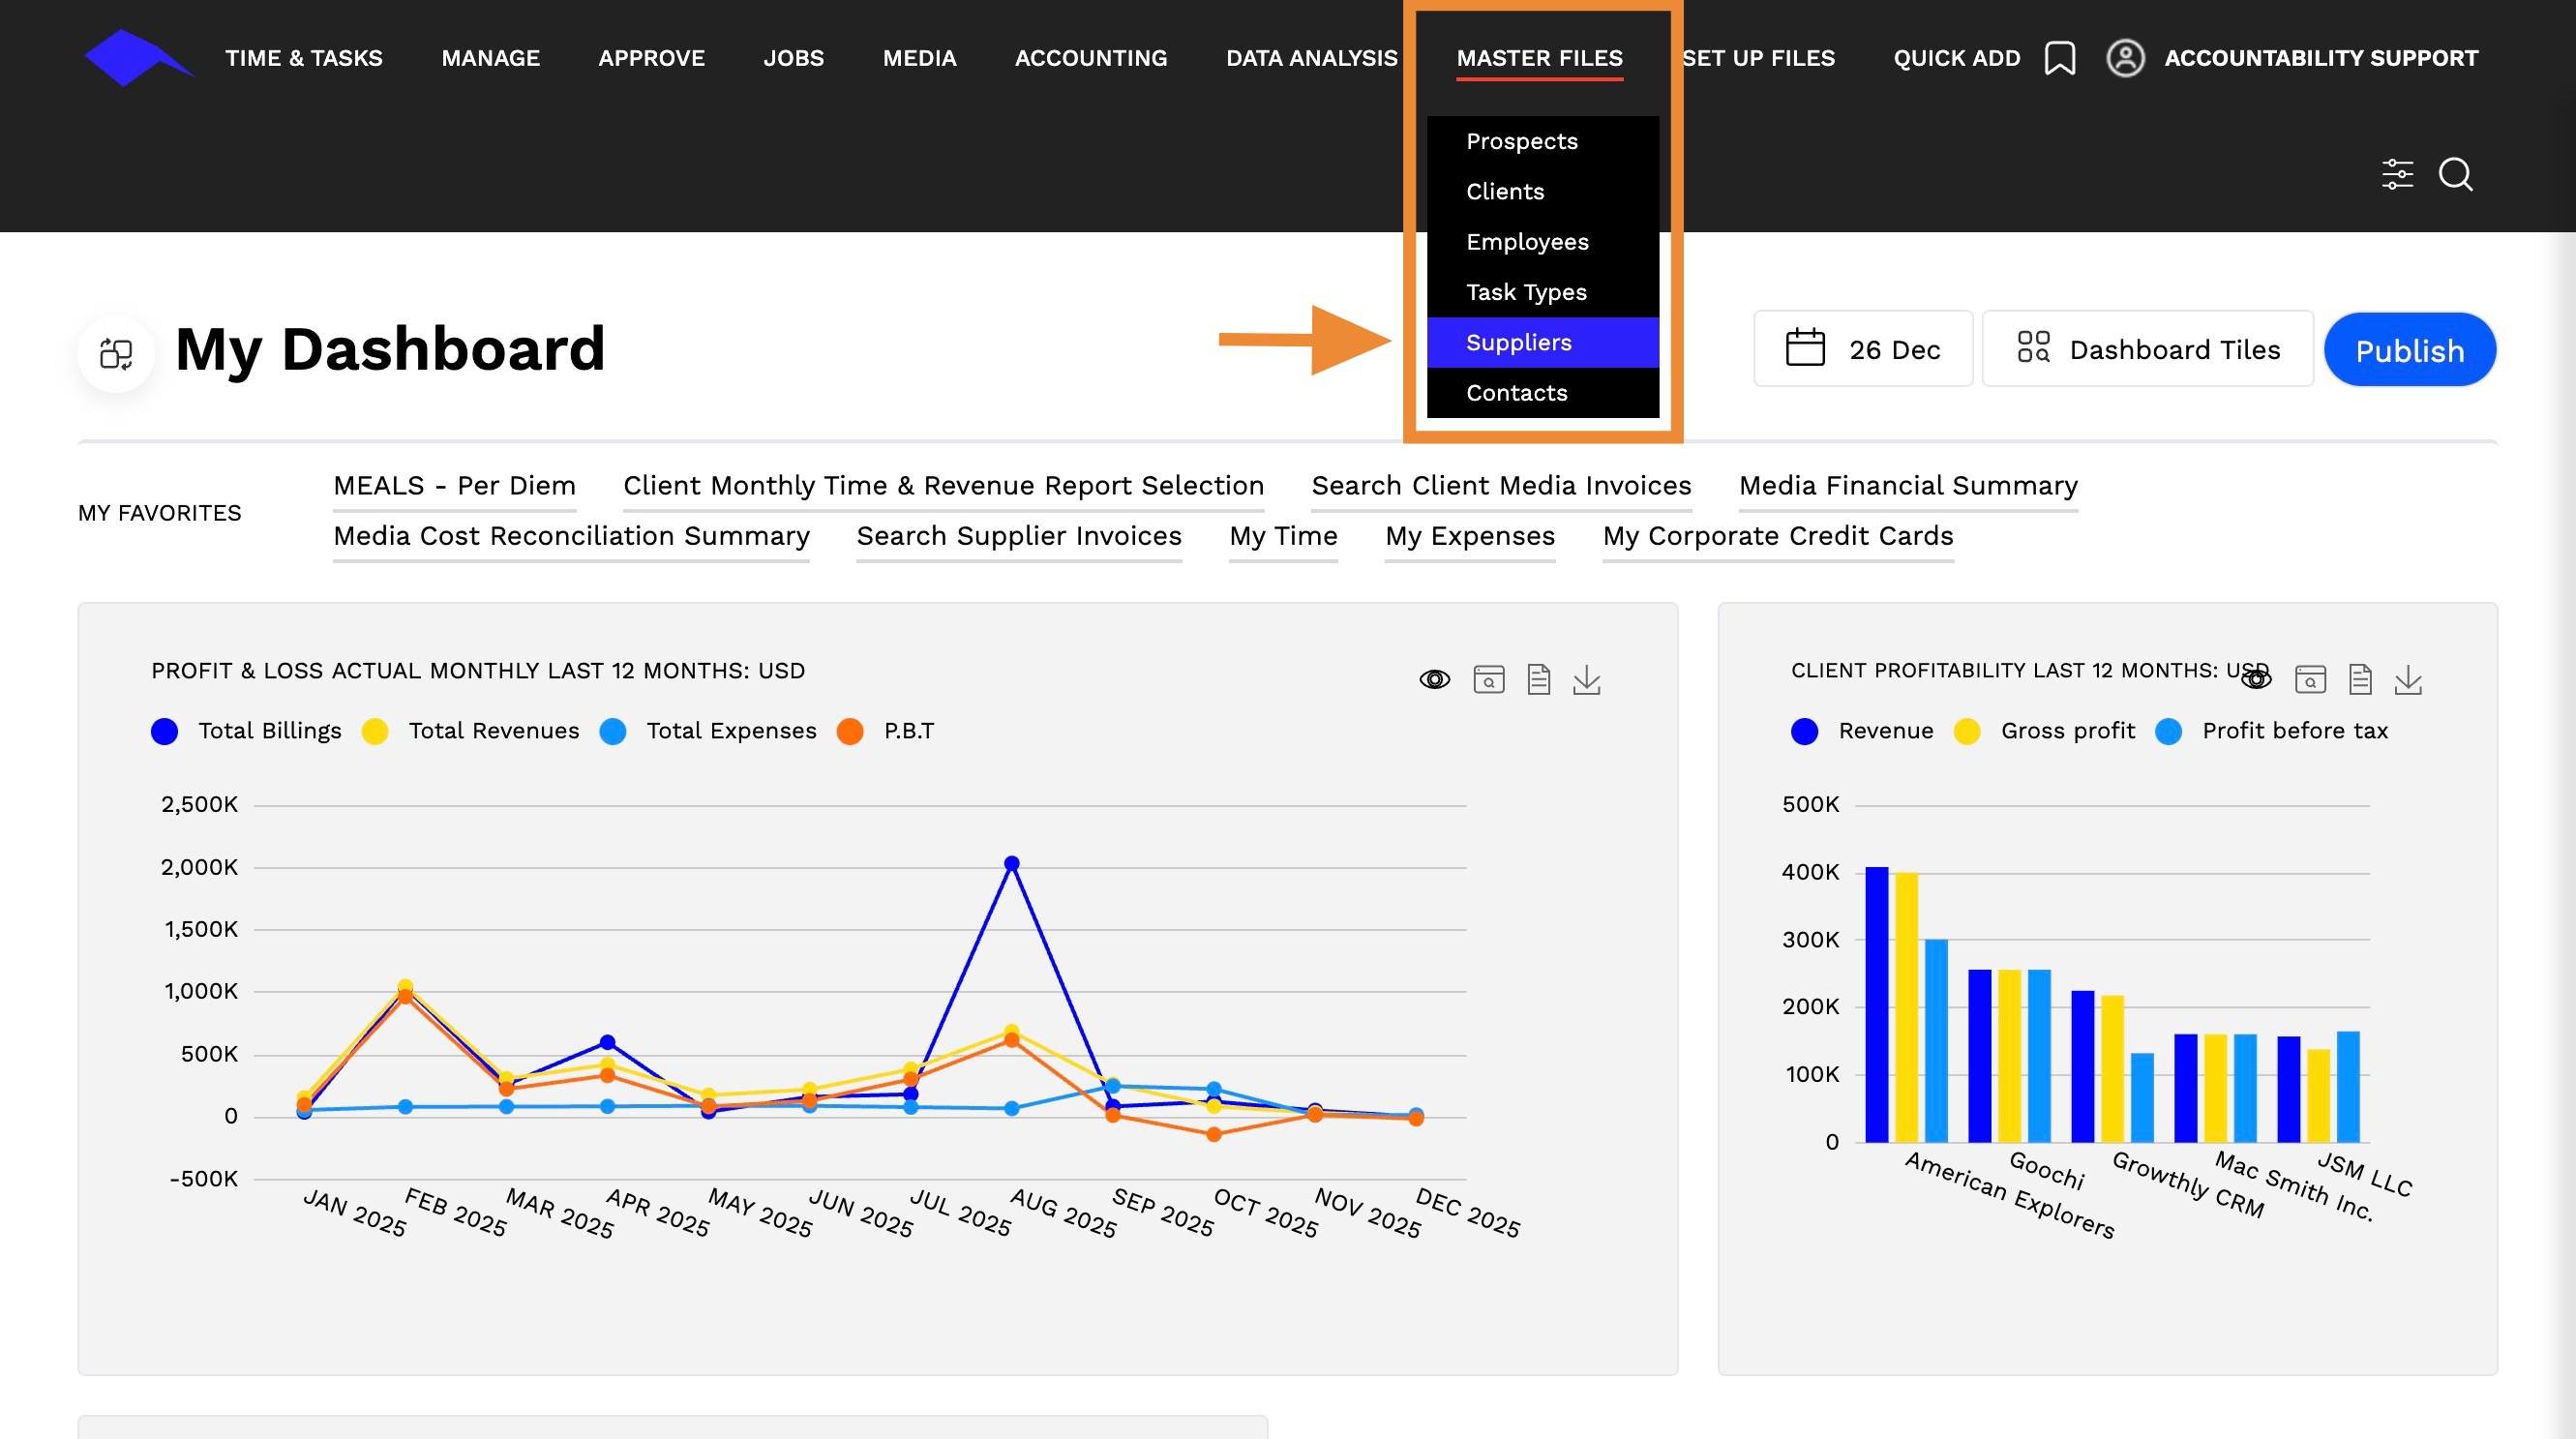
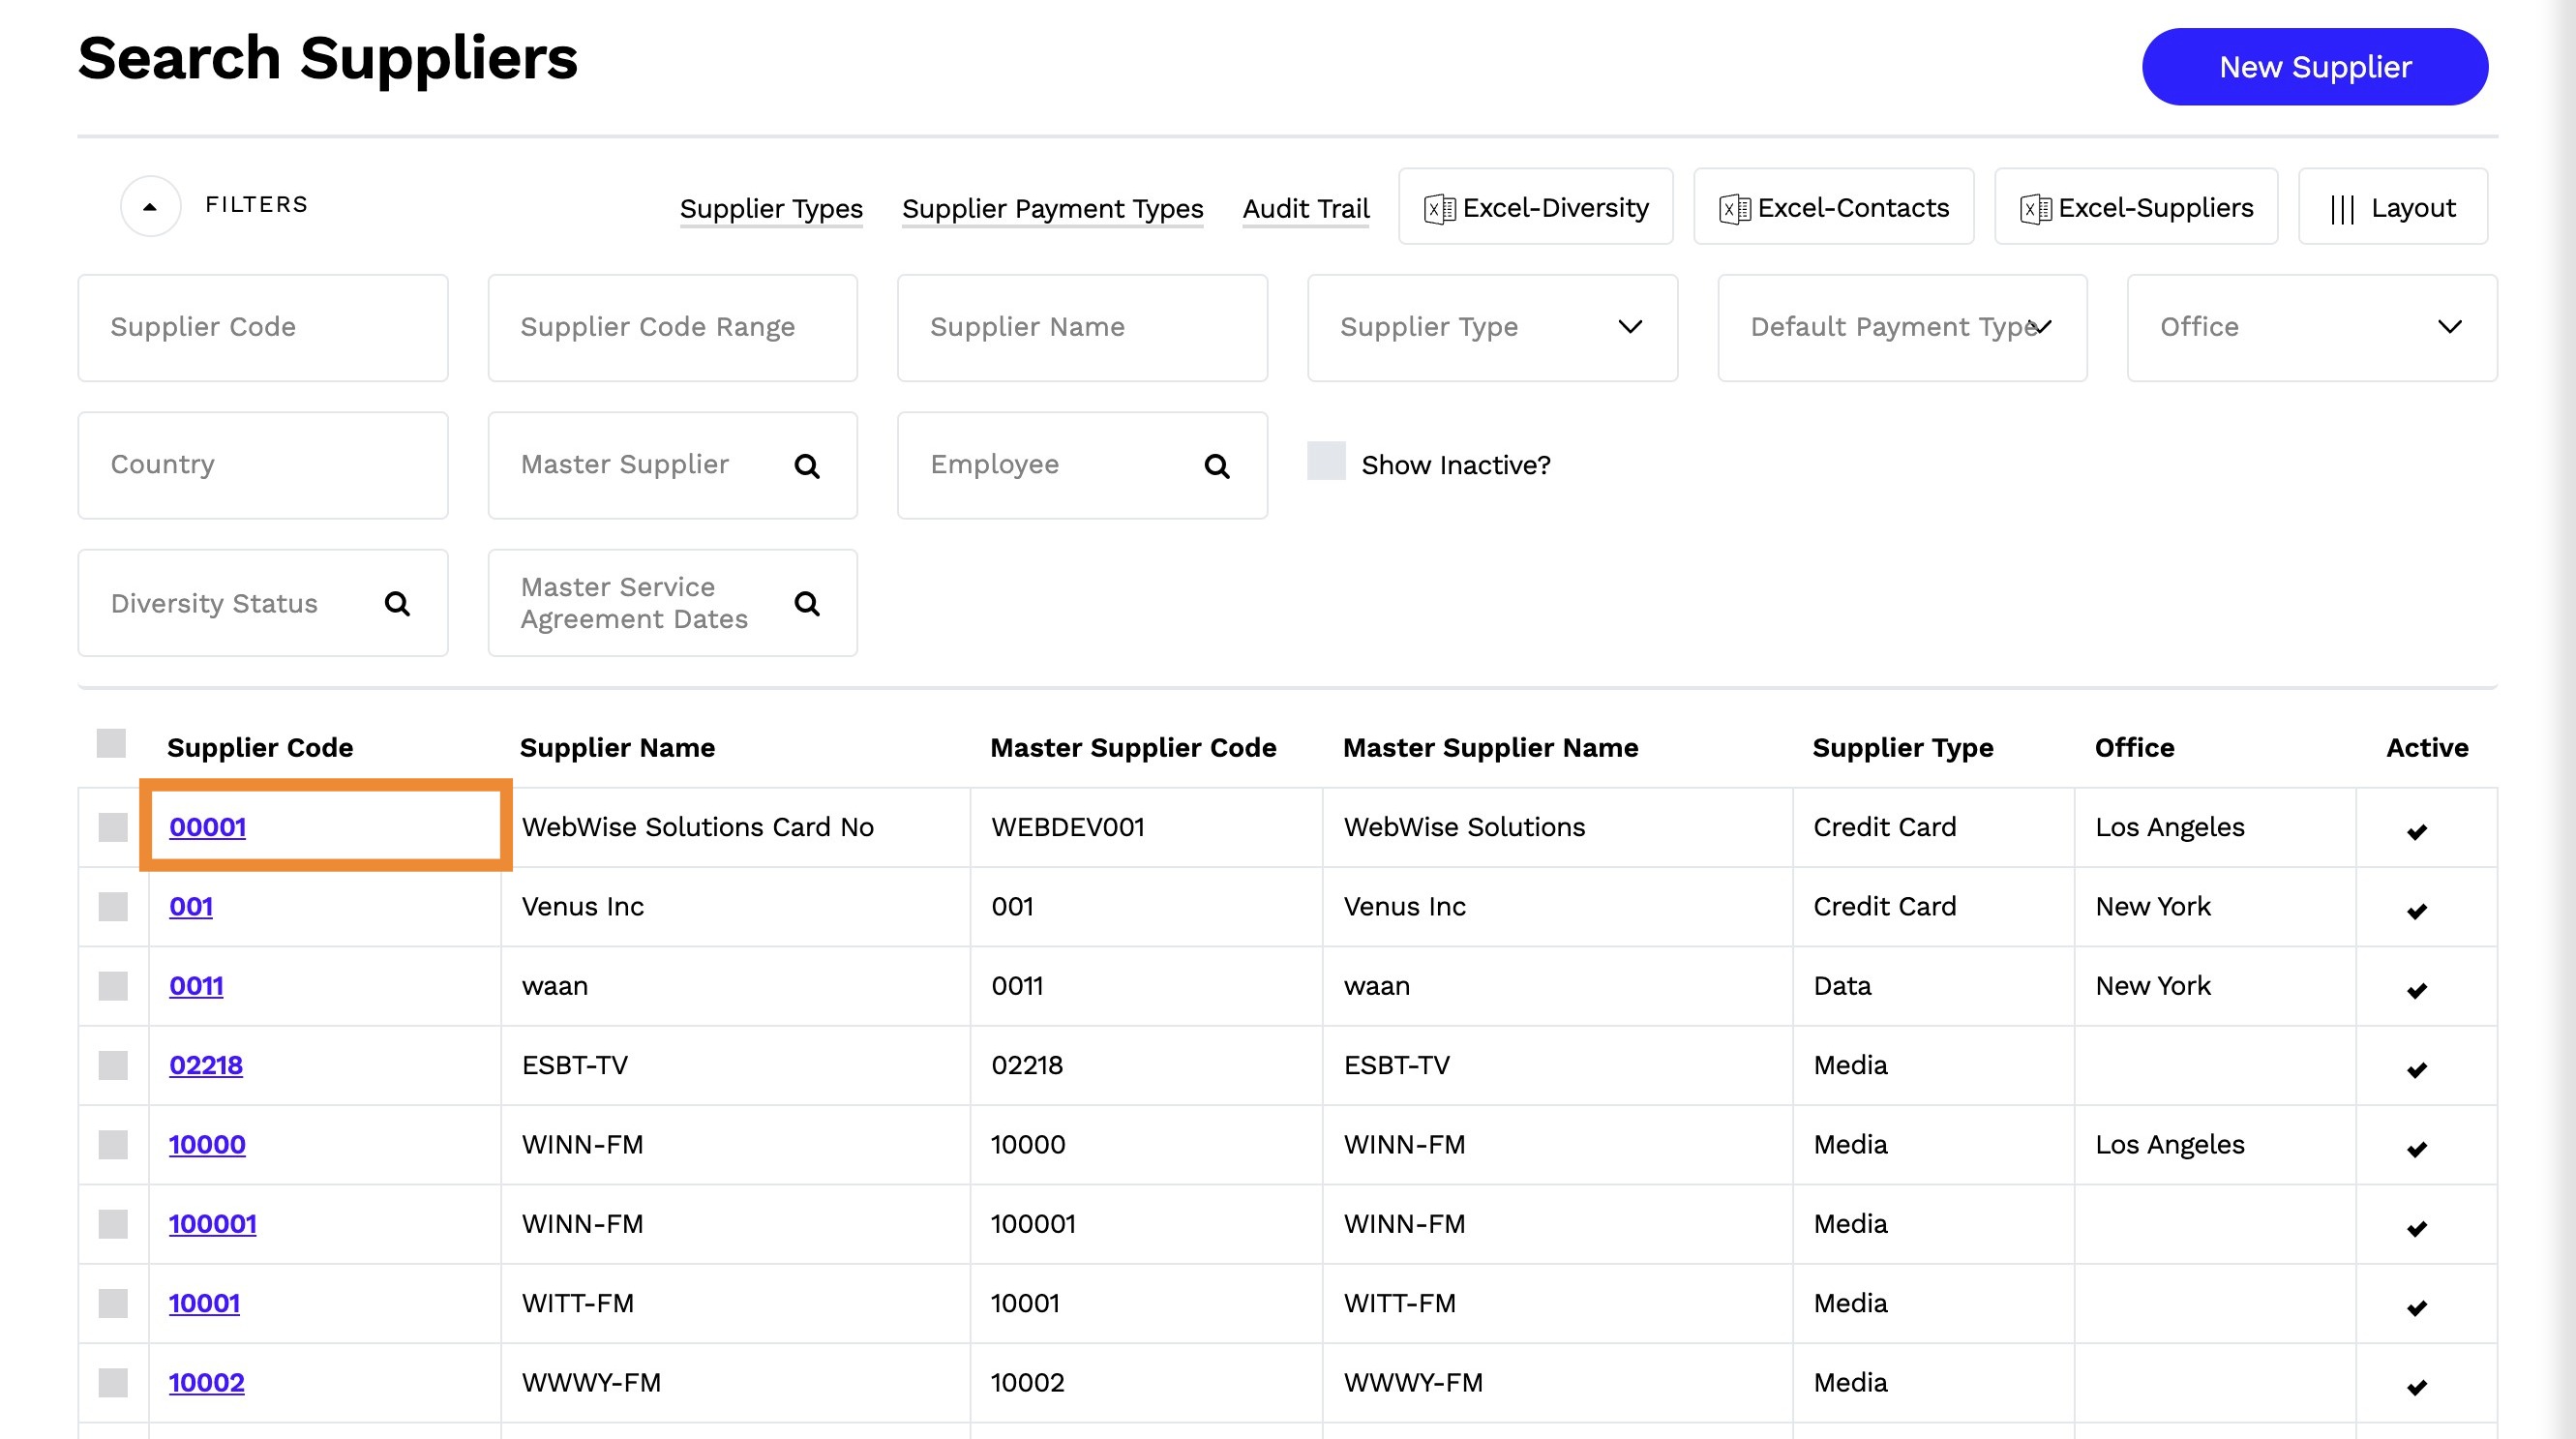
13. Enter or select a Supplier Code
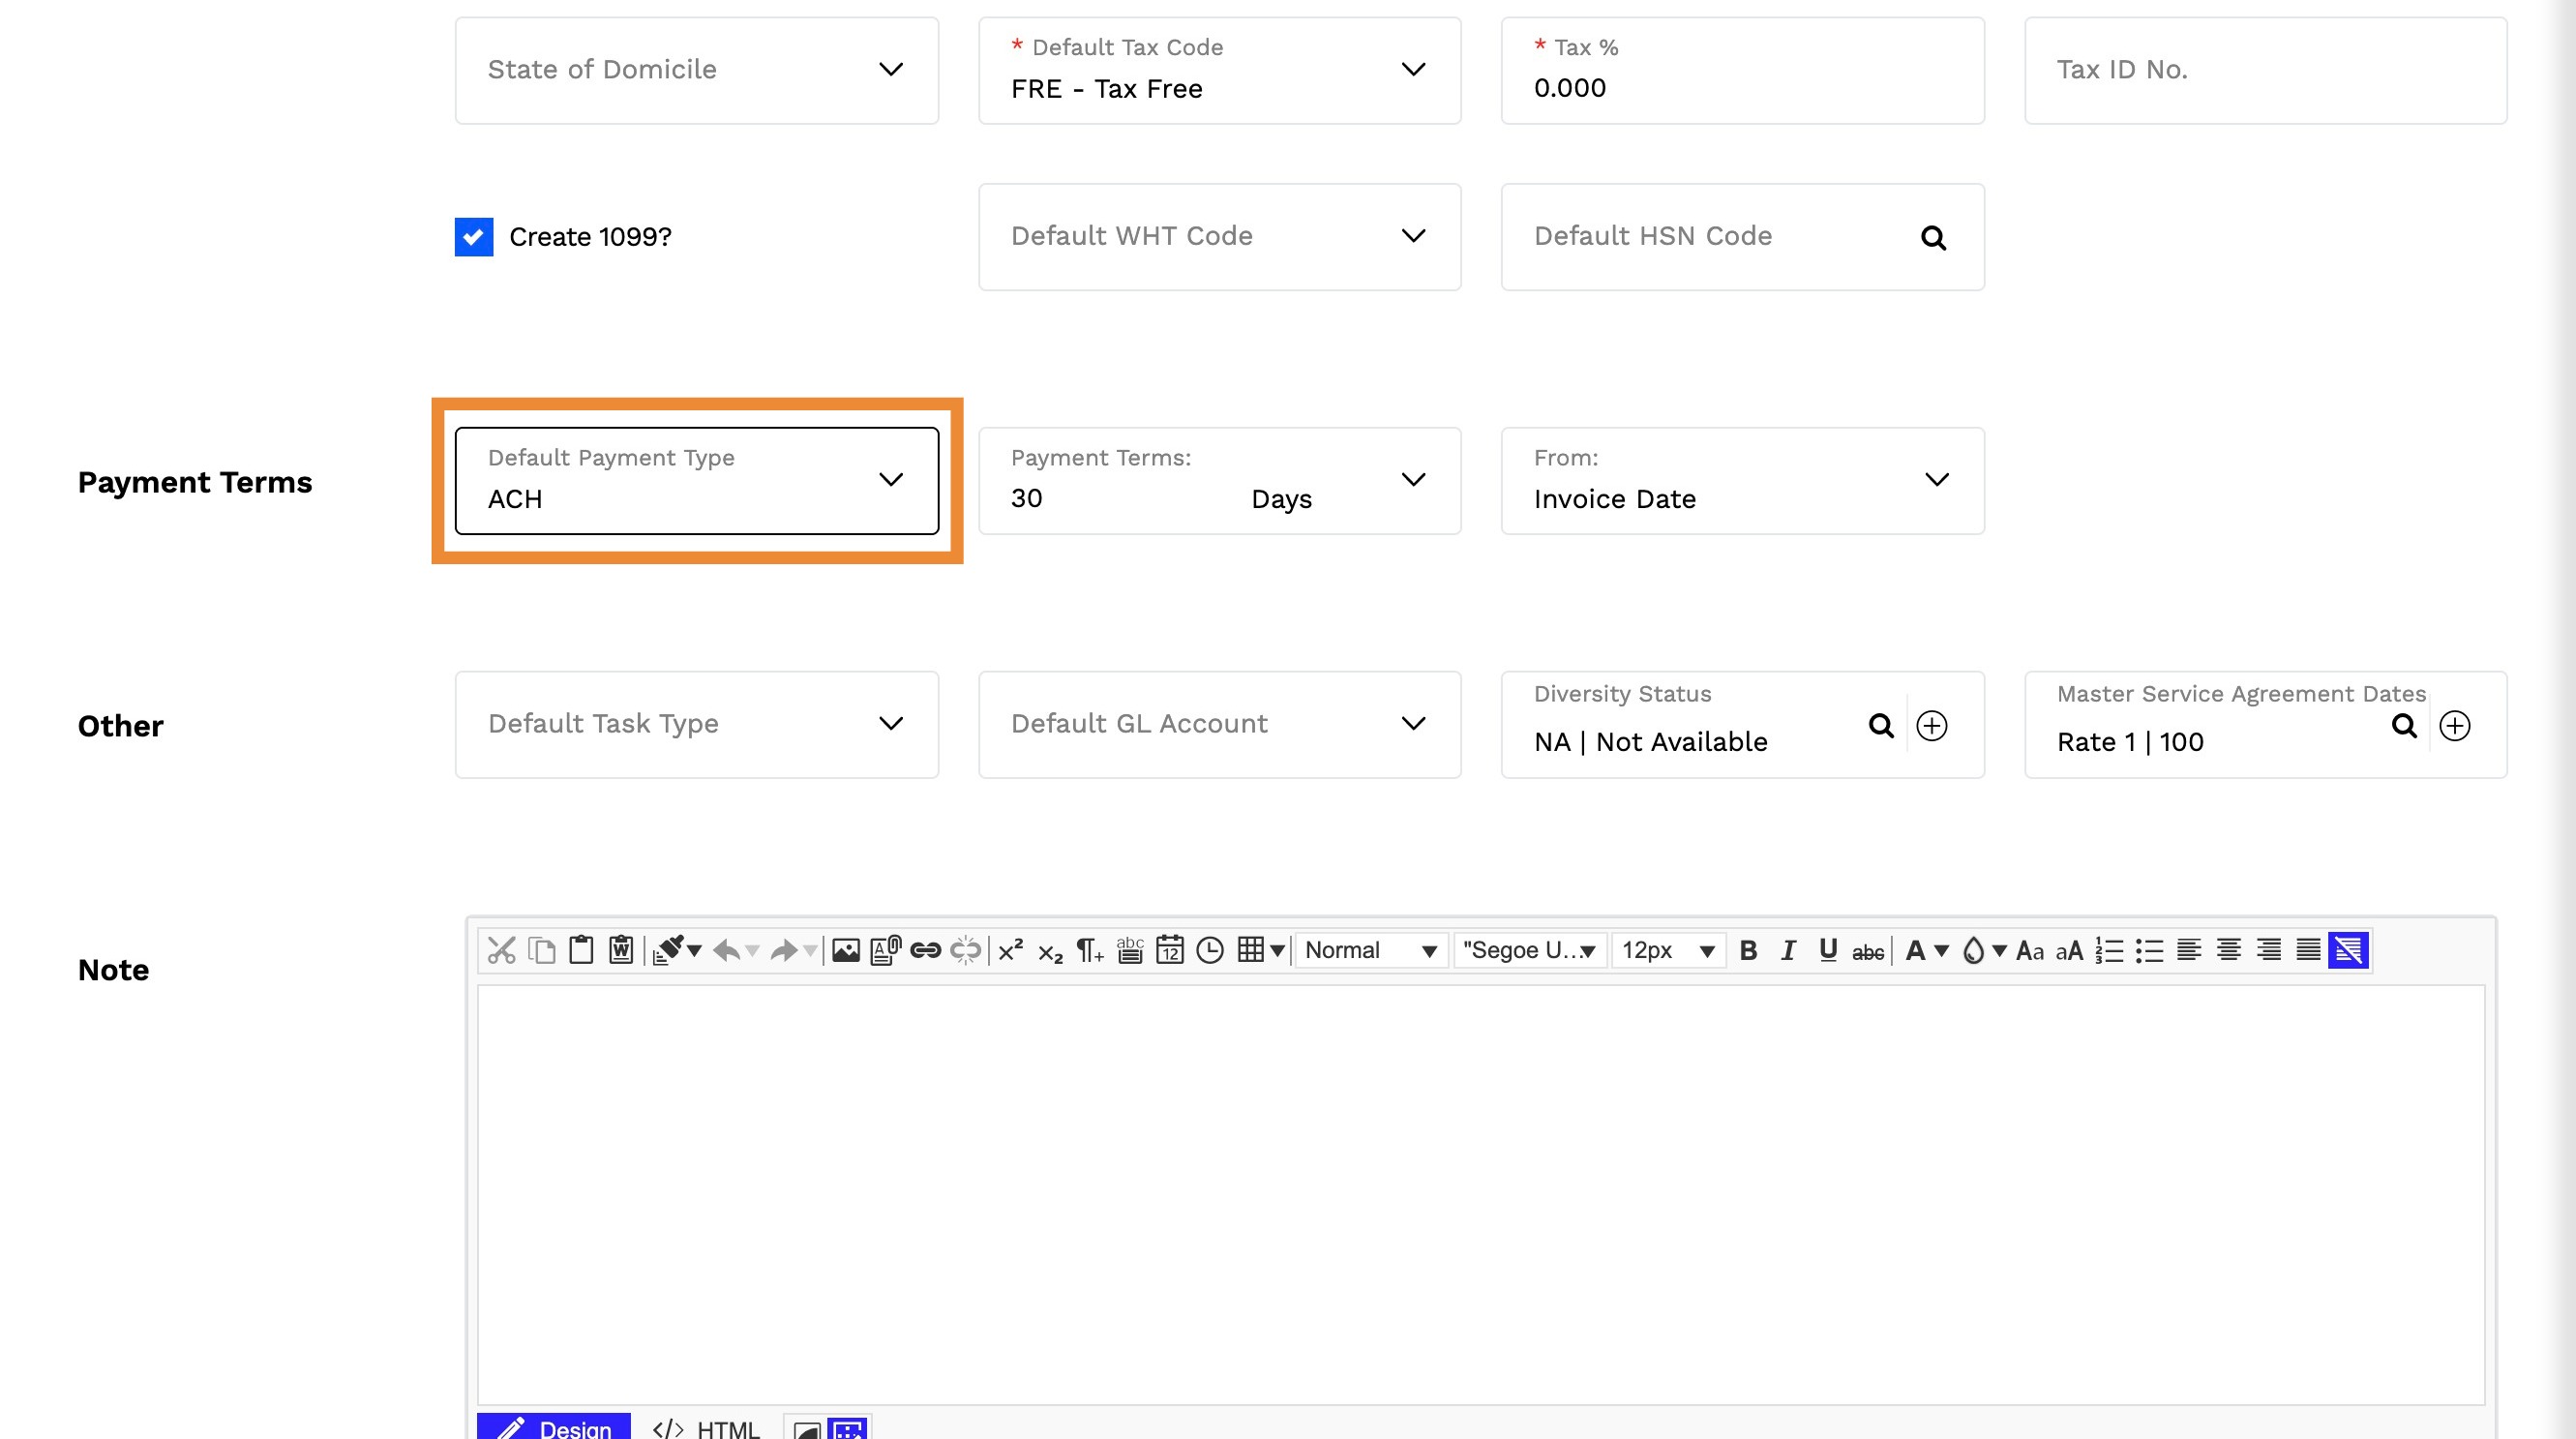
14. Scroll down to Payment Terms and assign the Default Payment Type as ACH
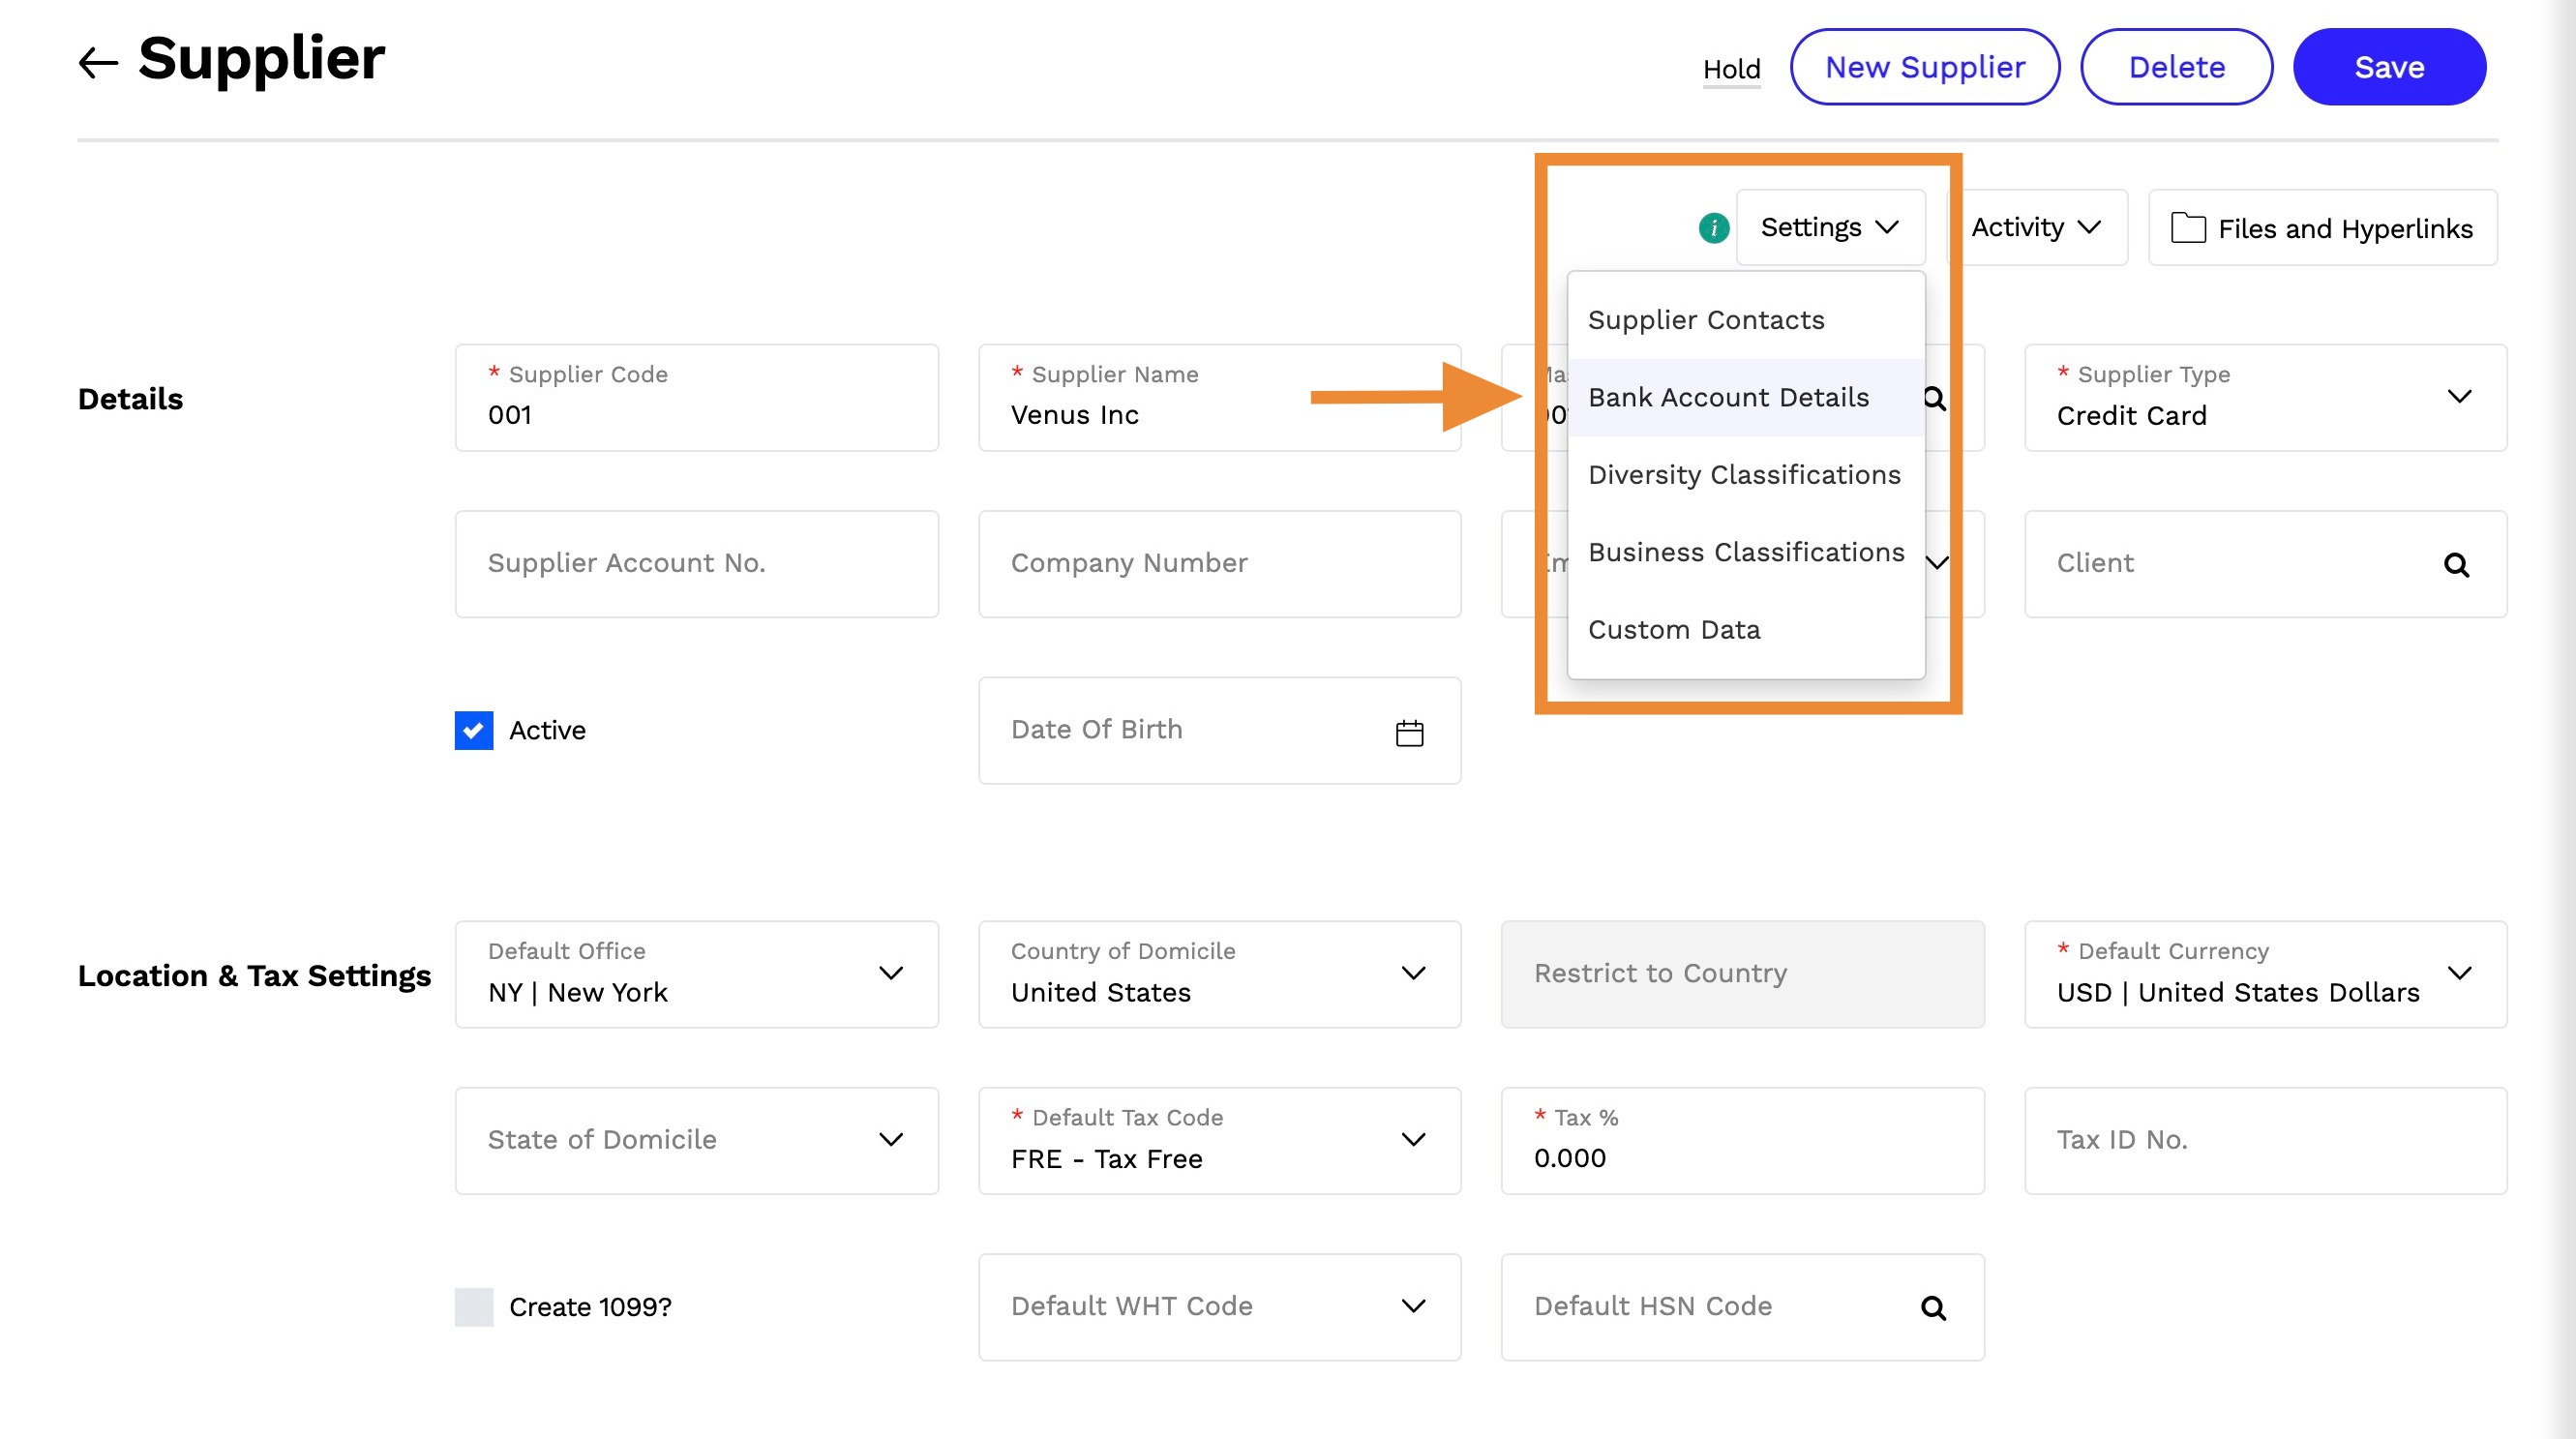
15. Scroll up and click Settings and select the Bank Account Details
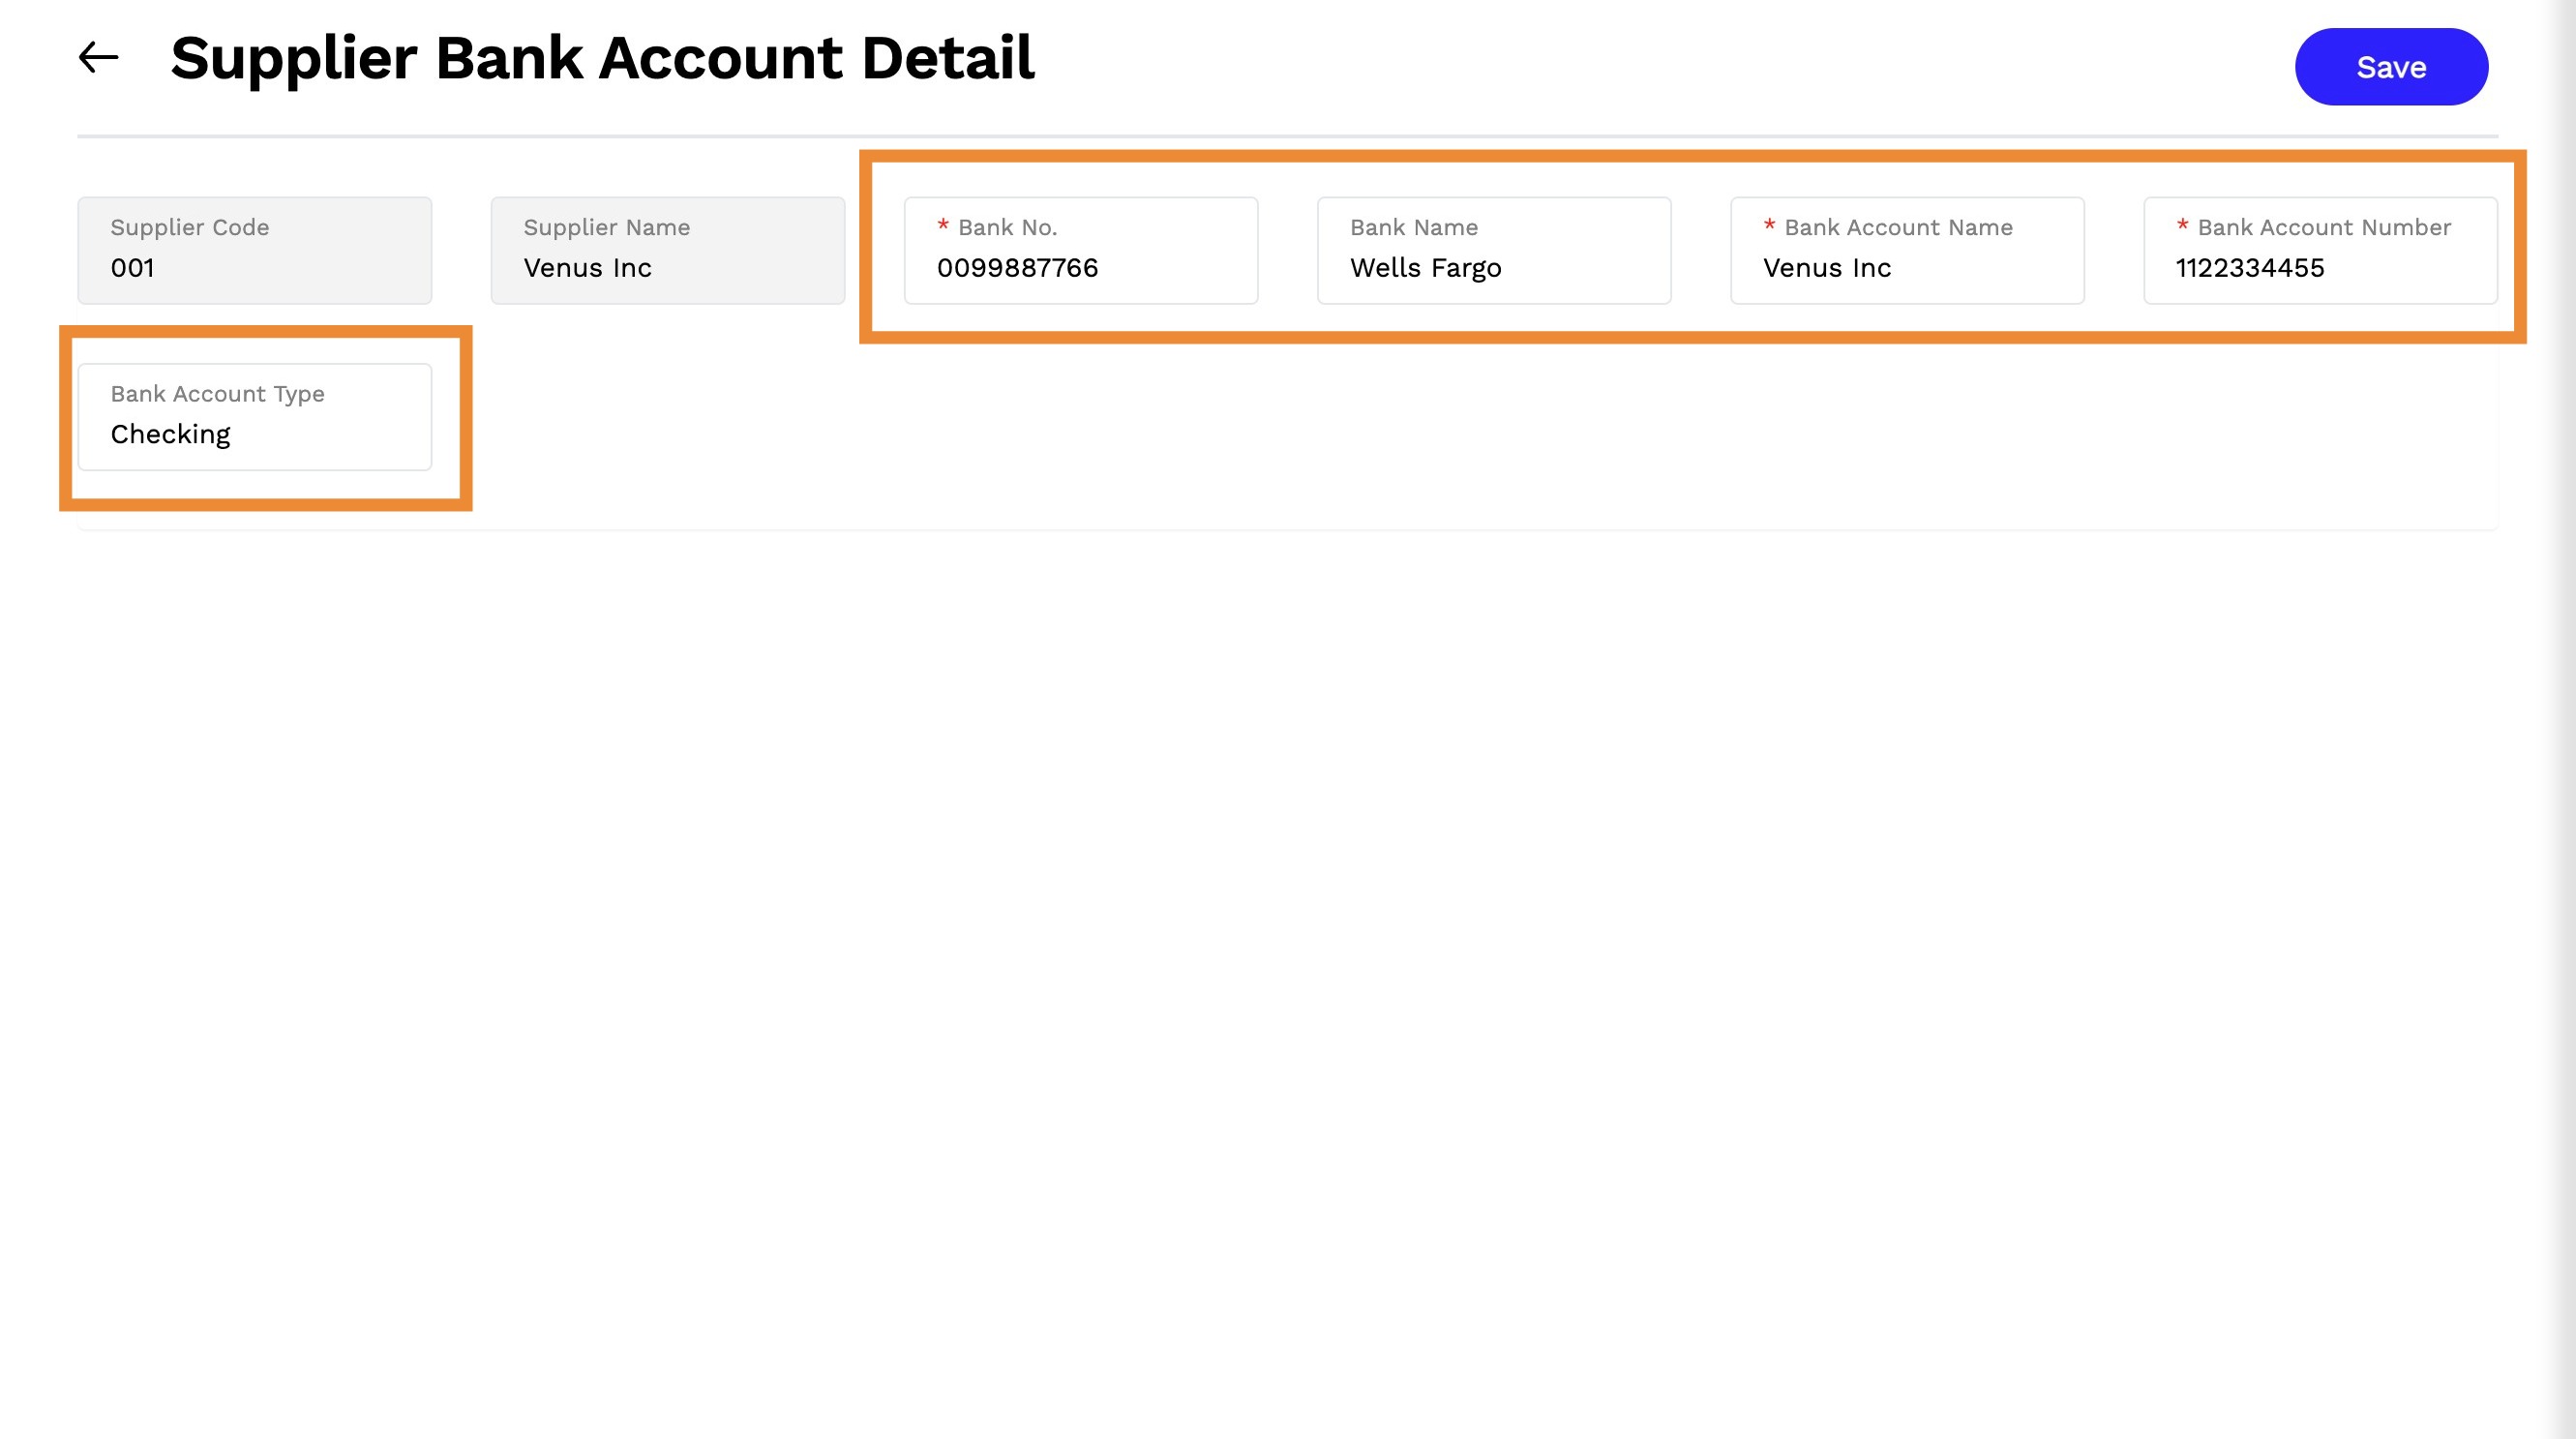
16. Enter the following information:
- Bank No - Enter the bank identification number that payments for this supplier are transmitted to.
- Bank Name - Enter the bank name (Optional)
- Bank Account Name - Enter the name of the account that payments for this supplier are transmitted to.
- Bank Account Number - Enter the number of the account that payments for this supplier are transmitted to.
- Bank Account Type - Enter the bank account type (Optional)
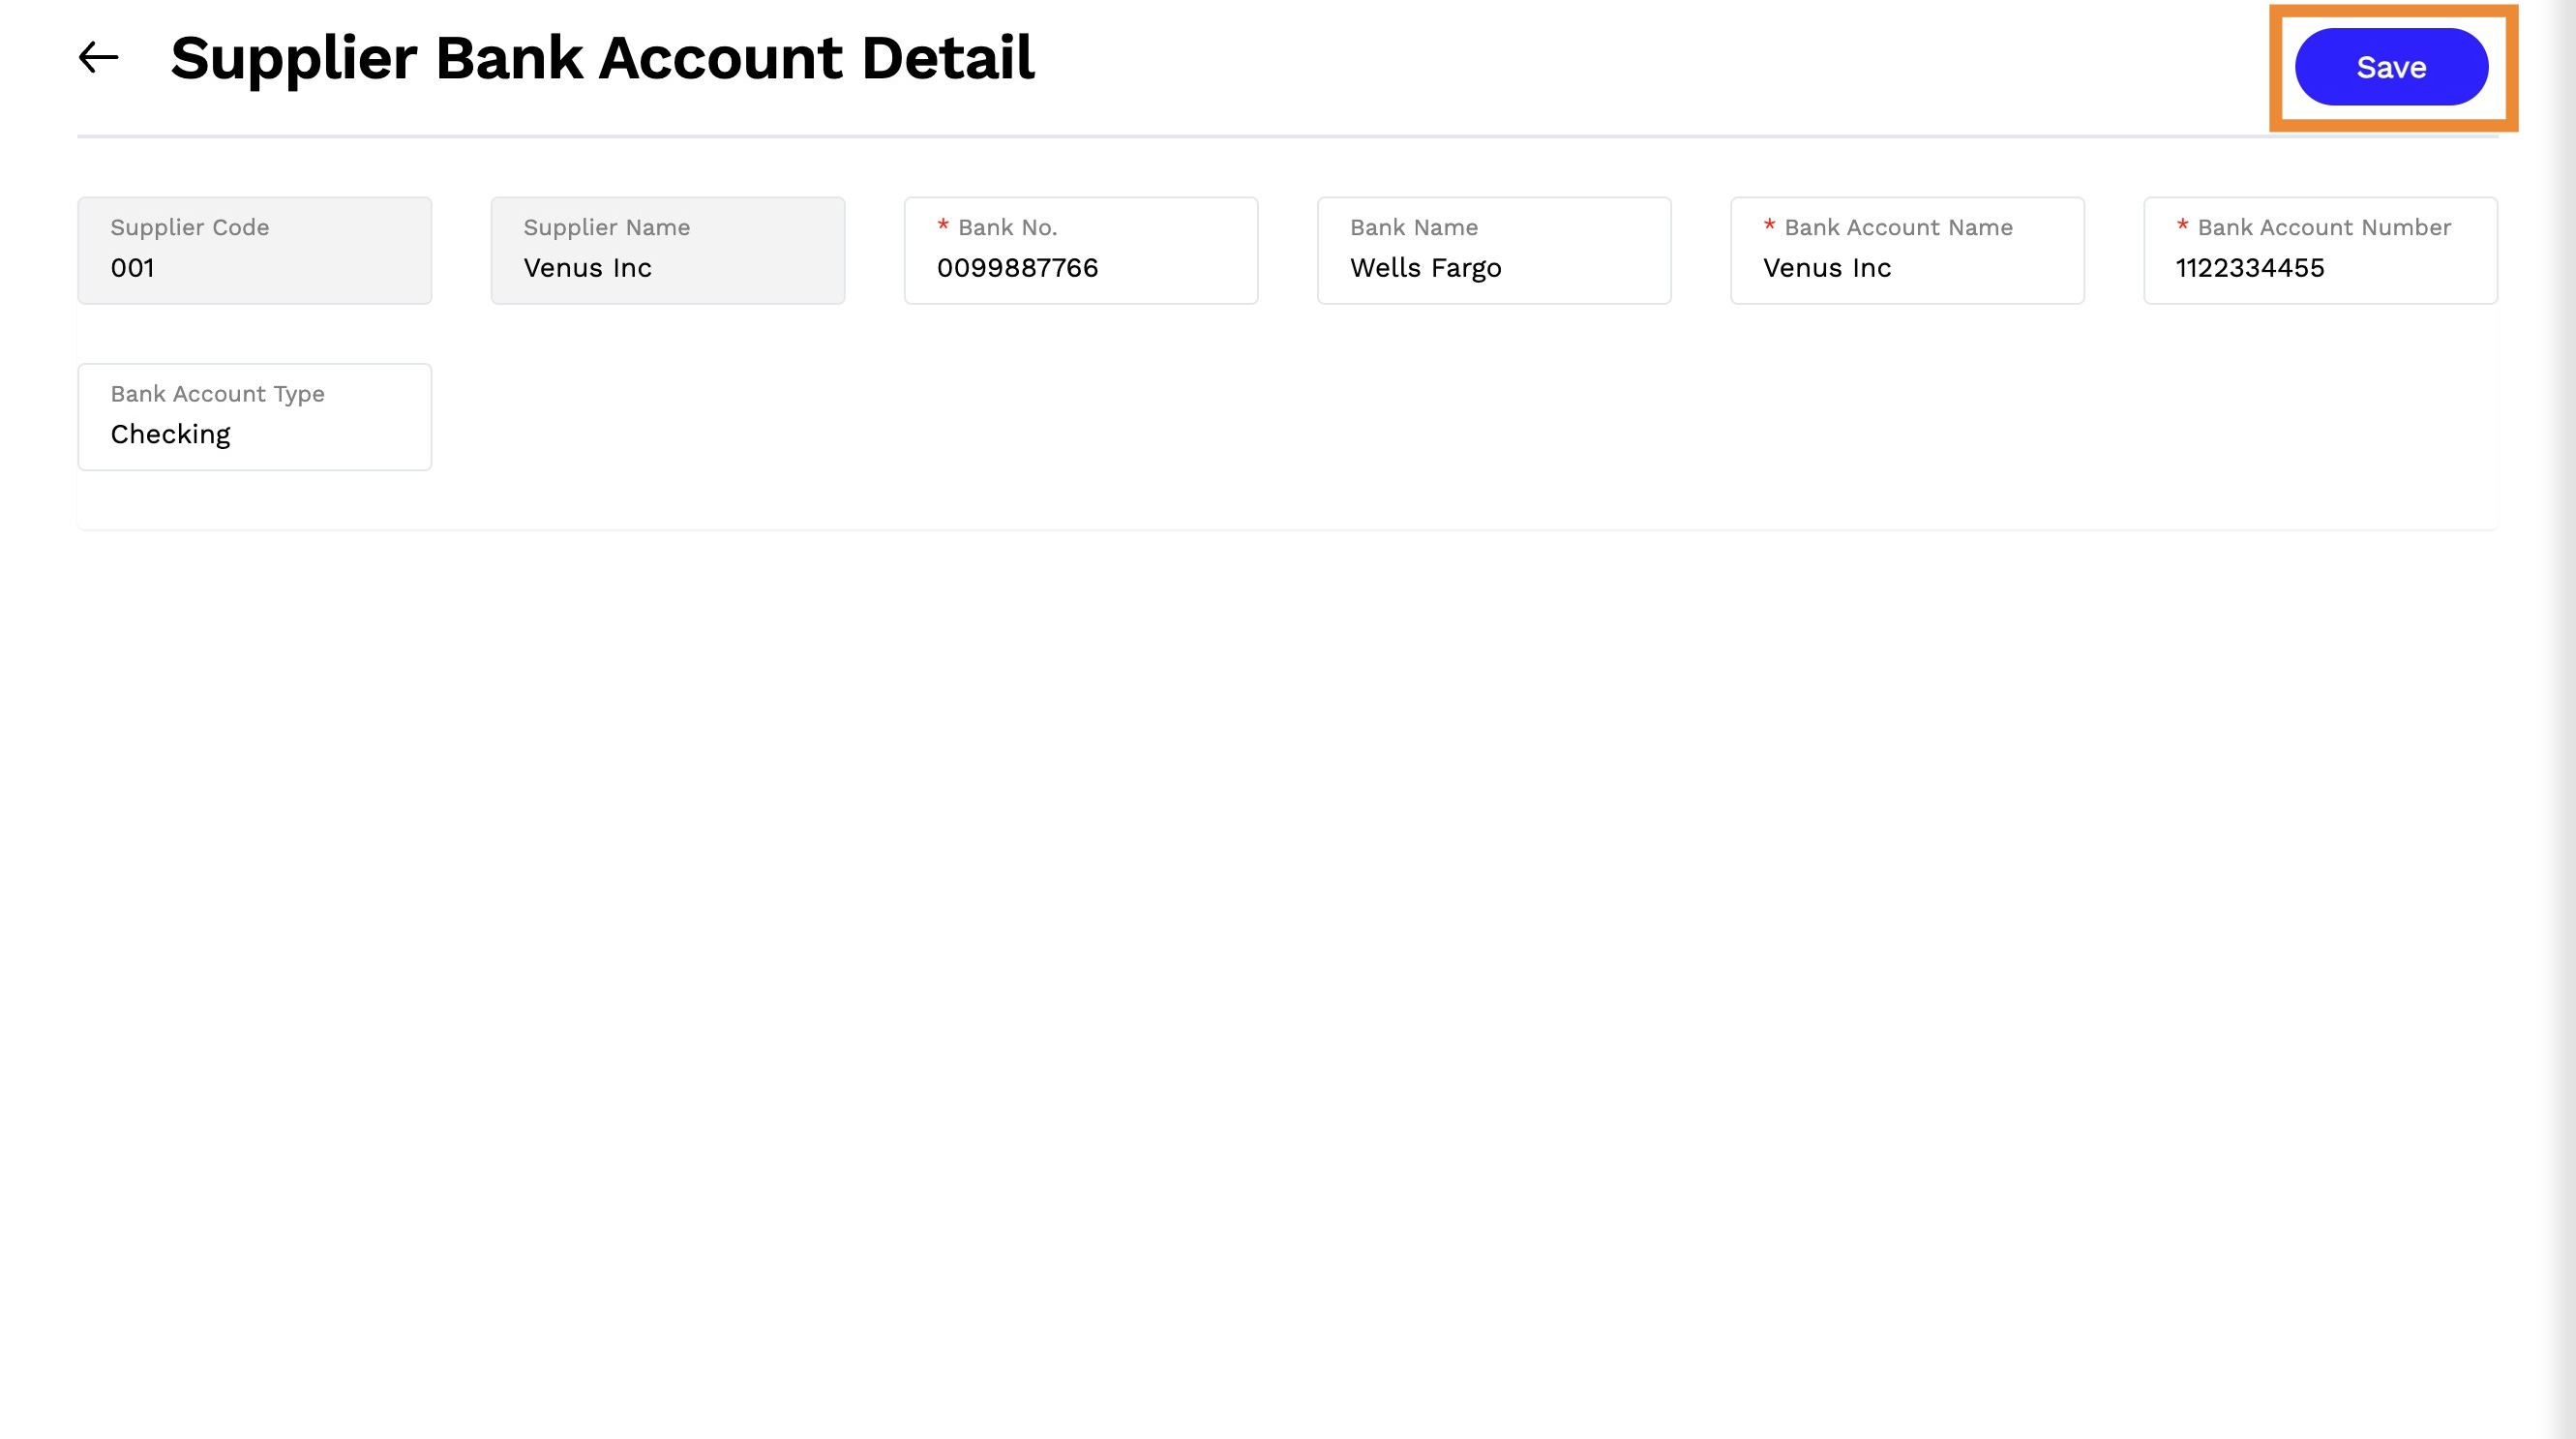
17. Click Save
Tip: Setting up bank account details for reimbursable employee expense claims
Employees can enter/update their own bank account details for expense claims reimbursements. From My Expenses, click the My Bank Account link. Details entered on this screen will update the bank account details for the employee's supplier record.
Making ACH Payments
18. Once you have completed the above setup requirements, follow the instructions for creating supplier payments and Internet Banking Exports in order to generate an ACH payment file.
This payment file then needs to be imported to your bank as usual.
Tip: Tip:
If this is the first time you're generating an ACH file from Accountability, we recommend generating a test file to ensure that it works with your bank.