![AccountAbility_logo_primary_fullcolor-1.png]](https://knowledgebase.counta.com/hs-fs/hubfs/AccountAbility_logo_primary_fullcolor-1.png?height=40&name=AccountAbility_logo_primary_fullcolor-1.png)
Before you begin
- Create or open an expense claim in the COUNTA Mobile App.
- Have a clear image of the full receipt available. You can capture long receipts as multiple photos.
- Required fields are marked with an asterisk. Your company’s configuration determines which Job No., Task Type, tax, attendee, or other fields are available or required.
Choose an itemization method
|
Method |
When to use it |
|
Use when the receipt contains multiple recognizable charges. SmartScan, powered by OpenAI, analyzes the receipt and proposes expense groupings and receipt lines. |
|
|
Manual mode |
Use when you prefer to create the split yourself, or when SmartScan does not detect multiple items. |
Itemize with SmartScan
Smart Scan analyzes the receipt and displays a suggested itemization. The suggestion is a starting point: verify the lines, classifications, reimbursement status, and required fields before saving.
1. Add a receipt
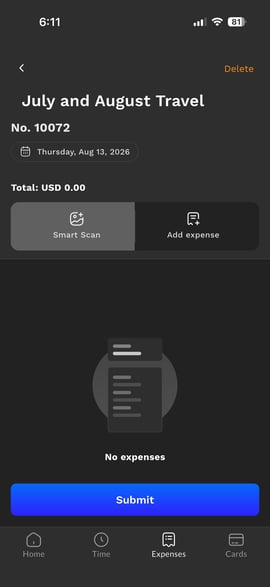
On the main Expense claim page, click Smart Scan (rather than Add expense) to begin scanning a receipt for potential itemization. You will be prompted to capture a photo, upload a file, or select a photo from your device gallery.
2. Scan and open the completed receipt
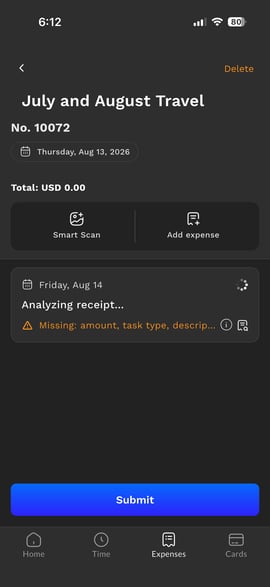
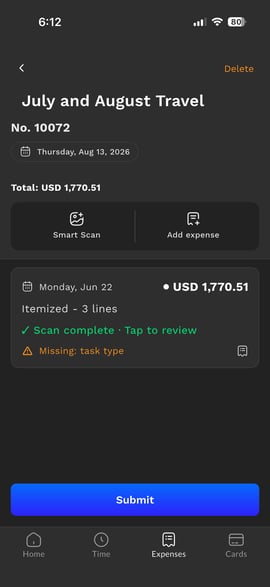
Capture or select the receipt image. The claim displays Analyzing receipt while Smart Scan processes it. When processing finishes, the expense shows Scan complete · Tap to review; tap the expense to continue. Any missing required information is also identified on the claim.
3. Choose whether to itemize
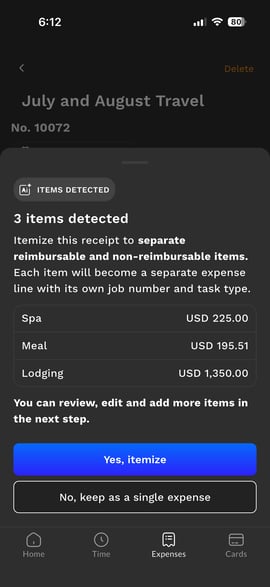
When SmartScan detects multiple charge types, review the Items detected screen. Tap Yes, itemize to create separate expense lines, or No, keep as a single expense to submit the receipt as one expense item.
4. Review the suggested split
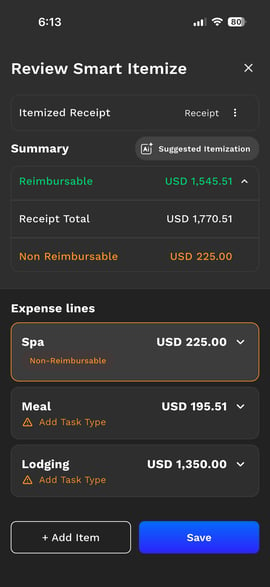
Review each proposed expense line. SmartScan automatically groups receipts into categories such as lodging, meals, and other charge types.
Click into the category name to edit it and click on the 'down arrow' to expand. Confirm the date and update it as needed.
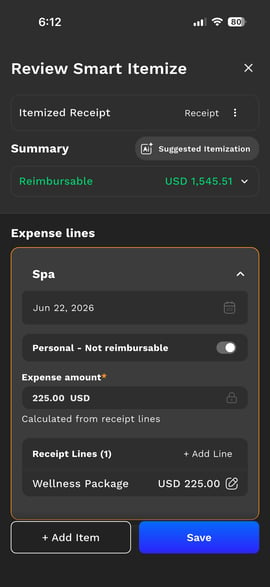
5. Mark personal expenses as non-reimbursable.
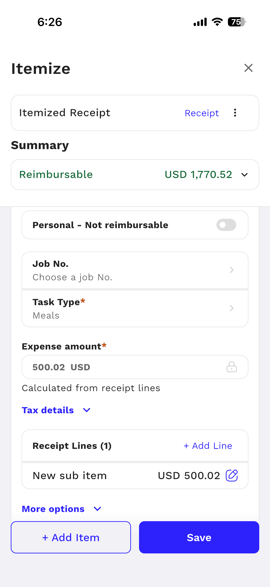
You can mark any personal expenses on the receipt as non-reimbursable. Expand the item name and click on the Personal - Not reimbursable toggle. You'll see that the Reimbursable total is reduced and the Non-Reimbursable total on the Summary increases.
6. Review and code each reimbursable expense line.
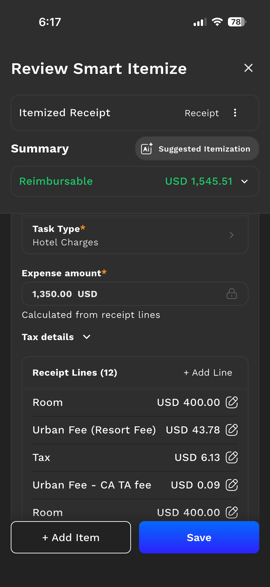
For reimbursable expense lines, keep the "Personal - Not reimbursable option" off. Review and update the following:
- Financial details
- Assign a Billable or Non-Billable Job No. (if required by your agency)
- Assign a Task Type
- Scroll down to More Options to override the Expense Employee, Add Attendees, or include a Note
- The Expense Amount is calculated from the receipt lines
- Receipt line items
- Review each receipt line and edit the description and/or amount if needed.
- Jump to the next step if you need to move a receipt line to another group/charge type.
7. Review or edit receipt lines
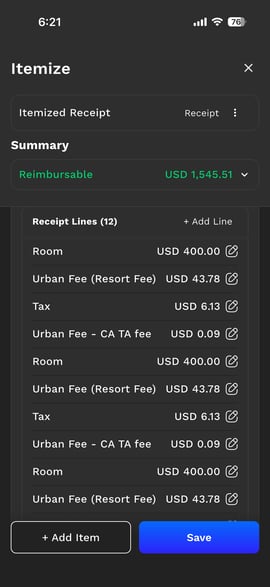
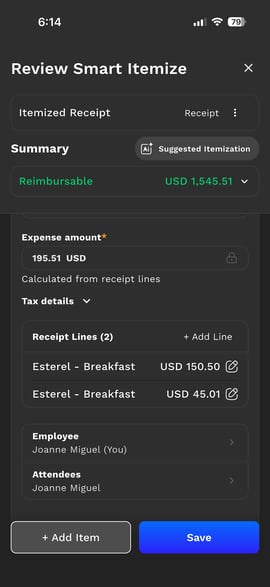
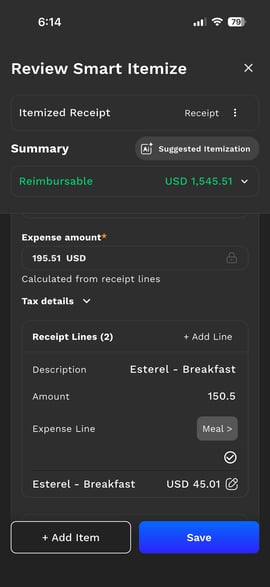
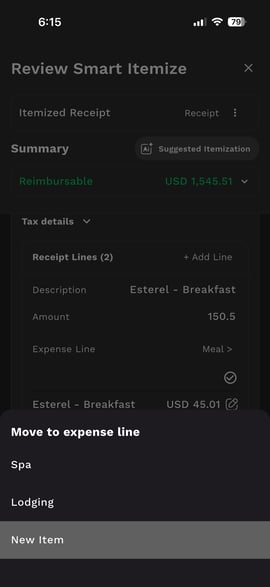
Under Receipt Lines, review the description and amount for every extracted charge. Tap the edit icon to correct a receipt line or move it to a different expense group.
Let's say you want to categorize the $150.50 Meal expense as Business Meal Expense. Tap + Add Item to create a new expense group.
Then click on the current category and select from the list of expense lines, including any New Item you might have created.
8. Add or adjust expense items
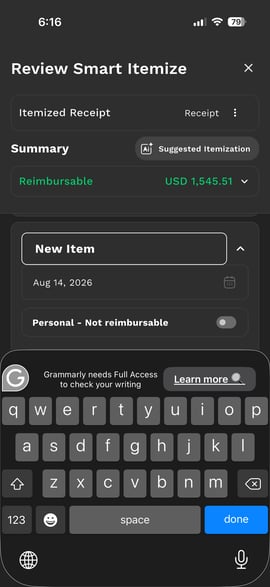
Click into the Expense Line Item label to update it from "New item" to "Business Meals", for example.
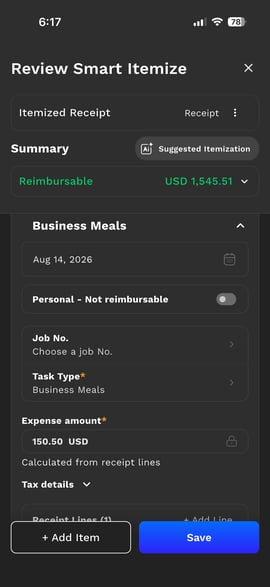
9. Save the itemization
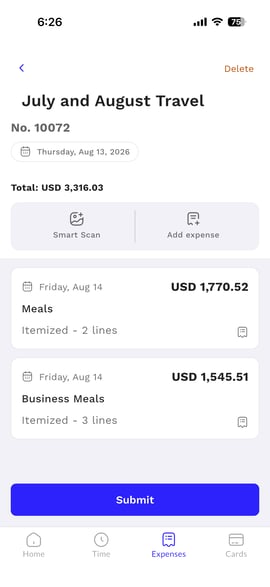
When all expense lines are complete and the totals are correct, tap Save. The claim displays the expense as Itemized and shows the number of expense lines.
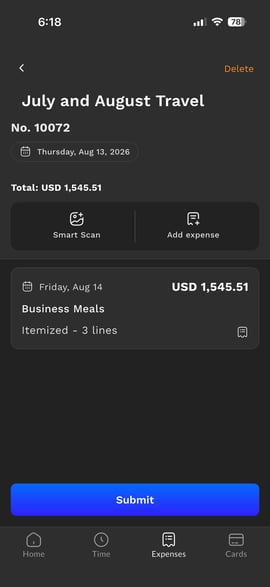
Itemize an expense manually
Manual itemization lets you create the expense split yourself. It also serves as a fallback when SmartScan creates a single expense because it doesn't detect multiple receipt items.
1. Open the expense
Open the expense and tap Itemize this expense under Need separate expense lines?
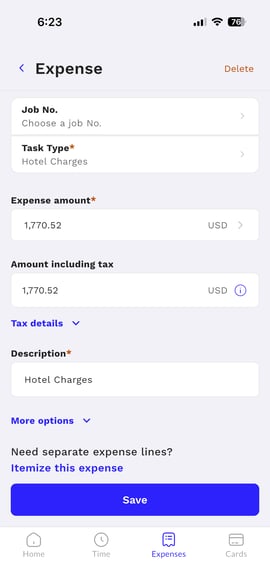
2. Create the expense items
The first item contains the total receipt amount you entered from the previous page. Tap + Add Item to create another item, then enter its Task Type and other required details.
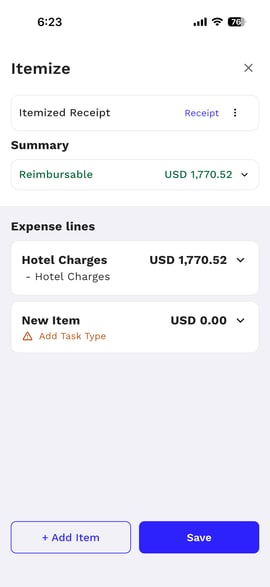
3. Add and edit receipt lines
Within each item, tap + Add Line to create a receipt line. Enter a description and amount. Use the edit icon to revise a line. The Expense amount is calculated from its receipt lines.
4. Balance and save
Repeat until the expense items total the full receipt amount. Confirm required fields and reimbursement status, then tap Save. The claim displays each saved expense as Itemized with its number of lines.
Important checks before submitting
- The itemized amounts should add up to the original receipt total.
- Assign a Task Type to every reimbursable expense line and complete any other required fields. If your agency requires a Job No. for each expense line, you can't submit until it's assigned.
- Mark personal charges as Personal - Not reimbursable so they are excluded from the reimbursable total.
- Review tax details, employee, attendees, and other fields when they apply.
- Return to the Expense claim and tap Submit only after all missing-field warnings are resolved.
Troubleshooting
-
SmartScan did not create multiple items. Open the expense and use Itemize this expense to create the split manually.
-
A SmartScan line is incorrect. Tap the edit icon next to the receipt line and correct its description or amount.
-
A charge is missing. Tap + Add Line within the applicable expense item.
-
The expense cannot be submitted. Resolve the orange missing-field warnings, especially Task Type and other fields your company requires.
-
The totals do not match. Review every receipt line, duplicate line, personal charge, and missing charge until the itemized total matches the receipt total.