Step by Step Guide:
The audit trail function records the details of every addition, change, or deletion of key system master files, recording the exact details of what was added/changed or deleted as well as which employee/user made the change and when they made it.
Overview
1. Master data records are shared across the agency, so changes to these records impact multiple users and lines of business. Keeping a history of these changes with a date stamp and employee name provides a layer of security and auditability within the platform.
How it works and what's included?
2. This function is available for the following records:
- Organizational data: Offices, Entities, Departments, Task Types
- People data: User Access Groups, Employees
- Client data: Clients, Client Contacts, Products
- Supplier data: Suppliers
- Accounting data: GL Accounts, Currencies, Tax Codes
- Jobs: Jobs, Job Types, Campaigns
- Media: Media Types, Mediums
3. Navigate to the main page of the specific master data record, e.g. Client
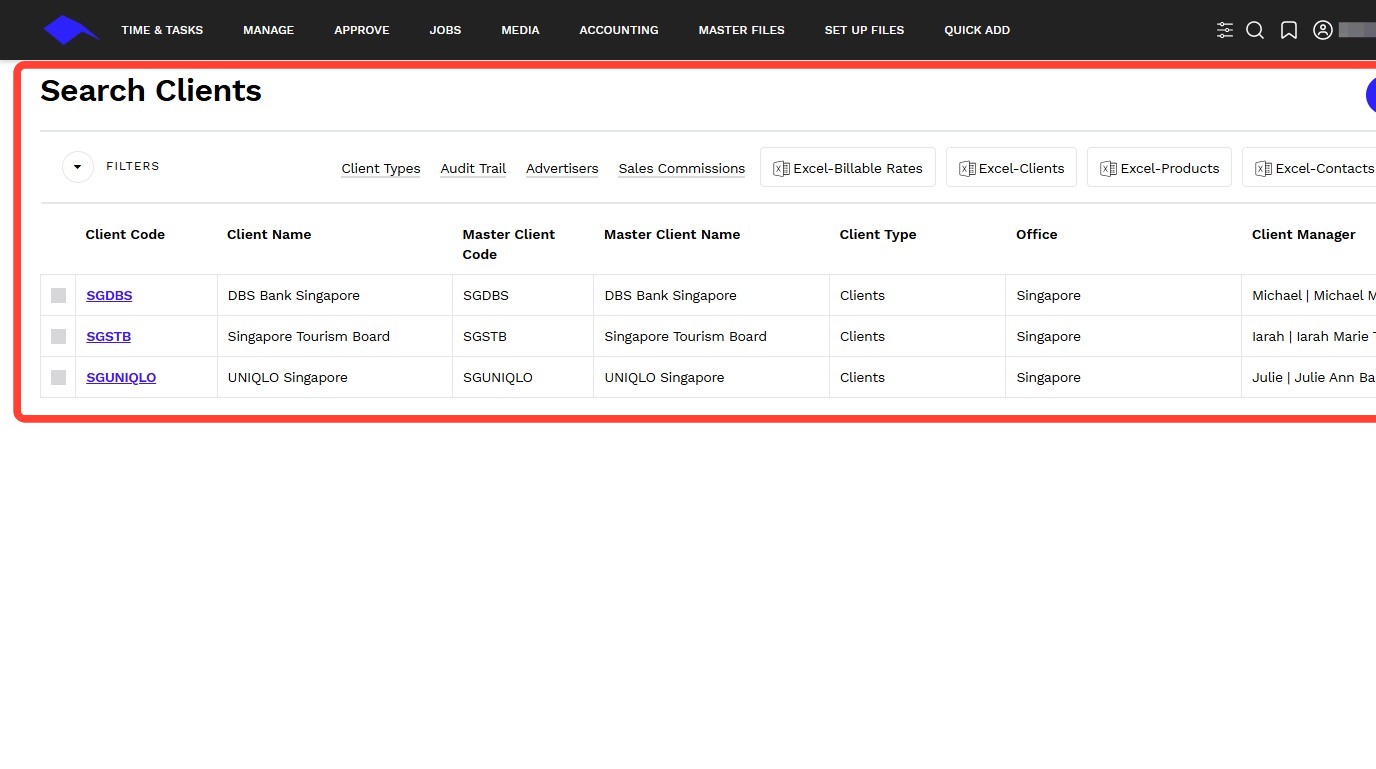
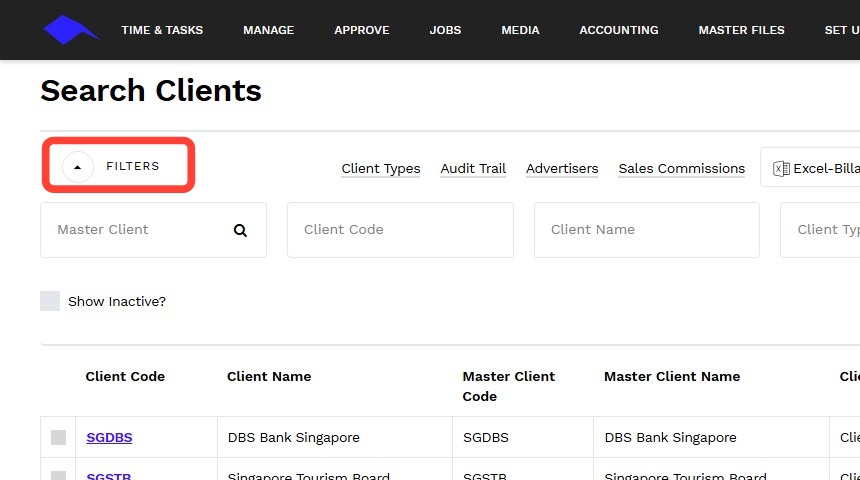
4. Use the page Filters to zoom in on a specific set of parameters or leave clear your filters to include all records, e.g. all clients across all offices.
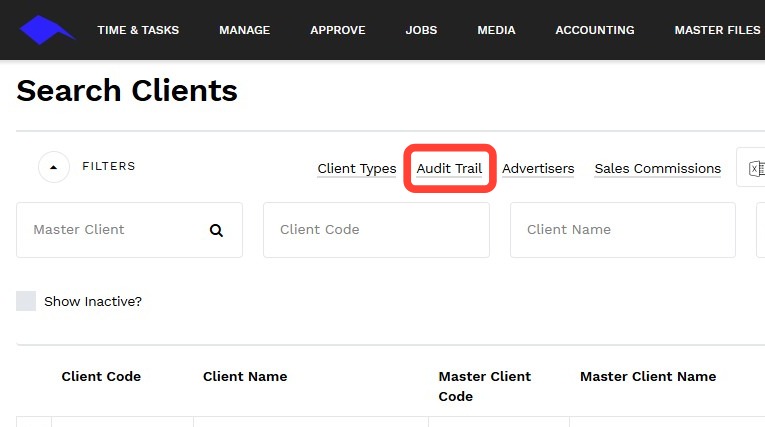
5. Click on the Audit Trail hyperlink at the top of the page.
6. On the Audit trail landing page, you keep the default parameters or narrow down your search.
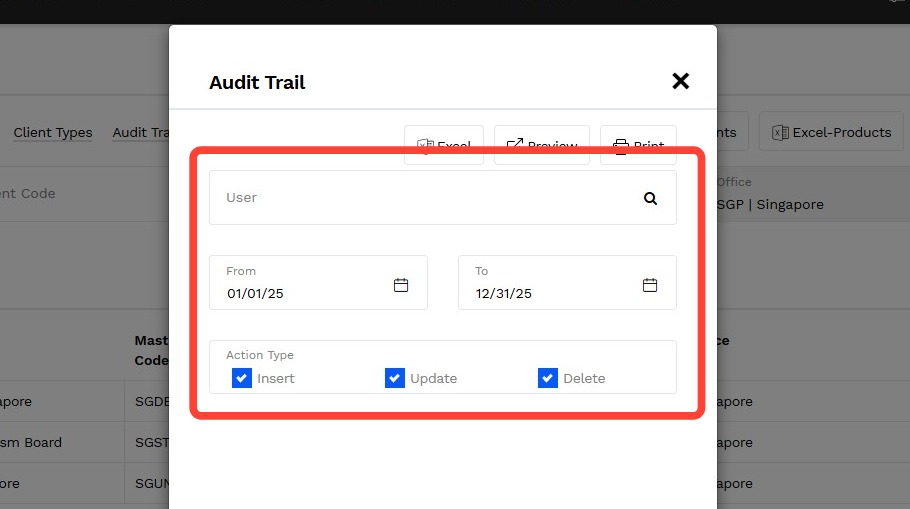
7. 1. User: This is optional. Select a specific user if you know who created, changed, or deleted a specific record or if you want to see all changes made by a specific person.
2. From and To: This defaults to the current full calendar year. Update the date range if you want to narrow down the report to a specific period.
3. Action Type: All types are selected by default
- Insert: Include new records
- Update: Include revised records
- Delete: Include deleted records