
Step by Step:
The My Time page in Counta allows users to log their working hours, manage time entries, and submit timesheets for approval. This guide provides step-by-step instructions on how to navigate and use the My Time page efficiently.
1. Accessing My Time
There are two ways to access the My Time page:
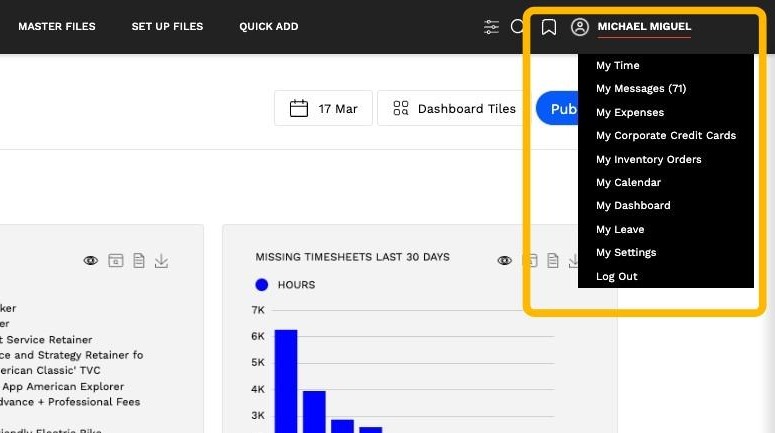
Via User Profile
Click on your User Profile (top right corner).
Select My Time from the dropdown.
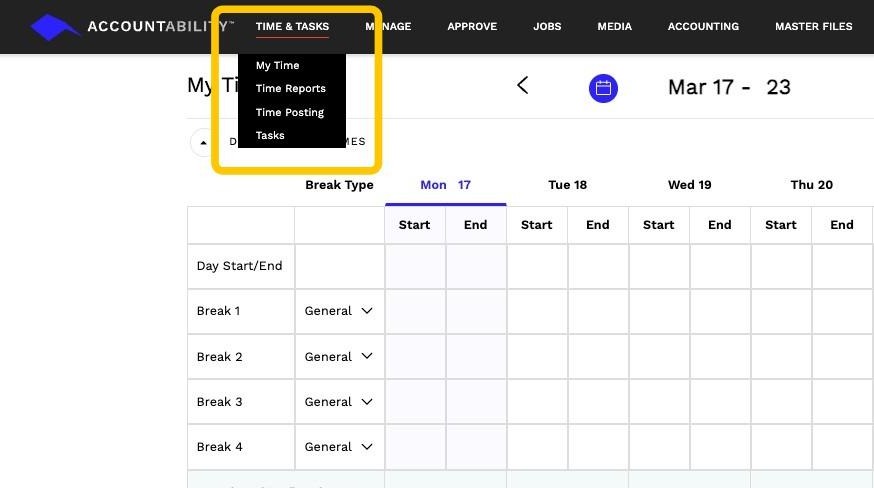
Via Time & Tasks
Navigate to the Time & Tasks menu.
Click on My Time.
Upon selection, the My Time landing page will be displayed.
2. Understanding the My Time Page Layout
The My Time page is divided into multiple sections:
Page Title & Date Range
- Located at the top-left corner, the Page Title confirms you are on the correct page.
- In the middle of the page, the system displays the current week by default.
- To adjust the timesheet period:
- Use the back (<) or forward (>) buttons to navigate between weeks.
- Click the calendar icon to select a specific date range.
Buttons
- Located on the right side of the page:
- Save: Saves entered time entries without submitting.
- Submit: Finalizes and submits the timesheet for approval.

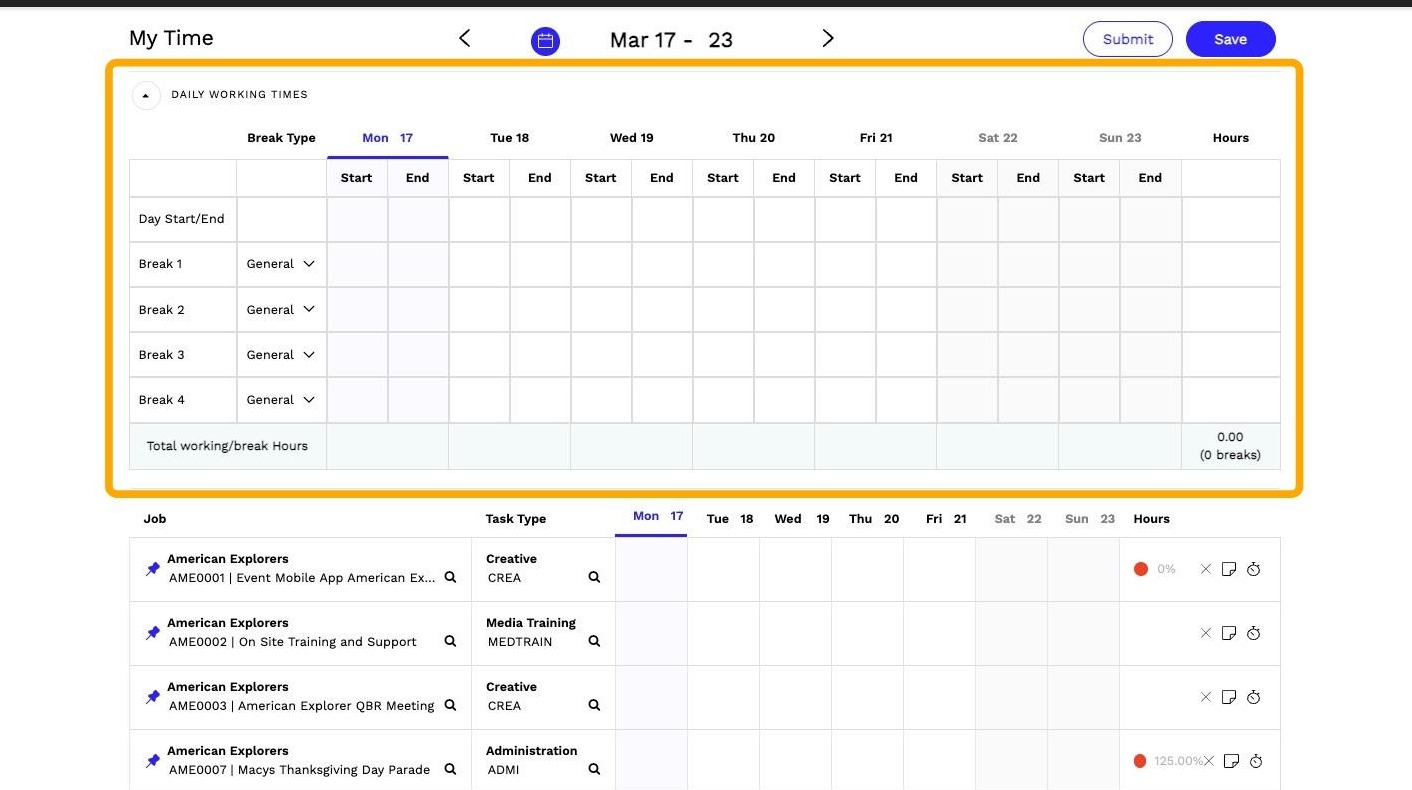
3. Daily Working Times (Optional)
- Some agencies may opt to use Daily Working Times as part of their My Time setup.
- This section, located at the top of the My Time page, allows users to log:
- Start and End times for each workday.
- Break periods, categorized under different break types.
- Total working hours, including break hours.
- Agencies that do not use Daily Working Times will only see the standard My Time table for logging hours against jobs.
4. Adding Time Entries
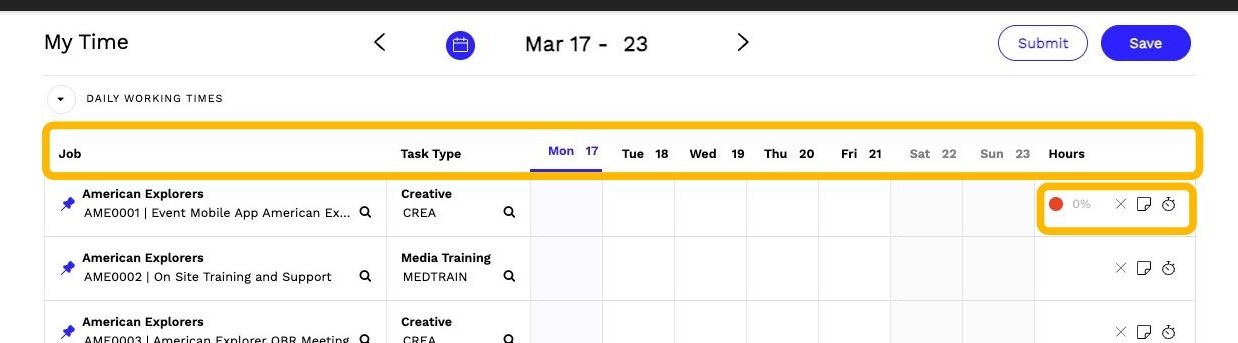
The timesheet table organizes time entries by:
- Job
- Task Type
- Timesheet Period
- Total Hours by Job
- Notes
- Timer Icons
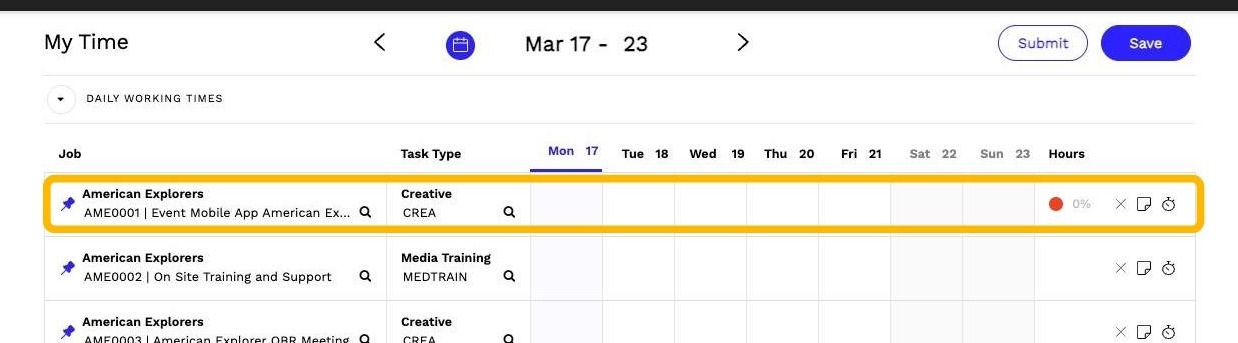
5. Entering Work Hours
- Locate the relevant job row.
- Enter the number of hours worked under the corresponding date column.
- If needed, add notes for further clarification.
6. Understanding Non-Working Days
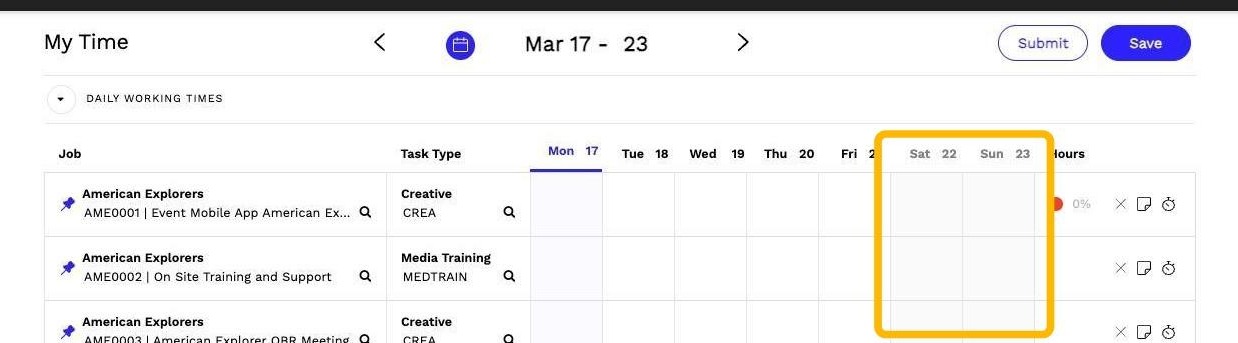
- Some columns may be grayed out, indicating non-working days (as defined by the system administrator).
- However, time can still be entered on these days if needed.
7. Pinning a Job for Future Timesheets
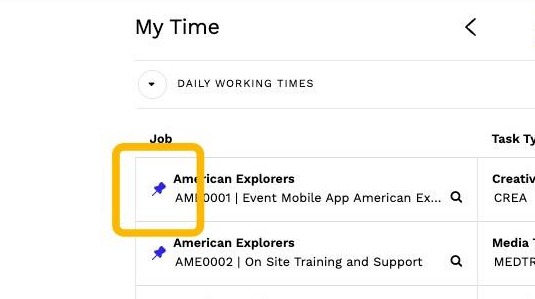
- Click the Pin Icon 📌 next to a job.
- This will carry the job forward to other timesheet periods for quick access.
Alert: - The My Time page may look different based on your organization's workflow.
- If any elements are missing or appear differently, consult your system administrator for details.
Tip: - After entering your hours, click Save to store your progress.
- Once all entries are complete, click Submit to finalize your timesheet.
Other Features
| Feature | Description |
|
Timesheet Entry Via Proxy |
Proxies can now be designated to enter timesheets for other employees. To set up timesheet proxies and enter timesheets as a proxy, click on My Time - How to Create a Timesheet Proxy. |
|
Non-working Days are Gray |
Working days in Accountability are defined by your system administrator. For readability, you will now see the hours column for non-working days grayed-out on your timesheet, however, entry into these days is still permitted. |
|
Public Holidays and Leave Requests |
Public holidays and leave request are consolidated on one line, labeled Time Off and appear at the top of the timesheet. This is only applicable to agencies using the Leave and Public Holidays functionality within Accountability. |
|
Utilization Percentages |
My Time page provides a quick snapshot of the time entered versus estimated. This is expressed as a percentage and calculated as total timesheet hours divided by estimated hours. Note - If the Hide Time Analysis option is checked in Setup Options, this functionality is not available. |
|
Pin Icon |
The Pin icon enables a user to carry over frequently used jobs from one time period to the next. |
| Stopwatch Icon | The stopwatch icon enables a user to track their time using a timer. |
| Notes | Users can enter detailed notes by clicking on the note icon. |
| Billable vs. Non-Billable time |
You can now see the breakout of your billable vs non-billable hours across days in one place. |