![AccountAbility_logo_primary_fullcolor-1.png]](https://knowledgebase.counta.com/hs-fs/hubfs/AccountAbility_logo_primary_fullcolor-1.png?height=40&name=AccountAbility_logo_primary_fullcolor-1.png)
Step by Step Guide:
1. To access the Management Date Export:
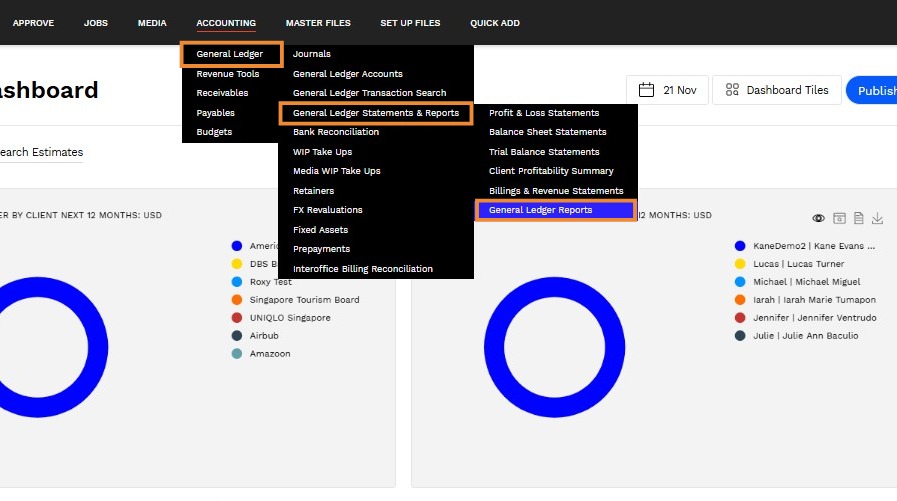
Navigate to Accounting > General Ledger > General Ledger Statements & Reports > General Ledger Reports.
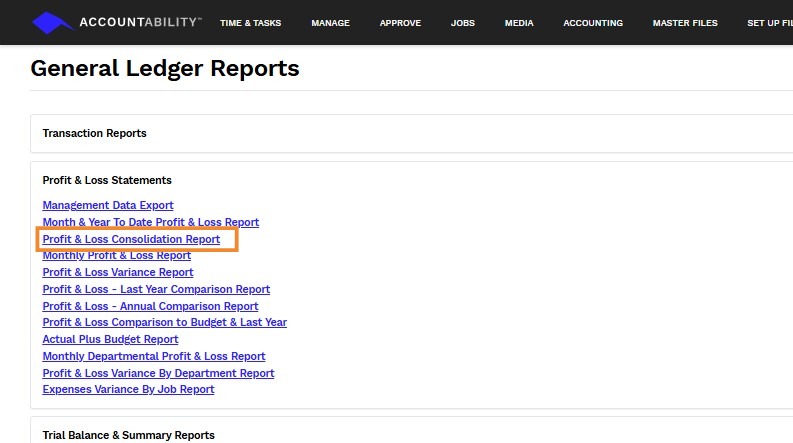
2. Expand the Profit & loss Statements section and click the Profit & Loss Consolidation Reports hyperlink.
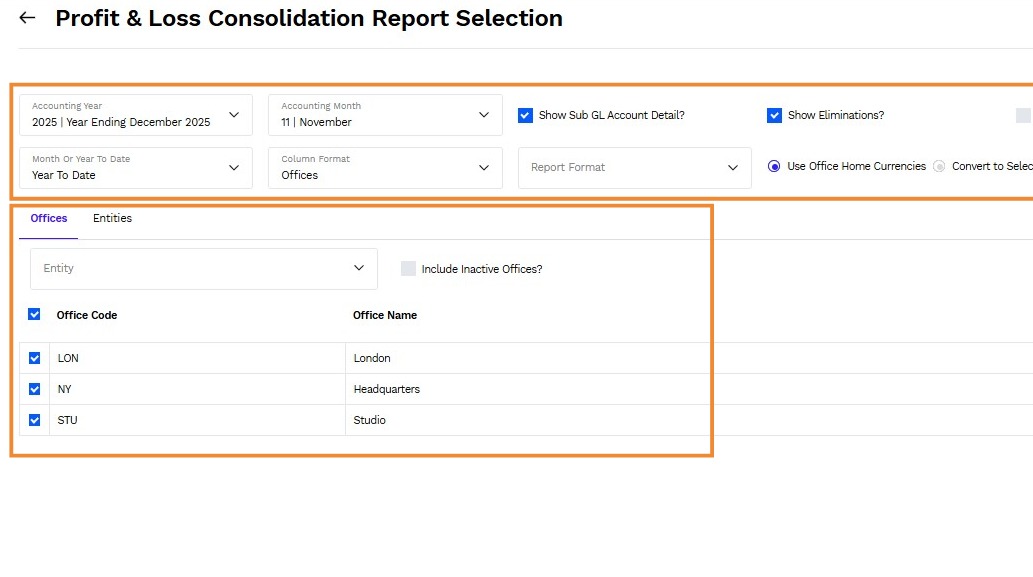
3. Enter or select the desired information.
- Accounting Year - You can view your consolidated balance sheet at a point in time by selecting the Accounting Year
- Accounting Month - You can view your consolidated balance sheet at a point in time by selecting the Accounting Monthc
- Checkbox Show Sub GL Account Detail? - This is checked by default. If you created header accounts, uncheck this to roll up the report at the header account level.
- Checkbox Show Eliminations? - This is checked by default to include elimination entries on the consolidated balance sheet.
- Checkbox Apply Ownership - This will apply the Ownership % specified on the each Office record.
- Month or Year to Date
- Column Format - You can choose to flowchart your report by Office or by Entity. If you only want to include specific offices or entities in the report, use the Filters or select/de-select the offices on the list accordingly.
- Report Format - If your agency has custom financial statement formats, you can apply one of those formats to this report. See Financial Statement Formats for more information.
- Use Home Currencies
- Convert to Selected Currency - Select this to get a consolidated report across offices with various currencies. The Report FX Rate column on the office list at the bottom of the request page will appear showing the FX rate for each office to the selected Report Currency.
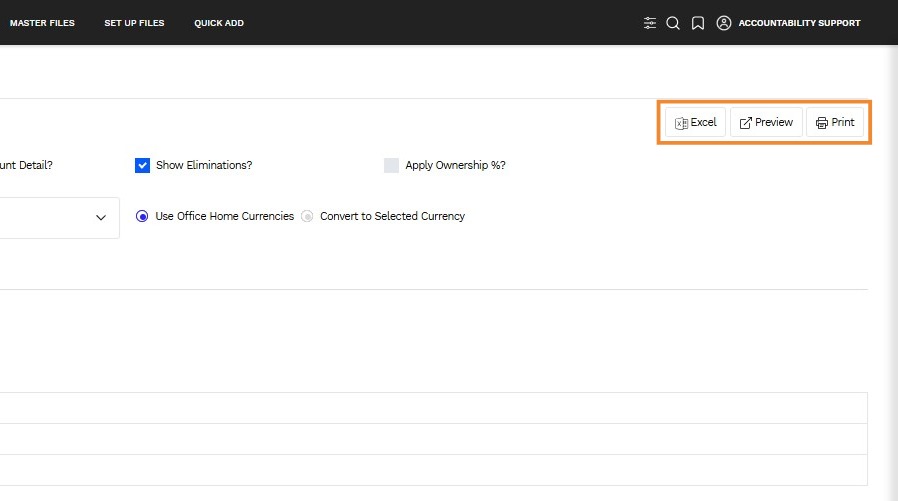
4. Click "Submit"